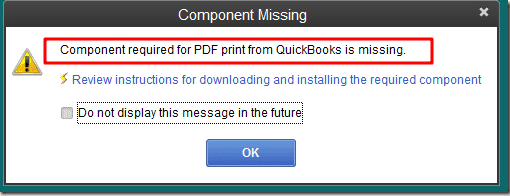
QuickBooks uses third-party printing components like XPS Document Writer by Microsoft and Adobe Reader to save and print statements, reports, and forms as PDF files. But, sometimes, while printing PDF files using QuickBooks, you may end up with an error message that reads, “QuickBooks can’t complete the current action due to a missing component.” The QuickBooks Missing PDF Component error message does not clarify which PDF component is missing and thus makes it difficult to troubleshoot the error. However, to address this issue, you must try the Print & PDF Repair Tool and configure settings for XPS Document Writer.
The other details about the PDF issues in QuickBooks, like what triggers them and how to fix them with ease, are discussed further in this blog, so keep reading!
Wondering what to do if the QuickBooks component required for PDF print is missing? Get in touch with our experts without delay by dialing our Asquare Cloud Hosting Helpline Number +1(855) 738-0359. They will answer all your queries instantly.

What Are The Causes Behind QuickBooks PDF Component Missing Error?
Below,we have mentioned the top 3 reasons behind the component required for PDF print from QuickBooks is Missing error:
- It can take place due to damaged, missing, or outdated Adobe Reader applications.
- Another reason is the outdated version of the QuickBooks application.
- The Microsoft XPS document writer is turned off in Windows settings.
- Lack of proper permissions to access the temp folder and XPS document writer.
- Corruption in the template or form you are trying to print.
- Corruption in the QBPrint.qbp file required to print from QuickBooks.
- Print Spooler service is not running on the system.
- Corruption in the QuickBooks Desktop program.
These are all the identified reasons why QuickBooks starts throwing a missing PDF component error message. Next, in this article, we will discuss the most efficient troubleshooting methods that will not only help resolve missing PDF component error but several other print-related issues in QuickBooks.
Troubleshooting Methods To Resolve QuickBooks Missing PDF Component Error
You can fix the missing component in QuickBooks desktop error in various ways. So, once you have understood the possible causes, you can move ahead with the troubleshooting methods discussed below.
Method 1: Update QuickBooks Desktop
The QuickBooks missing PDF component error can take place due to an outdated version of the QuickBooks desktop. Thus, it’s essential to update QuickBooks to its latest available version. There are two options to update the QuickBooks application: downloading the updates from within the application whenever they are available or downloading them from Intuit’s official website. We have listed steps for both methods below; you can follow them as required.
Update QuickBooks from outside the Application:
- First, go to the QuickBooks download & update webpage and select the Standard Setup option.
- Then, select the Country and the Product from the Select Country and Select Product drop-down menu, respectively.
- Select the QuickBooks version from the Select Version drop-down list and click Search.
- Click the Get the Latest Updates option and Save to download the installation file.
- When the download completes, double-click the downloaded file to initiate and complete the installation.
Update QuickBooks from within the application:
- Open QuickBooks Desktop, go to the File menu and choose the Close Company or Log off option followed by Exit.
- Right-click on the QuickBooks icon and select the Run as Administrator option.
- Go to the Help menu and click on Update QuickBooks.
- Click on the Reset Update option followed by Get Updates from the Update Now menu.
- At last, restart QuickBooks and click Yes on the install updates confirmation box.
Read More: How To Update A Company File In QuickBooks?
If the QuickBooks missing PDF component error persists even after updating the software, you can follow the next resolution method. Updating wouldn’t have fixed the issue, but it makes sure that the program is functioning with the utmost efficiency.
Method 2: Run QuickBooks PDF & Print Repair Tool From The Tool Hub
The QuickBooks Tool hub’s Print and PDF repair tool can help you fix various issues related to printing, saving, or emailing PDFs in QuickBooks. You need to download the Tool Hub application and then run the Print and PDF Repair Tool from the Program Problems tab. The detailed steps are given below:
Step 1: Download the QuickBooks Tool Hub and Install It on the System
QuickBooks has integrated various tools and utilities with the Tool Hub application. Thus, with a single download, you gain access to a wide range of tools that help you resolve various issues. So, follow the below-given steps to download the QuickBooks Tool Hub. For a better experience, use Tool Hub on Windows 10, 64-bit.
- Close QB and download the latest version of QuickBooks Tool Hub.
- Save the downloaded file somewhere you can easily locate afterward, like the Downloads folder or Windows Desktop.
Note: If you cannot find Tool Hub on the system, then check its version. For this, visit the Home tab and check the version details at the bottom of the page. If required, then update it to the latest version.
- Now, open the file that you downloaded. It would be a file with a .exe extension.

- Now, follow the on-screen instructions and complete its installation. Additionally, agree to the Terms and Conditions when prompted.
- When the installation completes, you can double-click the Tool Hub icon on the Windows Desktop and launch it.
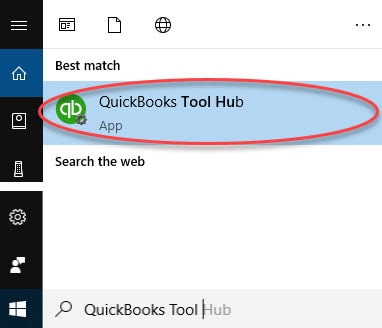
Note: If you can not find the tool hub icon, then search for it using Windows search and double-click the program to open it.
Step 2: Run QuickBooks Print & PDF Repair Tool
- Open the QB Tool hub and go to the Program Problems tab.
- Click the QuickBooks Print & PDF Repair Tool and give it about a minute to run.
- After the tool finishes the repair, print, email, or save as a PDF from QuickBooks Desktop again to check whether the error is resolved. If the missing PDF component error persists, follow the next solution.
Method 3: Reset the Temp Folder Permissions
QuickBooks may throw the missing PDF component error if it cannot access the file required to print PDF because of insufficient access permissions over the Windows Temp folder. Thus, to resolve the error, you need to reset the permissions for the Temp folder.
Step 1: Restart the System
Before resetting the temp folder permissions, you need to restart the system once and then check whether the issue is resolved. If not, move ahead with the steps given below to reset the permissions.
Step 2: Reset Permissions for Temp Folder
- Press the Windows and R keys on the keyboard to trigger the launch of the Run window.
- Then, type the command %Temp% and hit Enter.
- After this, right-click in the empty space inside the folder and choose the Properties option.
- Select the Security option.
- Make sure all the user names and groups in the Security section have Full Control.
- If not, then set the permissions to Full Control and try performing the printing operations in QuickBooks to check if the error is resolved.
Step 3: Check If You Can Print to XPS Document Writer
QuickBooks uses Microsoft’s XPS Document Writer to save a document as a PDF. So, if you are facing the QuickBooks desktop missing pdf component error, you need to check if you can print to XPS Document Writer outside the QuickBooks. Perform the following steps to verify if XPS Document Writer is working right:
- Open Notepad on the system and type the command Test.
- Now, select File and then Print.
- Choose the XPS Document Writer option and hit Print.
- Then, type a file name and save it to the desktop.
- Now, go to the desktop and view the XPS document that you printed from the notepad.
If you cannot print to the XPS Printer outside the QuickBooks, then you would need to connect with an expert for help. However, if you can print outside QuickBooks and still get the ‘QuickBooks missing PDF component’ error message, follow the next solution.
Method 4: Enable Microsoft XPS Document Writer
The Microsoft XPS document writer is a print-to-file driver that allows QuickBooks and other programs to create XPS document files that are required to perform a printing operation. In this solution, we will enable MS XPS document writer to ensure it is not the root cause of the error.
- Press the Windows + R keys on the keyboard to open the Run window.
- Now, type the optionalfeatures command in the search box and hit OK.
- Now the Turn Windows Features On or Off window will pop up on the screen.
- Checkmark the box against Microsoft XPS Document Writer to enable it.
Retry to print a PDF from QuickBooks to check if enabling the Microsoft XPS document writer helps resolve the error. If not, follow the next solution and fix general issues with the XPS document writer.
Method 5: Reinstall Microsoft XPS Document Writer and Adjust Permissions for It
You can reinstall XPS Document Writer with the help of the following steps:
- Press the Windows key + R key to get the Run command on the screen.
- Enter command control printers in the space and hit Enter.
- Select the Add Printer option.
- Then, click the option The printer I want isn’t listed and select the Add a local printer or network printer with manual settings option.
- Select the Use an existing port option and hit Next.
- Select Microsoft from the left column and Microsoft XPS Document Writer from the right column.
- Hit Next, and the XPS Document will get downloaded.
Steps to Adjust Windows User Permissions for XPS Document Writer
If a Windows user account does not have permission to print to the XPS Document Writer, then QuickBooks won’t be able to convert any file to a .PDF file. So, you need to log in as an administrator and change these permissions accordingly. After logging in as an administrator, follow the instructions below to change Windows user permissions for XPS document writer.
- Go to the Printers Control Panel on your system and right-click Microsoft XPS Document Writer.
- Choose the Printer properties option and move to the Security tab.
- Choose the Everyone user group; if you don’t find it, hit the Add button.
- Click Check Names after entering Everyone in the text box.
- Click OK and select Print in the Allow column.
- Hit OK and follow the path C:\Windows\System32\spool.
- Select the Properties option after right-clicking the Printers option.
- Now click Security > Edit > Add > and enter Local Service.
- Hit Enter and ensure Full Control is given to the Local Drives.
- Click OK and retry to print PDF from QuickBooks.
If you still find the missing PDF component error message popping up on your system, move to the next troubleshooting solution.
NOTE: Sometimes, third-party antivirus and firewall applications like McAfee or Norton block the creation of .xps files, which in turn results in print-related errors in QuickBooks. Thus, you must make the necessary changes to your security program’s settings to ensure that .xps files are not blocked.
Method 6: Update & Repair Adobe Acrobat Reader
As discussed, you may end up with the QuickBooks missing component PDF issue due to an outdated or damaged Adobe reader. Follow the below-given steps to fix this issue by installing the Adobe Reader updates and repairing it:
- Click on the Start icon and type Adobe in the Search Programs and Files box.
- From the application list, click on Adobe Reader.
- Now, select the Check for Updates option from the Help menu.
- To download the setup file for installation, you can visit the Adobe Product Download Page.
- Lastly, follow the instructions displayed on your screen for installing the latest updates.
If you still get the QuickBooks PDF component missing error even after installing the Adobe Acrobat Reader. try to repair the damage by following the below-given steps:
- First, you must close all the open Windows and browsers on your computer.
- Press the Windows + R keys together to open the Run Window. Then, type appwiz.cpl and press the Enter key.
- Now, double-click on the Adobe Reader and select the Uninstall/Change option.
- Click on Next followed by Repair.
- Again, you must click Next and then select the Install option.
- When the installation completes, click on Finish and restart Windows.
If the component required for PDF print from QuickBooks is missing error persists even when you have installed and repaired the Adobe reader, then you must move to the next resolution method.
Method 7: Create a New Template or Form Before Printing
If you are still getting the missing PDF component error, even after implementing the above-mentioned solutions, then it might be because of the issues in the template or form you are printing. So, you can try creating custom templates for forms. Go to the Lists menu, select Templates, and then follow the steps below to customize the templates:
- Select the type of form that you want to customize.
- Then, click the Formatting tab from the Form and select the Manage Templates option.
- Now, select a template to preview and click Copy to create a new template. You can also click OK to edit the templates.
- Use the basic customization window to format the template:
- Add logo: Click the Use logo checkbox if you want to add your company’s logo to the form. Click the Select Logo option to change the logo and select the image you want to use.
- Change Fonts and Colors: You can personalize the fonts and colors for different details in the form, like company names, labels, and data.
- Change Company and Transaction Information: You can select the contact information you want to add to the invoice. You can also select the Update Information option to change this information.
- You can add or remove items from the header, columns, or footer by selecting the Additional Customization option.
- You can move or resize the items on the form by clicking the Layout Designer option.
- When everything is done, click OK.
- After this, click the Print Preview option to see the form and review it.
- If everything looks good, click Close and OK.
Note: updates and repairing it: Microsoft XPS Document Writer.
Method 8: Rename the QBPrint.qbp File
QBPrint.qbp file provides info like customization of your forms and printer set up to QuickBooks and thus plays a crucial role in printing PDF from QuickBooks. In this solution, we will rename this file to prompt QuickBooks to create a new one to ensure it is free of any corruption or damage.
- Launch File Explorer by pressing the Windows + R keys and move to the C:\ProgramData\Intuit\QuickBooks 20XX folder.
- NOTE: XX in 20XX represents your QuickBooks Desktop version, and you may need to display hidden files and folders to view the QBPrint.qbp file on the system
- Locate the QBPrint.qbp file in the folder and right-click it.
- Select the Rename option and add .old at the end of the file name.
- Launch QuickBooks Desktop and select Printer Setup from the File menu.
- Choose any transaction in the Form Name list and hit the OK button.
- This action will prompt QuickBooks to create a new QBprint.qbp file.
Retry to print a transaction from QuickBooks to check if this resolves the QuickBooks Missing PDF Component in Windows error. If not, you will need to perform a Clean Installation of QuickBooks Desktop.
Need Technical Assistance!
This blog covers all the possible methods that can help you fix the QuickBooks pdf component missing error. However, there are chances that you might get stuck while implementing the troubleshooting solutions. In that case, you can get in touch with our experts at Asquare Cloud Hosting on the Asquare Cloud Hosting Helpline Number at +1(855)-738-0359. Our experts are available 24/7 for your quick assistance.
Frequently Asked Questions
You cannot view or open a PDF in QuickBooks if the PDF file is damaged or the PDF reader is outdated and needs an update.
Sometimes the PDF function in QuickBooks works, but the reconcile window disappears, or QB seems to lock up after selecting the Reconcile option from the Banking menu. If this happens, you need to check all the open windows to see if the reconcile window is listed. Then, select the Close All option and begin the reconciliation again.
You can fix the QuickBooks missing PDF component Windows 11 error by updating QuickBooks Desktop and Adobe Reader to the latest version. You can also configure Microsoft XPS Document Writer settings to fix it.
To ensure reinstalling Adobe Acrobat Reader fixes printing issues in QuickBooks, you will first need to completely remove it using the Adobe Cleaner Tool and download and install it from HERE.
Oriana Zabell, a professional cloud engineer, has over three years of experience in desktop, online QuickBooks support and troubleshooting. She is currently working as a cloud hosting consultant with Asquare Cloud Hosting. She loves to read and write about the latest technologies such as cloud computing, AI, DaaS, small businesses, manufacturing. When not writing, she is either reading novels or is indulged in a debate with movie fanatics.