Last Updated on January 28, 2026
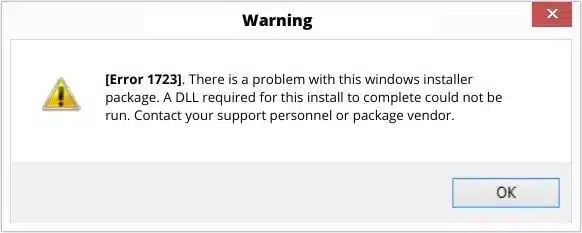
When installing the QuickBooks Desktop or its update, you can see an error message like the one below:
| “Error code 1723 Installation failed QuickBooks Desktop. There is an issue with your Windows Installer. A .DLL file is needed to complete this installation.” |
QuickBooks error 1723 is often the result of damage in the Windows installer package or QB setup file, the temp folder permissions not being configured correctly. However, that is not all, and a lot of different factors can give way to this problem. Let us explore in detail why you can’t install QuickBooks Desktop and expert-recommended ways to fix that.
If you need help with QuickBooks installation or updates, contact our experts at +1(855)-510-6487.
Why Do I Run into an Error When Installing QuickBooks?
Here are the common reasons you can’t install QuickBooks Desktop and run into the error 1723 Windows 10 installer package:
- Windows operating system might be outdated or incompatible with QuickBooks.
- Virus or malware have infected the computer, challenging the data integrity of hard disks
- Windows installer service might be outdated or damaged
- Windows installer is occupied installing another program in the background.
- The current user logged into Windows might lack administrative rights to make changes.
This list is not exhaustive, and there could be other reasons why you run into this issue. Now, let us see how to fix it.
How to Troubleshoot QuickBooks Error 1723: DLL File Needed for Installation
One by one, let us troubleshoot various aspects that can give way to QuickBooks error 1723. For that, go through the solutions given below and follow the instructions given.
1. Update Windows Operating System
QuickBooks installation might result in errors if the Windows operating system is outdated, incompatible, or has some damaged components. Windows update often resolves these things. Therefore, follow the steps below to check for updates and get them if available:

- Open the Start menu.
- Go to Settings, then open Update & Security.
- Tap on Check for Windows updates.
- Let Windows check for updates; this might take a while. If any are available, tap Download & install.
- Windows will now download and install the updates. Once done, restart the computer.
Finally, resume installing QuickBooks Desktop or its updates. However, if you find QuickBooks error 1723, move to the next solution.
2. Change the Permissions for the Windows %temp% Folder
Let us edit the permissions for the Windows temp folder. To do so, follow the steps below:
- Go to the search bar in the Start menu.

- Type %temp% into it.
- Hit Enter.
- Now, when the TEMP folder opens, right-click anywhere in the folder and select Properties.
- Tap the Security tab, then click Edit.
- Select the Windows user you are logged in as, and under the Allow column, check the option for Full Control.
- Click on OK twice to save the changes.
Now, try to install QuickBooks Desktop. If you face a challenge, let us run a tool designed to fix installation issues.
3. Run QuickBooks Install Diagnostic Tool
QuickBooks Install Diagnostic Tool repairs damaged Windows components, the registry, and the QuickBooks installation. You need to download and install the QuickBooks Tool Hub to use it.
- Once you have installed QuickBooks Tool Hub, open it on your computer.
- Now, tap the Install Issues tab.
- Then select QuickBooks Install Diagnostic Tool.
You will need to wait a few minutes while the tool downloads in the background and appears on the screen. Allow it to run until it finishes repairing the installation issues. Once the tool has completed, restart your computer, then try installing QB Desktop again.
4. Login with Admin User or Assign Admin Right to the Current Account
To make major changes to the computer, such as installing software, you need administrative rights. If you are not logged in as an admin user, please log in. Alternatively, you can also assign the current user administrative rights. Let us show you how to do so:
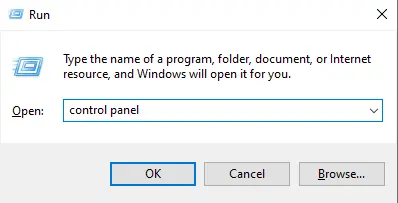
- Open the Start menu, then open the Control Panel.
- Go to User Accounts, then double-click the user account that requires administrative rights.
- Now, tap Change the Account Type, then choose Administrator.
- You will be required to enter an Admin password to make the changes if you are logged in with a non-admin account.
In the end, restart your computer and resume QuickBooks installation.
5. Run the System File Checker Tool to Repair Damaged Files
To resolve corruption in critical system files, let us run the System File Checker tool.
- Open the Start menu and type cmd.
- When you see the Command Prompt in the search results.
- Right-click it and select Run the program as an administrator.
- If asked for the admin password, enter that.
- In the command prompt window, type in sfc /scannow.
- Hit enter.
Allow System File Checker to automatically repair damaged files. Once it is done, restart the computer and install QB Desktop.
6. Repair the .NET Framework
If the QuickBooks Install Diagnostic Tool wasn’t able to repair the Microsoft .NET Framework component, you will need to do it manually.
- Go to the Start menu.
- Search for the Control Panel in the search bar, then open it.
- Go to the Programs and Features.
- Choose the Uninstall a Program option.
- Choose the Turn Windows features on or off.
- Look for the .NET Framework from the list.
- Select the checkbox to turn on .NET Framework if it is not selected.
- Tap on OK.
After that, restart the computer, then try installing QuickBooks Desktop. If you see the QuickBooks error 1723, install the software in selective startup mode.
7. Install QB in Selective Startup Mode
Often, a third-party program interrupts QuickBooks installation. To eliminate such issues,
- Press the Windows Key+R.
- Enter msconfig in the search bar.
- Then, click OK.
- Select Selective Startup and clear the Load startup items option.
- Go to the Services tab and select the Hide all Microsoft services option.
- Tap on Disable All.
- However, you must select the Windows Installer from the list of services, then tap OK.
- Go to the System Configuration window and choose Restart.
In the selective startup mode, install QuickBooks Desktop. Now, switch to
- Launch the Run window by pressing the Windows + R keys together.
- Type msconfig in the box, then press Enter.
- Tap Normal Startup on the General tab, then tap OK.
- Now, on the System Configuration window, tap on Restart.
The computer will now boot in normal mode and help you resolve the error 1723 in your QBDT.
Expert Tips to Avoid the QuickBooks Error 1723
To avoid this error in the future, ensure you maintain the following points.
- Ensure that Windows updates are up to date on your system.
- Keep the Windows Installer service active and up to date.
- Check and repair the system files to avoid corruption.
- Use the admin rights to access the QuickBooks application.
- Turn off the antivirus and firewall settings.
These points will help you in the future to fix and avoid errors.
Quickview Table for QuickBooks Error 1723
Now, let’s take a quick summary of the blog and understand what we have learned so far.
| Description | When you try to download or install the latest updates for your QBDT, you might encounter QuickBooks error 1723. |
| Causes | The causes of this error include virus- or malware-infected files, if Windows is not up to date, if you lack admin permissions, and if the files are corrupted or damaged. |
| Ways to Fix | To troubleshoot the problem, you can use the QuickBooks Tool Hub to fix it, update the Windows version, log in as an administrator, fix the .NET Framework files, or install the QuickBooks application in selective startup mode. |
Conclusion
This was about how to resolve QuickBooks error 1723 during desktop application installation. We mentioned several reasons you may be experiencing this issue and several ways to troubleshoot it. However, if the problem persists, contact our TFN experts for accurate solutions and assistance.
Frequently Asked Questions (FAQs)
What is error 1723 in QuickBooks installation?
QuickBooks error code 1723 occurs during installation or application updates. It implies an issue with the Windows package installer, the Microsoft .NET Framework component, system files, or the user’s lack of admin rights to make changes to the system.
How do I fix the QuickBooks Online Sync error?
To resolve the sync error in QuickBooks Online, go to Settings > Setup > Sync & Integrations > Connect to QuickBooks. Type in the QuickBooks Online Primary Admin user ID and password, and choose to Sign in. Finally, in QuickBooks Online, select the company you want to sync with your BILL account, then select Confirm.
How to add the .old extension in TLG and ND files?
To include the .old extension, here are the steps to follow:
1. Go to the QuickBooks file folder.
2. Locate the .TLG and .ND file in your system.
3. Right-click on it and choose rename.
4. Add .old at the end of the name.
5. Save the details

Kate is a certified public accountant (CPA) with expertise in various accounting software. She is technically inclined and finds passion in helping businesses and self-employed people carry out bookkeeping, payroll, and taxation without worrying about errors. Every once in a while, Kate loves to travel to far-off places and relax in the lap of nature.