Last Updated on November 20, 2025
There are times when you need to create a QuickBooks journal entry. Remember, it is the last resort for entering transactions, and if you are not well-versed in accounting, speak with your accountant.
In this blog, we will show you how to add a journal entry, edit it, reverse it, or delete it. Alright then, let us begin.
Section 1: How to Add a Journal Entry
It is quite simple to add a QuickBooks journal entry; just follow the steps below:
- Launch the Company menu and choose Make General Journal Entries.
- Provide the information in the required fields. Moreover, ensure that the debits equal the credits before moving to the next step.
- Finally, choose Save or Save & Close.
Section 2: How to Edit a Journal Entry
If you ever need to edit a journal entry, here is how you can do the same:
- Open the Company menu and choose Make General Journal Entries.
- Here is how to locate the journal entry you need to edit:
(i) If you are on QuickBooks for Windows, choose Find and in the Name, Date, Entry No., or Amount. Finally, hit Find.
(ii) If you are on QuickBooks for Mac, look for the journal entry from the list on the left side of the Make General Journal Entries screen.
- Double-tap the journal entry you want to edit and then make the changes.
- Finally, choose Save or Save & Close.
- To confirm the changes, choose Yes.
Section 3: How to Reverse a Journal Entry
Follow the steps below to reverse a QuickBooks journal entry:
- Open the Company menu and choose Make General Journal Entries.
- Here is how to locate the journal entry you need to edit:
(i) If you are on QuickBooks for Windows, choose Find and in the Name, Date, Entry No., or Amount. Finally, hit Find.
(ii) If you are on QuickBooks for Mac, look for the journal entry from the list on the left side of the Make General Journal Entries screen.
- Choose Reverse followed by Save or Save & Close.
- To confirm the changes, choose Yes.
You will see an “R” next to the entry number of the reversed journal entry and debit and credit amounts reversed if they are reversed. The new entry will have the first day of the next month, in sequence to the original transaction date.
Section 4: How to Delete a Journal Entry
If you ever need to delete or void a journal entry, here is how you can do the same:
- Launch the Company menu and choose Make General Journal Entries.
- Here is how to locate the journal entry you need to edit:
(i) If you are using QuickBooks for Windows, choose Find and in the Name, Date, Entry No., or Amount. Next, choose Find.
(ii) If you are using QuickBooks for Mac, look for the journal entry from the list on the left side of the Make General Journal Entries screen.
- Here is how you delete the journal entry, depending on the operating system you use:
(i) In QuickBooks for Windows: Double-tap the journal entry and choose Delete or Void, followed by OK.
(ii) In QuickBooks for Mac: Open the Edit menu and choose Delete General Journal.
- Finally, choose Save or Save & Close.
Conclusion
In this blog, we discussed how to add a QuickBooks journal entry, edit or reverse it, and even delete or void it. We explored the steps for both operating systems, Windows and MacOS. If you face a challenge or have a query, connect with a QB expert at +1(855)-510-6487. They will provide you with real-time assistance and help you resume the task right away.
Frequently Asked Questions
How to Create a Journal Entry in QuickBooks Online?
Let us show you how to create a journal entry in QuickBooks Online:
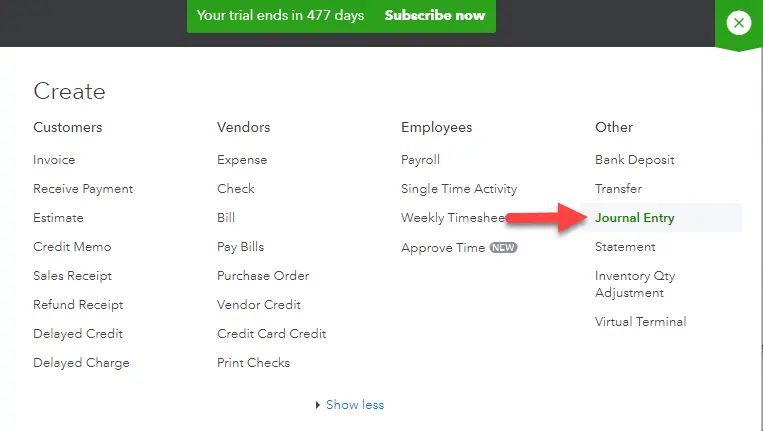
1. Open to the main dashboard, select the + New menu and choose Journal.
2. Provide all the necessary information for the journal entry.
3. Finally, choose Save & New, and there, you have successfully created a journal entry.
How to Delete a Journal entry in QuickBooks Online?
Follow the steps below to delete a journal entry in QuickBooks Online:
1. Choose Settings ⚙️ followed by Chart of accounts.
2. Look for the account you created the journal entry for and choose Account history.
3. Locate the journal entry in the account register and choose the journal entry to expand the view.
4. Tap on Delete followed by Yes.

Kate is a certified public accountant (CPA) with expertise in various accounting software. She is technically inclined and finds passion in helping businesses and self-employed people carry out bookkeeping, payroll, and taxation without worrying about errors. Every once in a while, Kate loves to travel to far-off places and relax in the lap of nature.