Last Updated on November 20, 2025
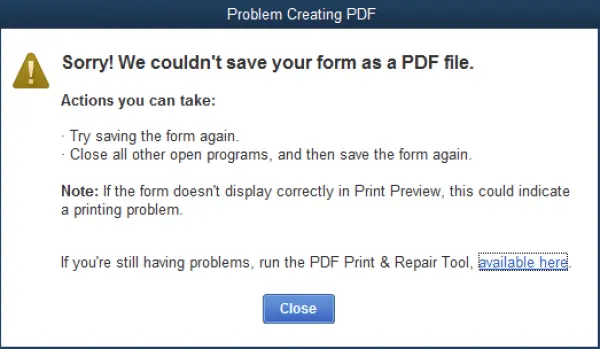
While trying to save the reports as PDFs or print them, many QB users encounter a problem because QuickBooks cannot create PDF. They might also come across an error mentioning QB could not save the form as a PDF file, or there is a component missing.
There can be several reasons that lead to this problem, such as a missing PDF file component, or the device isn’t ready to print from the QuickBooks PDF Converter. Your form wasn’t sent because QB could not create the necessary PDF files.
The comprehensive guide will provide you with significant information on what to do when you can’t create the PDF. Below, we have outlined the most effective methods to resolve the QB Save as PDF not working error. However, before implementing any solution, it is essential to understand the causes of the problem to implement the most effective resolution procedure.
Troubleshooting PDF and Print problems can be a time-consuming and hectic process. Therefore, it is wise to connect with a Asquare Cloud Hosting Team +1(855)-510-6487, our specialists are always just a phone call away to resolve your problem.
Understanding the Possible Reasons Why QuickBooks Cannot Create PDF
Below are the most significant reasons why your QuickBooks cannot create PDF. Go through them to gain a deeper understanding of this issue.
- Faulty, damaged, or outdated Adobe Reader applications
- An outdated QuickBooks Desktop version could be another reason
- It might be possible that the Microsoft XPS document writer is disabled in Windows settings
- Lack of admin permissions to utilize the temp folder and XPS document
- Maybe you are trying to create a PDF of the corrupted template or form
- A faulty QBPrint.qbp file can interrupt the process
- Damaged QB Desktop program
Once we identify the actual causes of the issue, we can proceed with troubleshooting and addressing other print-related problems.
Expert Ways to Fix the QuickBooks Cannot Create PDF Windows 11
After identifying the causes, try the methods outlined in this section to resolve the ‘QuickBooks cannot create PDF’ error. But first, ensure that you update the QuickBooks Desktop to the latest version.
Method 1: Use the QuickBooks PDF & Print Repair Tool
QuickBooks PDF & Print Tool will fix the problem that prevents it from sending and creating PDFs. Ensure that the QuickBooks Tool Hub is installed on your computer. After verifying that, follow the next steps to implement this process.
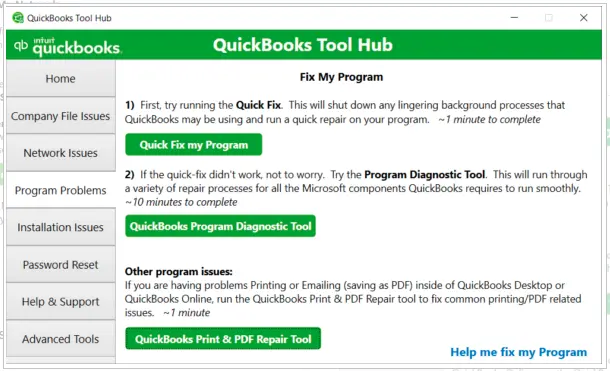
- Locate and open the QuickBooks Tool Hub
- Select the Program Problems
- Next, click on the QuickBooks PDF & Print Repair Tool
Note: This tool will take about a minute to run
Once the repair process is complete, you can print, email, or save the document as a PDF from the QB software again. If this doesn’t resolve the problem, head to the next possible solution.
Method 2: Reset the Temp Folder Permissions
Before doing anything, restart your computer and check whether it fixes the issue. In a case, it doesn’t fix the problems, reset the temp folder permissions.
- Press Windows + R keys to access the RUN command
- Next, type %Temp% and hit Enter on the keyboard
- Now, right-click an empty space in the temp folder, and select Properties, followed by Security
- Ensure all the users’ names and groups in Security have Full Control
After setting the permission to Full Control, save the document as a PDF again in QuickBooks Desktop. Now, check whether the problem is solved. Still can’t create a PDF? Follow the next method.
Method 3: Verify If You Can Print the XPS
Suppose even resetting the temp folder permission doesn’t resolve the QuickBooks cannot create PDF issue. Then, you should test if you can print to the XPS (dedicated for Save as PDF and Email issues). Follow the next few steps to implement the issue.
- Start by opening the Notepad
- Next, to type Test, select File and then Print
- Choose the XPS Document Writer, and then Print
Note: Now, if you can’t see XPS Document Writer, you should allow the system to print to your XPS printer.
- Type a filename and store it on your device
- Navigate to the desktop and view the XPS document you printed from your notepad
In such cases, if you can’t print to your XPS printer outside of QuickBooks, you need to contact your IT professional or Microsoft for help.
Grant Permission for the Computer to print to the XPS printer
To implement this, follow the next few steps:
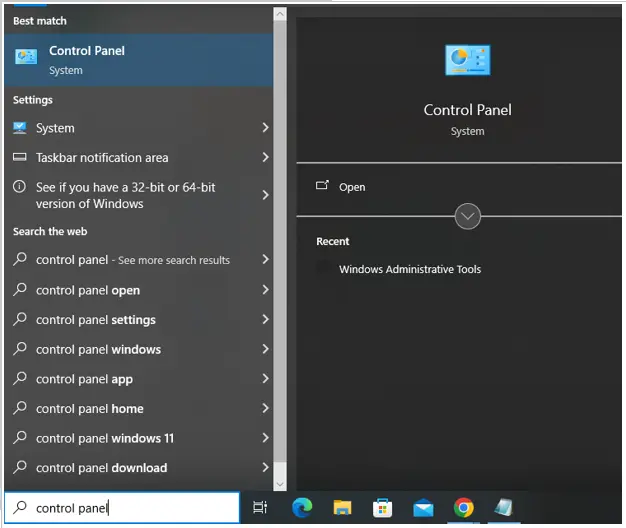
- Search Control Panel from the Start button
- Next, select Program
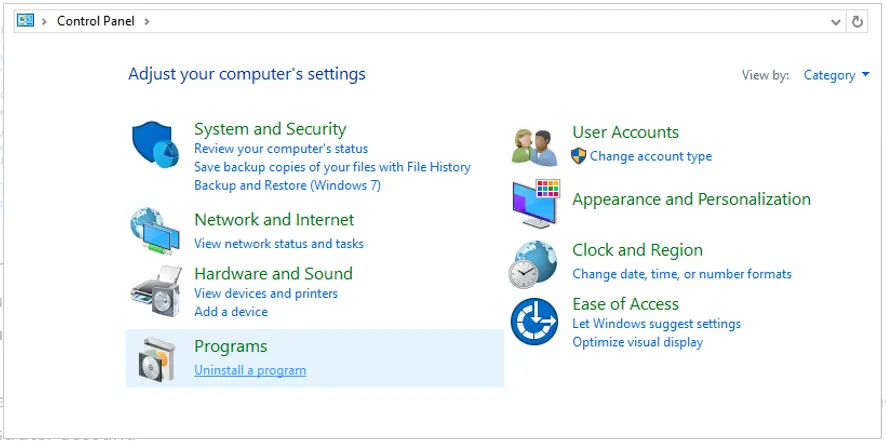
- Choose the Turn Windows features on or off in the Programs and Features
- Then, verify the Microsoft XPS Document Writer in the list of services
- Lastly, select OK to save the changes
Once you have implemented this method, check whether your problem is solved. If it doesn’t resolve your problem, follow the next method.
Method 4: Update the Print Spooler Service Properties
Updating the Print Spooler service properties will help you resolve the QuickBooks cannot create PDF issue. To try this method, follow the next few instructions.
- Start by right-clicking the Start, select Run, then type Services.msc and select OK
- Browse for the Print Spooler service
- Again, right-click on the Print Spooler service and choose Properties
- Head to the Startup type, and then select Automatic, followed by Apply, and then OK
- Lastly, right-click on the Print Spooler service and select Start to initiate the service
Once you have implemented this method, check whether you can create the PDF. If you are still facing the same issue, follow the next possible method.
Method 5: Temporarily Disable the UAC Settings
You can create the PDF after disabling the User Account Control (UAC) settings by following the upcoming instructions.
- Press Windows + R key on the keyboard to access the Run window
- Type Control Panel, and then select OK
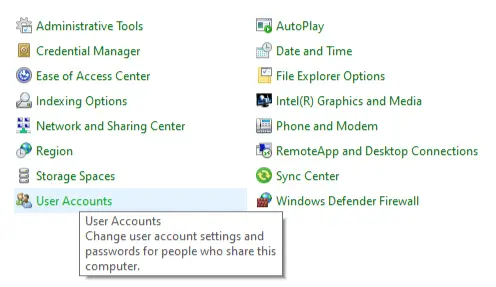
- Next, select User Accounts
- Now, select the User Accounts (Classic View)
- After that, choose Change Account Type
Note: You need to select the Yes option to continue when you get prompted by UAC
- Move the slider
- To disable it, set it to Never Notify and select OK to turn UAC off.
Once done implementing it, restart your device. To enable the UAC settings, repeat the above steps, but lastly set it to Always Notify and select OK.
Method 6: Generate a New Template or Form
You should create a new template for the form. To do so, follow the next few steps.
- Start by creating the template for your form
- Navigate to the Lists menu and choose Templates
- Here you can choose the type of template
- Next, change the template on the transaction
- Create the .pdf
Once done implementing this, check whether the issue is solved. If you still can’t create a PDF, follow the next method.
Method 7: Reinstall the XPS Document Writer
You should reinstall the XPS Document Writer by going through the steps below.
- Press the Windows + R keys to open the Run command
- Enter the command Control Printers and press the Enter button
- Next, select the Add Printer option
- After that, choose the The printer I want isn’t listed, followed by the Add a local printer or network printer with manual settings option
- Now, choose the Use an existing port option and hit Next
- Choose Microsoft from the left panel, followed by Microsoft XPS Document Writer in the right side panel
- Lastly, hit Next, and the XPS Document will get downloaded
Now, verify whether the QuickBooks cannot create PDF error has been solved or not. If it still can’t generate PDF, adjust Windows user permissions for XPS Document Writer.
Method 8: Enabled the XPS Services
If the XPS services are not enabled, then QB cannot create PDF. Here, you should allow these services by following the steps below.
- Tap on Windows + R on the keyboard
- Next, enter optional features, and then select OK
- Locate the Microsoft XPS Document Writer and ensure it’s selected
- Lastly, select OK
Once done, check whether the problem is solved. Try the following method if the problem persists.
Method 9: Manually Update the Adobe Acrobat
Outdated Adobe Acrobat software can also prevent the creation of a PDF when you try this method outside of QuickBooks. It is important to keep Adobe up to date. However, if the automatic updates aren’t enabled, you should manually check for the latest one by following the steps below.
- Start by launching the Adobe Acrobat
- Next, select the Menu, followed by Help, and then Check for updates
- If any update is available, select the Download option
- Now, you should go through the on-screen instructions to download the update
- Then, if prompted, choose Quit Acrobat, followed by Retry to complete the update
- Once the update process completes successfully, choose Close from the Update successful dialog box
Go through this to update the Adobe Acrobat on macOS. In a scenario of experiencing the same issue even after updating it, repair the Adobe.
Method 10: Repair the Adobe Reader/Acrobat
Even after updating the Adobe Reader/Acrobat, the problem hasn’t been fixed yet. Follow the upcoming instructions to repair the Adobe software.
- Close the Acrobat/Reader application and other web browser windows
- Type Control Panel, and then hit Enter
- Next, select the Programs and Features
- Select the Acrobat or Reader and then Uninstall/Change
- After that, select Next in the Setup dialog box
- Choose the Repair, and then Next
- Then, select Install
- Once the process is complete, choose Finish
After repairing the Adobe Acrobat software, restart your device. Now, log back in to the QuickBooks software and verify whether it is printing and creating the PDFs. If not, follow the next possible method.
Method 11: Manually Rename the QBPrint.QBP File
The QBPrint.qbp file contains information, including form customizations and printer settings for QB, which plays a crucial role in printing PDFs from QB software. In this solution, you will find the steps to rename the file, prompting QB to create a new one and ensuring it is free of corruption or damage.
- Find the QBPrint.qbp file
Note: You should display hidden files and folders or browse for the files using Windows to find these files
- Windows 10: C:\ProgramData\Intuit\QuickBooks 20XX
Note: You can identify the version by looking at the 20XX.
- For Server 2012 Version: C:\Program Data\Intuit\QuickBooks year and C:\Users*remote user*\AppData\Roaming\Intuit\ YEAR VERSION\TSPrinterSettings
Note: Remember that Terminal Service users report finding duplicate QBprint.qbp files with the saved client data files; double-check folders for odd scenarios.
- Next, right-click the QBprint.qbp file for the QB version, and then select Rename
- You will need to add the word old to the file name (i.e., QBPrint.qbp.old)
- Access the QuickBooks Desktop
- Select Printer Setup from the File menu
- Then, choose any transaction in the Form Name list and select OK
Note: You will not have to do this with every transaction
It will create a new QBprint.qbp file and try to open and print or convert to a PDF any transaction. Hopefully, the methods above will resolve the issue related to QuickBooks.
Quick View Table to Address the QuickBooks Cannot Create PDF
The table below shows the condensed version of the content from this blog to share a concise overview of significant points related to the QuickBooks cannot create PDF issue.
| Causes Why QuickBooks Cannot Create PDF | Faulty or outdated Adobe Acrobat applications, an outdated QuickBooks Desktop version, the Microsoft XPS document writer might be disabled, due to a lack of admin permissions to use the temp folder and XPS document, a damaged QB Desktop program, or maybe you are trying to create a PDF of the corrupted template or form. |
| Solutions to Fix the QuickBooks Cannot Create PDF Windows 11 | Run the QuickBooks PDF & print repair tool, reset the temp folder permissions, verify if you can print the XPS, update the print spooler service properties, temporarily disable the UAC settings, enable the XPS services, and rename the qbprint.qbp file, update the Adobe Acrobat, and repair the Adobe Acrobat |
You can use this table as a reference for resolving this issue, but it is recommended to read the entire blog to gain a deeper understanding of the topic.
Conclusion
This detailed guide covered several methods to fix the issue where QuickBooks cannot create PDF. We have discussed how a disabled Microsoft XPS document writer causes this issue. It is recommended that you thoroughly review every aspect of this blog to overcome this problem more effectively. However, resolving this issue could be a hectic and time-consuming process due to the technical difficulties. In such cases, let our professionals handle your tech troubles. Call us at this +1(855)-510-6487 now to speak with a certified expert and resolve your issue quickly.
Frequently Asked Questions (FAQs)
How to fix the QuickBooks PDF error?
You can try to implement some methods when you aren’t able to print, email, or save as a PDF from QuickBooks Desktop. To address this situation, run the QuickBooks PDF and Print Repair Tool from the QB Tool Hub. If this doesn’t work, restart and reset the temp folder permissions. You should create a new template or folder when resetting the temp folders doesn’t work. Updating the Print Spooler service also resolves this problem. If the issue persists, you will need to adjust the XPS document writer.
How to create a PDF on QuickBooks Desktop?
To create a PDF in QuickBooks Desktop, start by opening the QB Software and heading to the Sales. Next, select Customers, followed by Customer. Now, find and choose the sales form you wish to download or print from the Transaction List tab. Then, choose Print or Preview, and then select Print or Preview again. To save as a PDF, choose Download. End the procedure, select Close to exit the PDF viewer.
Why can’t my QuickBooks create a PDF?
Sometimes, you might see an error message stating that QuickBooks cannot create PDF. This problem could arise due to several reasons. There can be a problem with the QuickBooks PDF Converter, faulty or missing components, printer driver problems, or UAC settings. Damaged data or misconfiguration with the operating system could make you stuck in these problems.

Kate is a certified public accountant (CPA) with expertise in various accounting software. She is technically inclined and finds passion in helping businesses and self-employed people carry out bookkeeping, payroll, and taxation without worrying about errors. Every once in a while, Kate loves to travel to far-off places and relax in the lap of nature.