Last Updated on July 3, 2024
Regularly backing up crucial company data is considered one of the best practices to safeguard it from internal and external threats like corruption, theft, and accidental deletion. Intuit offers its users several ways to back up the company data, and one among them is Intuit Data Protect. This is an add-on service that you can avail of to securely back up the company data on Intuit’s online servers. However, this simple process of backing up the company data with Intuit Data Protect is not untouched by errors, and one among them is QuickBooks error 2277. You might see QB backup error 2277 right after opening Intuit Data Protect with an error message that reads ‘Intuit Data Protect Backup Failed: Firewall or connection issue.’ With this detailed guide, we will look at the actual causes of error code 2277 and some simple solutions that can help resolve it quickly.
Every Identified Reason for QuickBooks Backup Failed Error 2277
After profoundly analyzing error 2277 while backing up company data with Intuit Data Protect, we found the following to be responsible for this issue.
- Interruption while backing up the company data, due to which the backup is partially completed, can be a reason for error code 2277.
- Issues in the Intuit Data Protect installation can also be a reason.
- Restrictions imposed on Intuit Data Protect by Windows firewall is a prominent reason for getting error message 2277 while backing up the company data with IDP.
- Junk files stored in the form of cache, cookies, and temporary internet files can also trigger the same issue.
- Not having Intuit and related domains added as trusted sites can also restrict the data backup process in the form of error code 2277.
- Not having the most recent QuickBooks updates installed can also trigger QuickBooks error 2277.
Now that you have an idea of why you can’t back up the company data using IDP after going through the above-mentioned reasons let’s look at some simple troubleshooting solutions that can help resolve the issue quickly.
5 Instant Solutions to Tackle Intuit Data Protect Error 2277
The solutions mentioned below are carefully developed by certified experts and can help resolve QuickBooks error 2277 with ease. All you need to do is to follow the solutions in the same sequence as given below.
Solution 1: Get Help from the IDP Diagnostic Tool
Along with Intuit Data Protect, you also get the IDP Diagnostic Tool, which helps you rectify any issues with IDP in a few clicks. Follow the instructions below and check if running the diagnostics on IDP helps resolve the error.
- Click the System Tray icon at the bottom right of the Windows desktop and right-click the IDP icon.
- Choose the option that says About Intuit Data Protect and press the F2 + Ctrl key.
- This action will launch the Intuit Data Protect Diagnostics Tool, and you can click Run Diagnostics.
- The tool will identify issues you can’t back up with IDP. Once the problems are identified, you must manually fix issues with the software and hardware and reconfigure the Windows firewall and third-party security applications.
- If you have a security application from a third-party manufacturer, you must visit their official website for info on adding the following files to the exception.
- C:\Program Files(X86)\Common Files\Intuit\Data Protect\IntuitDataProtect.exe
- C:\Program Files(X86)\Common Files\Intuit\Data Protect\IbuEnghost.exe
- C:\Program Files(X86)\Common Files\Intuit\Data Protect\QBIDPServices.exe
Once you have successfully added the above-mentioned files as the exception, retry to backup and check if the error 2277 is resolved. If not, follow the next troubleshooting solution and add Windows Firewall ports.
Solution 2: Add Ports for IDP in Windows Firewall
IDP connects to the internet from some specific ports in the Windows Firewall. IDP could not connect to the internet to complete the backup if these ports were incorrectly configured. With this solution, we will add Windows firewall ports for IDP and check if this resolves the issue.
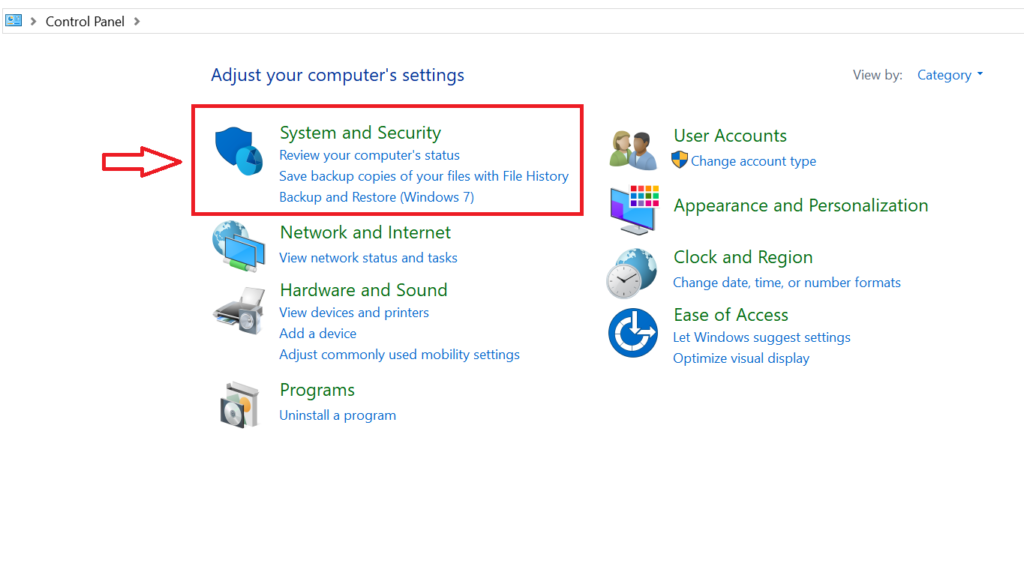
- Click the Windows Start button and select Control Panel. If it does not show in the Start menu, manually search for it in the Windows search.
- Move to the System and Security section in the Control Panel and click Windows Firewall.
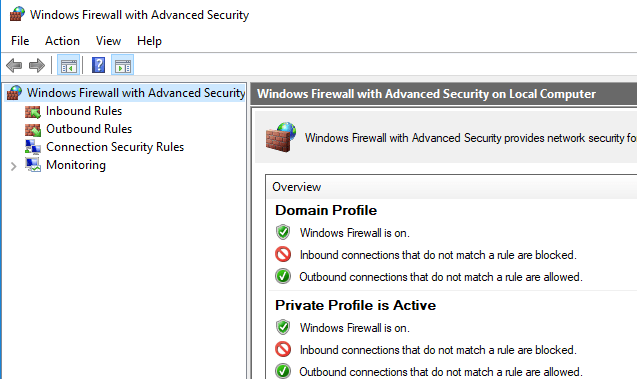
- Move to the Advanced Settings section and click Inbound Rules.
- Click the New Rule option and enter the following ports.
- Incoming Port: 80
- Outgoing Ports: 443, 16841
- After entering the ports, click Next and follow the on-screen instructions to add the port.
You must follow the same instructions to add outbound rules and check if adding ports for IDP helps resolve the issue. If not, get rid of the junk files stored in Internet Explorer with the help of the next troubleshooting solution to fix QuickBooks error 2277.
Solution 3: Clear Junk Files and SSL State in Internet Explorer
As already discussed, junk files stored in Internet Explorer can obstruct IDP from connecting to the Internet. Thus, with this solution, we will remove all the junk files stored as cache, cookies, temporary internet files, and SSL state to resolve QuickBooks error code 2277.
- Firstly, launch Internet Explorer and click the Tools option at the top-right.
- Choose Internet Options; if you can’t find it, press the ALT key.
- Now move to the General tab and choose the option that says Delete, which you can find in the Browsing History section.
- Now put a checkmark next to Cookies and website data, Temporary internet files and website files, Form data, History, and InPrivate Filtering.
- Make sure to uncheck the option that says Preserve Favourites and website data and click Delete.
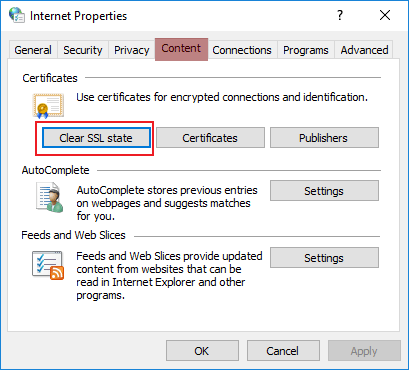
- Move to the Content tab and choose the Clear SSL state option.
- Finally, press OK to save the changes.
Retry to backup the company file after clearing the junk files in Internet Explorer, and check if this resolves the issue. Add Intuit and related domains as trusted websites in Internet Explorer with the next solution.
Solution 4: Add Crucial Intuit Domains as Trusted Sites in Internet Explorer
With this solution, we will add Intuit and other crucial domains as trusted websites in Internet Explorer so that they won’t get blocked and check if this resolves the error.
- Firstly, relaunch Internet Explorer and click the Tool option at the top-right.
- Click Internet Options, move to the Security tab, and uncheck the option that says Enable Protected Mode.
- Click Trusted Sites and choose the Sites option.
- On this screen, uncheck the Require server verification (https) for all sites in this zone checkbox.
- Lastly, add the following domains and select Close.
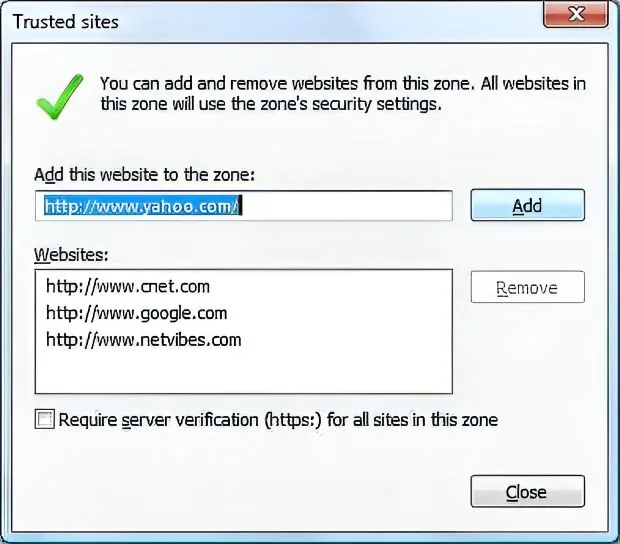
- *.backup.com
- *.intuit.net.
- *.intuit.com
- Move to the Privacy tab and click the option that says Sites.
- Now add the following in the Address of Website box.
- *.intuit.com
- *.quickbooks.com
- Choose the option that says Allow each time you add the web addresses, and click OK to save the changes.
You must now try to back up the company data and check if adding Intuit domains as trusted sites helps resolve the issue. If not, proceed with the last troubleshooting solution and install the latest QuickBooks updates to fix error 2277.
Solution 5: Get the Latest QuickBooks Desktop Updates to Resolve IDP Backup Error
Updating QuickBooks ensures there are no bugs in the application that can interrupt the backup process in the form of errors. Follow the instructions below and check if updating QuickBooks helps resolve IDP backup error 2277.
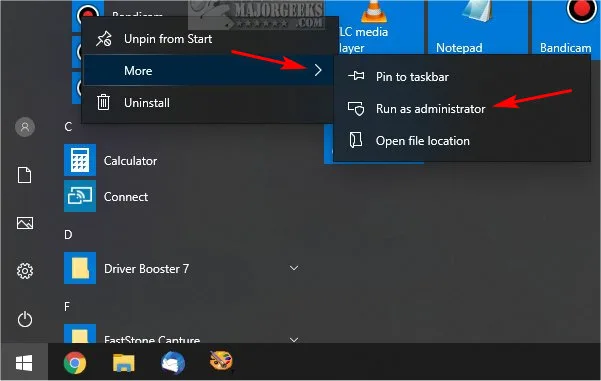
- Firstly, launch QuickBooks Desktop as an administrator by right-clicking its icon and selecting the Run as Administrator option.
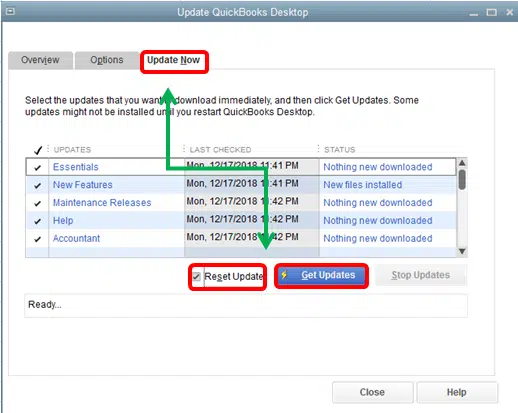
- Now, move to the Help tab, and you will find the Update QuickBooks Desktop option, which you must choose.
- Now move to the Options tab, select Mark All, then the Save option.
- Go to the Update Now tab, select the Reset Updates option, and click the Get Updates button.
- This will prompt QuickBooks to remove all previously downloaded updates and re-download the fresh updates again.
- Lastly, relaunch QuickBooks, and when prompted to install the downloaded updates, click Yes.
You can now retry to back up the company data to check if this final troubleshooting solution has resolved the error.
Conclusion
In conclusion, we have listed some identified solutions to help resolve QuickBooks error 2277. Most of the users have implemented these solutions and fixed the error in no time. However, in situations where you cannot proceed with the solutions or they don’t help resolve error 2277 in QuickBooks, we suggest you contact our Asquare Cloud Hosting Helpline number at (855) 738-0359 for immediate troubleshooting help.
FAQs
QuickBooks error 2277 is an error that you get while trying to back up the company file with the help of IDP, and it indicates issues with the Windows firewall and security settings. Resolving error 2277 requires you to run the IDP diagnostic tool, reconfigure Windows Firewall and security settings, add firewall ports for IDP, add Intuit and related domains as trusted websites, and install the latest QuickBooks Desktop updates.
Backing up data with Intuit Data Protect is a simple process; all you need to do is follow some simple steps below.
1. Open the System icon tray and right-click the IPD icon.
2. Click the Back up now option, browse, and select the files and folders you would like to back up.
3. Select the Backup Now option and hit OK to prompt IDP to back up all the selected files and folders.
Here are the instructions you can follow to manually back up the company data if you cannot back up with IDP for some reason.
1. Launch QuickBooks and open the File tab.
2. Click the Back-Up option and go to the Back-Up Company File section.
3. Click Browse, select the name of the backup file, and choose the location where you want to save the backup.
4. Click Save to create a backup of the company file.

Alastor Moody is an Author at Asquare Cloud Hosting with experience in technical and functional writing. He loves travelling for adventure and fun.