Last Updated on August 20, 2025
There’s no denying that QuickBooks offers its users the best available features that streamline their everyday business tasks. Along with that, it has equipped you with all the possible safeguards available to keep your data secure. Moreover, to protect your crucial accounting data, QuickBooks provides an automatic backup option. It is a data backup feature that backs up your crucial QuickBooks files on a regular basis. Utilizing the functionality, you can schedule the backup in such a way that QuickBooks will automatically take a backup of your data even if you forget to do so. Scheduling an automatic backup is the easiest approach to ensuring the safety of your QuickBooks data. However, like other features that empower QuickBooks, the scheduled backup feature also encounters errors like QuickBooks automatic backup not working, due to which your data backup process may come to a halt. You will surely be looking for the reasons behind this issue. Don’t worry! We have listed all the possible reasons ahead.
Why does the QuickBooks Scheduled Backup Not Working Error Occurs?
One of the common ways to keep your data secure is to schedule automatic backup. As said, you might end up with the QuickBooks Enterprise Automatic Backup not Working due to several reasons. Below we have mentioned all the possible reasons that contribute to the occurrence of the QuickBooks Scheduled Backup Error:
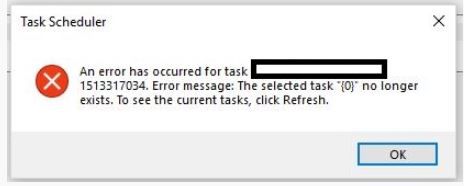
- QuickBooks scheduled backup not working error occurs due to compatibility issues between your operating system and QuickBooks.
- Issues may occur while automatically backing up the QuickBooks data file if you have incorrectly set up the scheduled backups.
- Outdated QuickBooks applications can cause issues in the automatic backup.
- Another reason behind QuickBooks’ scheduled backup failure is the damaged QuickBooks company file.
Factors To Consider Before Fixing Automatic Backup Stops Working Error
There are things that you must take into consideration before backing up your QuickBooks data file:
- File Name Too Long: You might fail to backup your company file, if its name exceeds 65 characters. The same may occur, when the file name has a lot of spaces, underscores, and special characters.
- File Too Big: Automatic Backup Stopped working issue might occur if you attempt to back up a QuickBooks file that’s more than 3 GIG in size.
- Improper Drive or Insufficient Access Rights: Nothing will stop a QuickBooks Backup faster than attempting to shuttle it off onto an external drive or flash drive, or into a directory where not only you but the QuickBooks Database Server, hasn’t received the necessary Windows access rights (full permissions).
- Preference Setting Conflict: Another cause for QuickBooks Disable Automatic Backup Issue or scheduled backups failing stems from the use of the “Keep QuickBooks running for quick startups” feature. While QuickBooks goes through the motions of creating the backup until the very end, it never actually finishes. In these cases, a .tmp file is usually created in the QuickBooks directory where your file is resident.
Once you’re done checking these things, you can try to schedule a backup again. If you’re getting the automatic backup stops working issue again, you can try following the below-given resolution methods.
The following blogs can help you: How To Troubleshoot QuickBooks Has Stopped Working Error?
How To Fix The QuickBooks Automatic Backup Not Working?
Follow the troubleshooting methods mentioned below to Resolve QuickBooks Backup Not Working Issue:
Solution 1: Run the QuickBooks application in Compatibility Mode
- Open the Run Window by simultaneously pressing Windows + R keys. Type winver in the text space and click OK.
- Further, make sure to check your Windows version from the About windows.
- Right-click on the QuickBooks Desktop icon and select the Properties option.
- Go to the Compatibility tab and mark the Run this program in compatibility mode for checkbox.
- Now, go to the drop-down menu and choose your Windows version.
- Lastly, click on Apply and then, OK.
Haven’t the above methods helped you fix the QuickBooks Automatic Backup not working error? In that case, you must proceed to the next troubleshooting solution.
you may also see: A Guide to Backup QuickBooks Desktop & Online Company Data
Solution 2: Make sure the automatic backup was set up correctly
- Go to the File menu and select Save Copy or Back Up option. It will open up the Save Copy or Backup window.
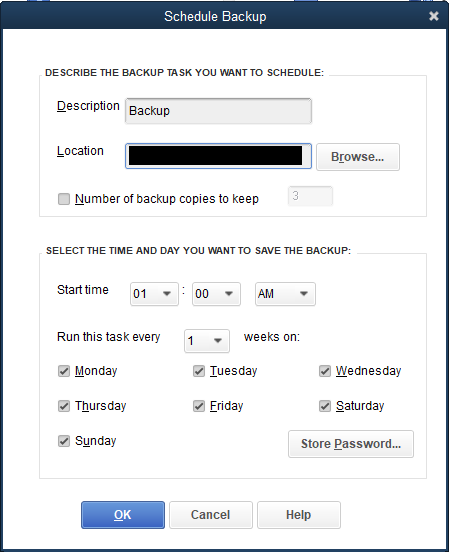
- Then, click on Backup Copy option followed by Next.
- If you haven’t created your backup, then, click on Options to set your backup defaults (such as where you want to save your local backup) and then click Next.
- After that, click on Change Location or Use this Location option and then, Next.
- Further, click on Save it now and schedule future backups or Only schedule future backups, and then click Next.
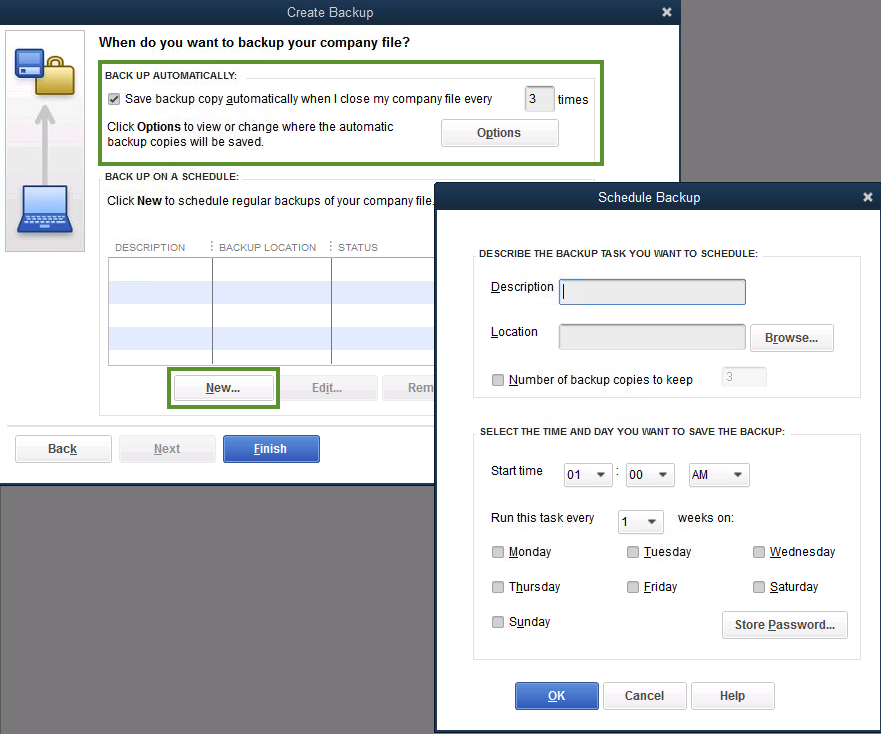
- Then, mark the Save backup copy automatically when I close my company file every [number] times checkbox.
- Lastly, enter a number in the field provided, and then click Finish.
Read Also: Top 5 Ways To Resolve QuickBooks Error 400 – HTTP Bad Request Validation
If the setup is correct, then, you must run the Verify Data Utility Tool to identify data errors. If you encounter Automatic Backup Stopped working error, then, make sure to run the Rebuild Data Utility Tool.
Read more: Simple Instruction To Restore QuickBooks Backup File
Solution 3: Run the Verify and Rebuild Data Utility
- Open the QuickBooks Desktop application and go to the File menu.
- There, click on the Utilities section followed by Verify Data.
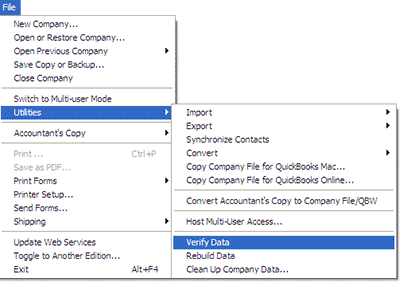
- The tool will scan your application if you come across any issue or data corruption. It will display a message that says ‘Your Data has Lost Integrity.’
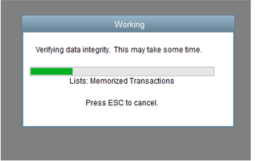
- Then, close the message and go to the File menu again.
- Click on the Rebuild Data utility from the Utilities section. After that, you’ll be asked to confirm the backup option.
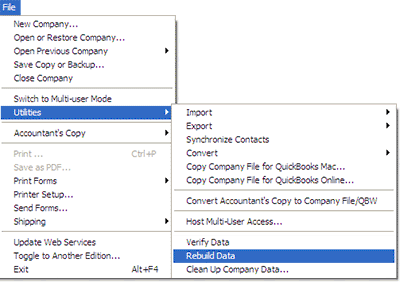
- The tool will start repairing your file for any damage that has taken place.
- When you receive the message “Rebuild has completed,” click on OK.
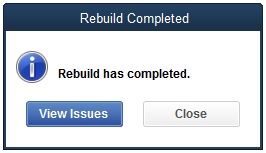
- To make sure that no data corruption persists, run the Verify tool once again.
If this doesn’t resolve the QuickBooks backup failed issue, then you must try updating your QuickBooks application as per the latest version.
Solution 4: Update QuickBooks Desktop Application
- Open the QuickBooks application, go to the File menu, and click on Exit.
- Click on the Windows icon and right-click on the QuickBooks icon. There, select the Run as Administrator option.
- Go to the Help menu and click on Update QuickBooks.
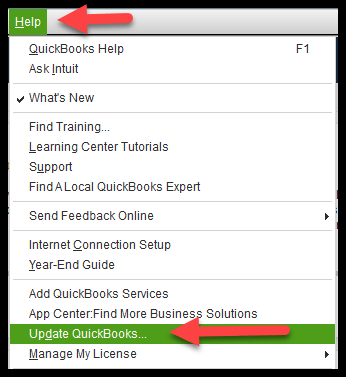
- Now, go to Options and select the Mark All option. Then, click on Save.
- After that, mark the Reset Update checkbox from the Update Now menu.
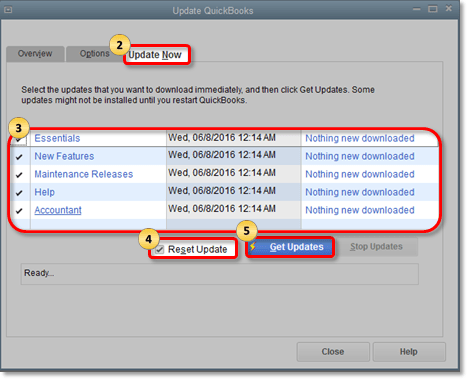
- Further, click on the Get Updates option and close the application after you come across an ‘Update Complete’ error message.
- Open your QuickBooks Desktop application once again and click on Yes when the ‘Install Updates’ pop-up appears.
- Restart your computer once the updates are installed.
Note: If the automatic backup feature doesn’t work even after following the above troubleshooting methods, then you might need to reinstall the QuickBooks Desktop application using the QuickBooks Clean Install Tool.
Conclusion
We hope the troubleshooting methods mentioned in this blog would have helped you fix QuickBooks automatic backup not working issue without much trouble. However, if you are still stuck with the same issue, then we would suggest you take the assistance of our experts by giving us a call on Asquare Cloud Hosting Helpline Number +1(855)-510-6487.

Alastor Moody is an Author at Asquare Cloud Hosting with experience in technical and functional writing. He loves travelling for adventure and fun.