Last Updated on November 20, 2025
If you have stored the QuickBooks company file remotely on a server or a computer, then it may seem challenging to access it due to technical complexity. But you don’t have to worry about that anymore. We have covered the process to access the company file using the QBDT application, even on a remote computer, with simple steps.
Moreover, we have listed some essential requirements as well as the benefits of the QuickBooks Desktop company file located on a remote computer. Read through this blog to understand how you can access the data, what the advantages are of storing the file on a remote computer, and what requirements you need to fulfill.
Are you facing issues while trying to access the QuickBooks Desktop Company file located on a remote computer? Our experts are ready to assist you. Call at +1(855)-510-6487 to speak with a QB professional!
How Does QB Desktop Company File Located on a Remote Computer Benefit You?
There are many advantages that you get when you use a remote server or computer to access the QB company file. We have listed a number of such benefits that you get by using a host computer in this section.
- You can use any computer or workstation to access the company file of your consumers, even outside of working hours, as it is accessible all the time.
- Apart from just a computer system, you can also use mobile devices to open the company file.
- You may notice reduced working hours every week since you have access to the QuickBooks Desktop company file located on a remote computer.
- It does not require you to be present in the office, which means you can access the company file remotely from home or anywhere else without compromising your convenience and comfort.
- In case you have to go out somewhere and take time off from work, you can easily access your company file remotely and contribute additional time to your business without disrupting your plans.
These are some of the significant benefits of using the QuickBooks company file on network drive; moreover, it is easier for you to manage and administer the data. In the next section, we have listed out ways for you to access and open the company file by using a remote server or host computer.
Before You Can Access the QuickBooks Company File on Network Drive
Listed below are some necessary criteria for you to fulfill before you use the QuickBooks Desktop company file located on a remote computer.
- Be prepared with details like the username and password for your QB and Intuit accounts.
- Remember to set the location of the folder that contains the company file before you commence with the access process.
- Make sure that you set up the host computer or a map server as the network drive for both private and user workstations.
- When using multi-user mode to access the QuickBooks company file remotely on a server or a computer, be sure to set up and assign workstations that can use the files.
With the above prerequisites ensured, you will be able to easily access the QuickBooks company file stored on a drive in a remote computer and avoid any issues. Now, let’s go through some advantages that you get by using a remote computer or server.
Steps to Access the QuickBooks Desktop Company File Located on a Remote Computer
Listed in this segment is the procedure that you can follow to set up the QB company file on a drive in a remote computer, as well as open it. Follow the procedures outlined below to smoothly access the files without getting into technical complications.
1. Install the QuickBooks Database Server Manager on a Remote Server or Computer
In order to access the company file on a remote system, we first need to install and set up the QB database server manager. It is a utility that helps facilitate multi-user mode and provides access to the host computer containing the company file for the users. You need to download and install the database server manager to open the QuickBooks Desktop company file located on a remote computer. You can follow the process below, but if you already have the tool, then you can skip to the 2nd step.
- Download the QB Desktop and install it on the host computer.
- Open the application and expand the File menu.
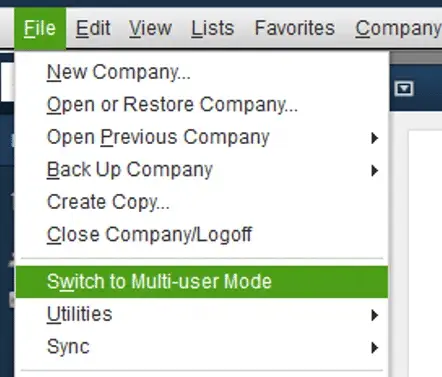
- Locate and click on Switch to Multi-user Mode as shown below.
- When the Multi-user hosting setup required window opens, hit Yes.
- You may notice that QBDT installs and runs QBDBMgrN.exe as a background service.
- This service must be active on the host computer, which will be used to store and access the company file, even when the application is inactive.
- Then, tap OK on the Multi-user setup information window.
- Now, open the Company menu and select Users to give access.
- Open the Set up Users and Roles section, then tap New.
Once you finish this process, you will have set up users and roles with permission to access the QuickBooks company file remotely on a server or a computer. Now, the next step is optional, but it helps to make sure that your workstations do not face any issues while trying to connect with the host computer on the shared network.
2. Activate Network Discovery and Disable Password Protected Sharing
Although it is not a mandatory step, the Network Discovery should be switched on on the host server so that the file is discoverable to be opened through a UNC path. Moreover, you can turn off the Password Protected Sharing so that Windows does not ask for a network password from your workstations. This process is to be done across the host server as well as the workstations that will be used to access the QuickBooks Desktop company file located on a remote computer.
- Go to the Windows Start menu and search for “Control Panel”.
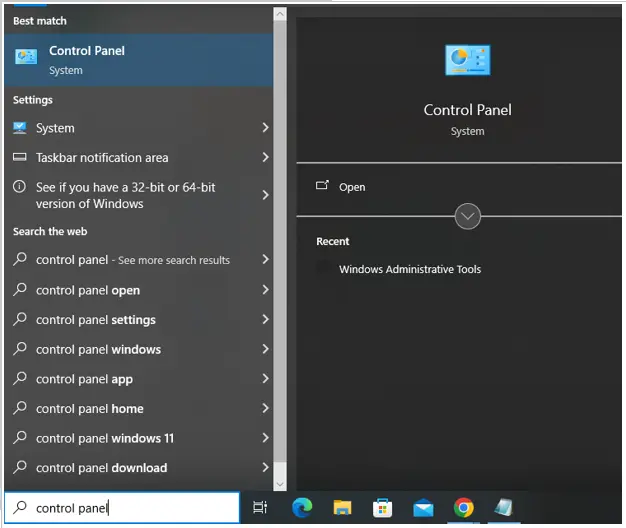
- Open the Control Panel across the host computer and workstations.
- Click on the Network and Internet option, as shown above.
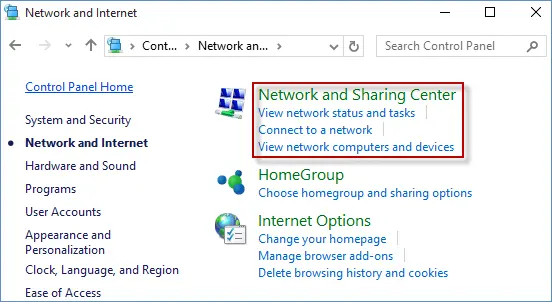
- When the next window opens, click on Network and Sharing Center.

- Next, locate and head to “Change advanced sharing settings” from the left panel.
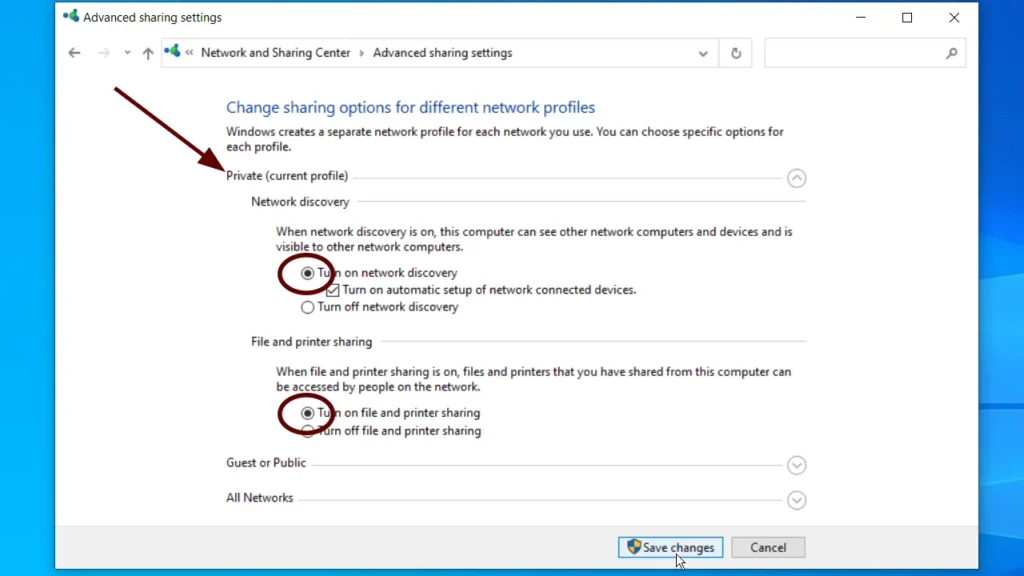
- Select the ‘Turn on network discovery’ button, as shown in the image below.
- After that, expand the “All Networks” drop-down.
- Scroll down and select “Turn off password protected sharing”.
- Once done, hit “Save changes”
The above process can be repeated across a server or a host computer and all the workstations that will be used to access QuickBooks the company file is stored on a drive in a remote computer over the shared network. Now, refer to the next step for locating and opening the company file.
3. Locate and Open the Company File
After you are done with the steps given above, you need to locate and open the QuickBooks Desktop company file located on a remote computer. This is to be done across all the workstations that will be used by your users for accessing the file through the shared network.
- Open QB Enterprise and click on the File menu.
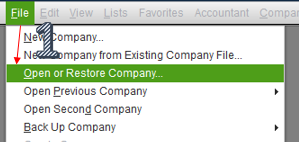
- Then, locate and hit the “Open or Restore Company” option.
- After that, you need to click on Open a company file, and then tap Next.
- Now, you need to browse to the location of the company file on your system.
- If the company file is stored on drive E on your computer, then search for Company Files Name (E:) in the list.
- Locate the company file that has the ‘.qbw’ file extension and select it.
- Now select the same file from the available list and then tap Open.
- You will be asked to enter your Intuit username and password.
Once you have completed all the above steps, you will be able to access and open the QuickBooks company file remotely on a server or a computer safely. In some cases, you may need to set up the permissions for the folder and Windows access to share the company file. But don’t worry, we have covered this for you in the following section.
How to Set up the Folder and Windows Access Permissions for Sharing Company Files
In order to access the company files in the multi-user mode, you have to give the right Windows permissions to the folders. There are corresponding components across all the versions of QB that need to be updated so that the multi-user mode can continue to work smoothly.
Precautions to Take Before Setting up the Folder and Windows Access Permissions
These are some important considerations for you before you set up the folder and Windows access permissions for opening the QuickBooks Desktop company file located on a remote computer. Read through the process below before you take any steps.
- You need to assign the proper permissions to the installation directories.
- The security tab might not be available in the regular mode in Microsoft Windows.
- You need to restart the system and turn on Safe Mode by following these steps.
- Restart the computer and hold down the F8 key while it is turning on.
- When the Advanced Boot window opens, select Safe Mode and press Enter.
- The QBDataServiceUserXX varies based on the version of QuickBooks Desktop you are using.
- QuickBooks Desktop 2024: QuickBooksDB34
- QuickBooks Desktop 2023: QuickBooksDB33
- QuickBooks Desktop 2022: QuickBooksDB32
- QuickBooks Desktop 2021: QBDataServiceUser31
- QuickBooks Desktop 2020: QBDataServiceUser30
- QuickBooks Desktop 2019: QBDataServiceUser29
- QuickBooks Desktop 2018: QBDataServiceUser28
- Sometimes, the workstations multi-user access can switch to Alternate Hosting mode, taking ownership of a company file. In this case, other users fail to open the file.
Once you ensure these key points, move on to the next section to set up the folder permissions for accessing the QuickBooks company file remotely on a server or a computer.
Setting up the Folder Permissions
Follow these methods below to set up folder permissions, so that you can open the QuickBooks Desktop company file located on a remote computer.
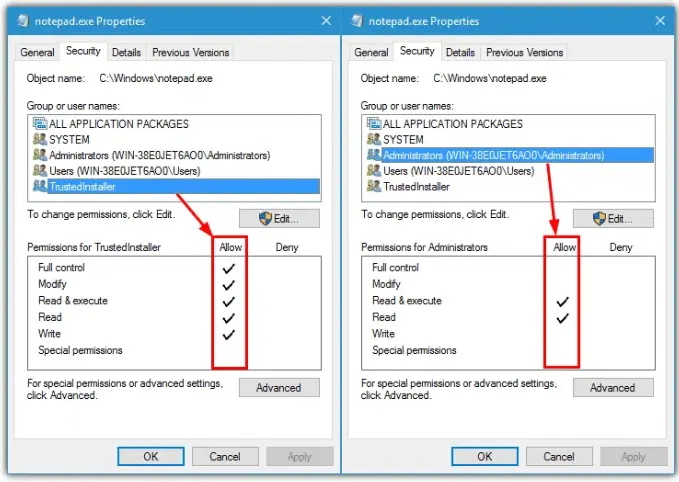
a. Review that the Folder Permissions are Set Correctly
The following steps can be taken to verify whether the folder permissions are set correctly to access the QuickBooks company file on network drive.
- Click Windows + E keys to launch File Explorer on your system.
- Find the folder containing the QuickBooks Enterprise company files.
- Right-click the folder and select Properties from the menu.
- Then, head to the Security section from the top bar.
- Under the Security tab, find and choose the Advanced option.
- Now, select the QBDataServiceUserXX for your version of QB Desktop, as given in the list below.
- QuickBooks Desktop 2024: QuickBooksDB34
- QuickBooks Desktop 2023: QuickBooksDB33
- QuickBooks Desktop 2022: QuickBooksDB32
- QuickBooks Desktop 2021: QBDataServiceUser31
- QuickBooks Desktop 2020: QBDataServiceUser30
- QuickBooks Desktop 2019: QBDataServiceUser29
- QuickBooks Desktop 2018: QBDataServiceUser28
- After that, tap on the Edit button to modify the permissions.
- Make sure that the following permissions are ticked and allowed for the folder.
- Traverse folder/Execute file
- List folder/Read data
- Read attributes
- Read extended attributes
- Create files/Write data
- Create folders/Append data
- Write attributes
- Write extended attributes
- Read permissions
In case you find that the permissions to the folder are not configured correctly, then proceed with the following steps to have the permissions updated properly so that you can open the QuickBooks Desktop company file located on a remote computer.
b. Configure the Folder Permissions Correctly
When the default permissions on a folder are configured improperly, use the procedures below to configure it properly. This is required to access the QB Desktop company file located on a remote computer; hence, use the instructions for your Windows operating system.
1. For Windows 11:
To correct the access permissions of the QuickBooks company file on network drive on Windows 11, the following steps should be taken:
- Find and choose the Company File folder.
- Tap on the Properties option that has appeared in the expanded menu.
- Go to the Security tab and press the Edit button.
- Find the QBDataServicesUserXX, and choose it.
- Mark Full Control in the Allow column.
- Once done, hit OK to save.
2. For Windows 10, 8, 7
To share the company files, you can perform the following steps and change the folder permissions of the QuickBooks multi-user setup on Windows 10, 8, and 7.
- To open the File Explorer, press the Windows and E keys simultaneously.
- Find and choose the Company Files folder.
- Open the Properties and sharing section from the menu.
- Go to the Share tab and locate QBDataServiceUserXX.
- Tick the Full Control checkbox under the Allow column
- Finally, hit Share to save the changes.
The QuickBooks Desktop company file located on a remote computer can be accessed easily in the multi-user mode without any issues by completing the process above. Now, move on to the next segment for changing the folder permissions.
c. Changing the Folder Permissions.
You can also change permissions of the Multi-user setup of QuickBooks Enterprise to gain access to the company file on the shared network in the following steps.
- Press the Windows + X keys to access the menu.
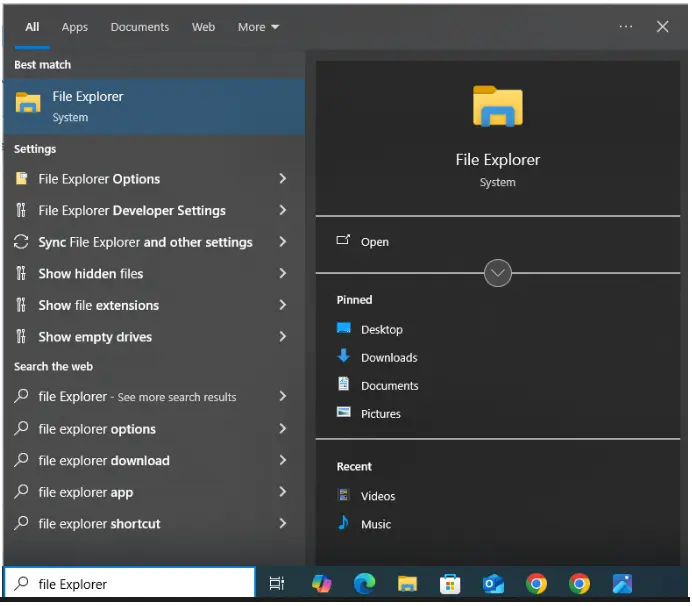
- Choose the File Explorer from the list, as shown in the image below.
- Now, locate and select the following folders:
- C:\Program Data\Intuit\Entitlement Client\v8
- C:\Program Data\Intuit\Entitlement Client\v6.0
- C:\Program Data\Intuit\Entitlement Client\v5
- C:\Program Data\Intuit\Entitlement Client\v3
- C:\Program Data\Intuit\Entitlement Client
- C:\Program Data\Intuit\QuickBooks Enterprise Solutions X.0 (X = version) or C:\Program Data\Intuit\QuickBooks 20XX (XX = year)
- C:\Program Data\COMMON FILES\INTUIT
- C:\Program Data\COMMON FILES\INTUIT\QUICKBOOKS
- C:\Users\Public\Public Documents\Intuit\QuickBooks\FAMXX (XX = year)
- C:\Users\Public\Public Documents\Intuit\QuickBooks\Company Files
- C:\Users\Public\Public Documents\Intuit\QuickBooks\Sample Company Files\QuickBooks Enterprise Solutions X.0 (X = version) or C:\Users\Public\Public Documents\Intuit\QuickBooks\Sample Company Files\QuickBooks 20XX (XX = year)
- After you locate these folders, right-click on the individual folder.
- Select and open the Properties tab.
- Navigate to the Security section and tick the Everyone checkbox.
- The Everyone checkbox may not be in the Group or User Name list; therefore, choose the Add option and enter Everyone, and then finish by tapping OK.
- Then, tick the Full Control checkbox.
- Lastly, tap Apply and press OK to finish.
Repeat the same process for any folder from the list. Don’t forget that some of these folders may not appear in specific versions of QB Desktop. You can proceed to the next section for setting up the Windows access permissions to share the QuickBooks Desktop company file located on a remote computer.
Set Windows Access Permissions to Share Company Files
The following procedures can be taken to ensure that QuickBooks Enterprise has the right level of access for opening the QB company file on network drive and prevent any future issues from occurring.
a. For Windows 10
You can follow the steps outlined below for setting the Windows access permissions in Windows 10, so that you can open the QuickBooks Desktop company file located on a remote computer without any issues.
- Hit the Windows + E keys and you’ll be redirected to File Explorer.
- You can also search for ‘File Explorer’ through the search bar on the Start menu.
- Find the folder that has your QB company file and select it.
- Open the Properties window from the menu.
- Head to the Sharing tab from the top bar.
- Locate and click on the Share Add option.
- Now, choose the QBDataServiceUserXX for your QB version, as given in the list below.
- QuickBooks Desktop 2024: QuickBooksDB34
- QuickBooks Desktop 2023: QuickBooksDB33
- QuickBooks Desktop 2022: QuickBooksDB32
- QuickBooks Desktop 2021: QBDataServiceUser31
- QuickBooks Desktop 2020: QBDataServiceUser30
- QuickBooks Desktop 2019: QBDataServiceUser29
- QuickBooks Desktop 2018: QBDataServiceUser28
- Tick the Full Control checkbox to set permission for both users.
- Once done, hit the Share button to save changes.
b. For Windows Server 12
In order to set the Windows access permissions in Windows Server 12, the process given below can be followed. This will help you open the QuickBooks company file on network drive.
- Firstly, install and set up the File and Storage Services on your computer.
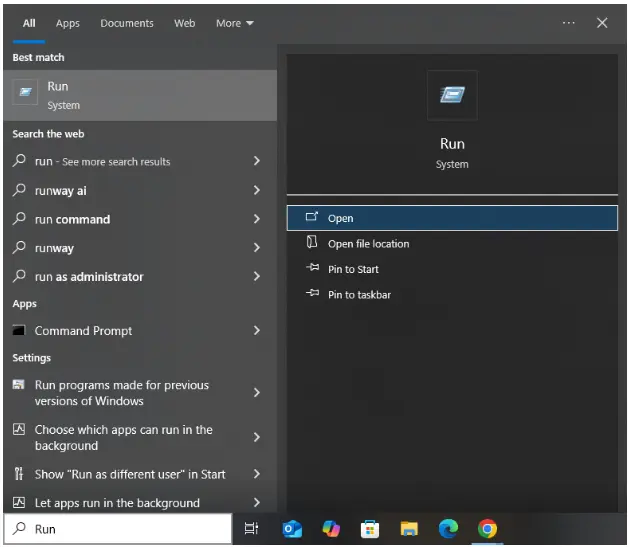
- Then, hit the Windows + R keys to launch the Run Command.
- You can also enter ‘Run’ in the search bar on the Start menu to open it.
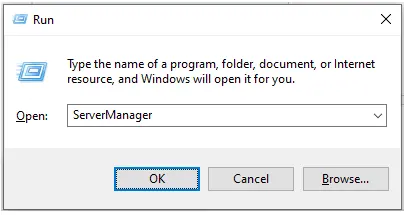
- Now, enter ‘ServerManager’ into the search box and hit OK.
- There, locate and select the File and Storage Services that you installed.
- Then, head to the Shares section.
- Choose New Share from the Task dropdown.
- You will see a list of File Share Profile. To understand the differences between profiles, simply click on each one to view its description.
- From the list of File Share Profile, you have to select SMB Share – Quick.
- The SMB Share – Quick is the default profile, but the name might not be the same in every version.
- Now, head to the Share location section and choose Type a custom path.
- Then, select Browse to find the folder for sharing.
- Once you find the correct folder, tap Select a folder followed by Next.
- The default selections under the Configure Share settings window are not required to be modified; therefore, you can hit Next.
After you have completed the process to set the right level of Windows access permissions for opening the QuickBooks Desktop company file located on a remote computer, you won’t face any issues accessing the file. We hope that you could easily follow through the steps and did not face any issues as you were doing the procedure.
A Quickview Table for Accessing the QuickBooks Company File Remotely on a Server or a Computer
In this segment, we have provided you with a tabulated overview of how to access QuickBooks the company file is stored on a drive in a remote computer.
| Pre-requisites | Keep details like your Intuit username and password in hand, set the location of the folder containing the QB company file, set up a host computer or a map server as the network drive for both the private and user workstations, and set up and assign workstations that can access the QuickBooks Desktop company file located on a remote computer in multi-user mode. |
| Its benefits | Being able to access the company file outside of working hours, using mobile phones to open the files, reduced working hours due to 24/7 access, accessing the files remotely, even outside, and contributing your time while being out, without affecting your schedule. |
| How to set up | Download and install QuickBooks Database Server Manager onto a remote server or computer, then switch on the Network Discovery and turn off the Password Protected Sharing, and lastly, find and access the company file. |
| Modifying permissions | Set up and review the folder permissions and modify them correctly, and change the Windows access permissions to share the QB company files. |
Conclusion
This detailed guide provides an understanding of how you can access the QuickBooks Desktop company file located on a remote computer. In this blog, we have walked you through various requirements to consider and the advantages that it offers you. Additionally, you have a detailed procedure to know how you can set up the QB company file remotely on a server or a computer.
Some cases require you to modify the folder and Windows access permissions so that you can share the company files. That’s why we have also covered the process for that.
However, following these procedures might get complicated. But don’t worry, we are here to help; just dial TFN. A dedicated team of QuickBooks professionals will provide you with full assistance.
Frequently Asked Questions (FAQs)
How do I find where my QuickBooks company file is located?
If you want to find out the path where the QuickBooks Desktop company file located on a remote computer or within your system, then you can try various methods. Firstly, head to the QBDT application and open your company file, then hit the F2 or Ctrl + 1 keys. This will launch the Product Information window, which will show you the path for the company file under the Location field in the File Information section. The path that is displayed in the said section is exactly where your company file is stored within your device and can be found through the File Explorer.
How to access QuickBooks company file from another computer?
In order to access the QuickBooks company file on network drive from another computer, follow the steps outlined below.
a. On the Server or Host Computer
1. Expand the File menu from the QuickBooks Enterprise home page.
2. Select the Utilities option, then click on Host Multi-User Access.
3. Open the Network and Internet settings in the Control Panel.
4. Disable the Password Protected Sharing.
b. On the Remote Computer or Workstation
1. Download and install the QuickBooks Desktop.
2. Set up QuickBooks Database Server Manager.
3. Locate and open the shared company file from the network drive.
Can QuickBooks be accessed remotely?
Yes, the QuickBooks application could be accessed remotely. To do so, you may utilize cloud-based solutions of QB, like QuickBooks Online, or you can place the QuickBooks Desktop on the cloud servers. Further, you can also connect a remote desktop software to a computer located on your network that has the QB program installed. This way, you will be able to access it wherever you go, provided you have access to the internet.

Kate is a certified public accountant (CPA) with expertise in various accounting software. She is technically inclined and finds passion in helping businesses and self-employed people carry out bookkeeping, payroll, and taxation without worrying about errors. Every once in a while, Kate loves to travel to far-off places and relax in the lap of nature.