Last Updated on November 20, 2025
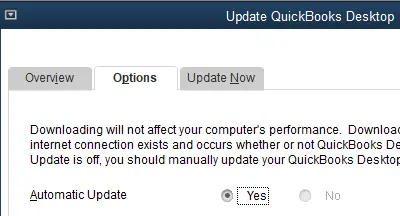
Although QuickBooks automatic updates are a good thing, we understand that sometimes you might need to turn it off. However, when you head to the Options tab, you might find that you can’t select No.

The picture above shows the no option QuickBooks automatic update greyed out. This prevents you from disabling automatic updates, which can sometimes delay workflow, and even install bugs that often come with some updates. In this blog, we will tell you what you can do in this situation.
No Option in QuickBooks Automatic Update Greyed Out – Try These Hacks
QuickBooks updates are mandatory to be installed every once in a while, but it is not compulsory to install every consecutive update.
You might want to turn off automatic updates, but when you try to do so, you will find no option in QuickBooks automatic update greyed out. We will show you how to address this problem here.
1. Update QuickBooks Desktop
This solution will help if you haven’t updated QuickBooks Desktop for long or haven’t installed the automatically downloaded updates.
It is because developers often roll out updates with bug fixes that might help you resolve various errors. Therefore, install the latest update and check if the bug has been fixed. However, if it doesn’t, move to the next step.
2. Disable Write Permissions to the Download Location
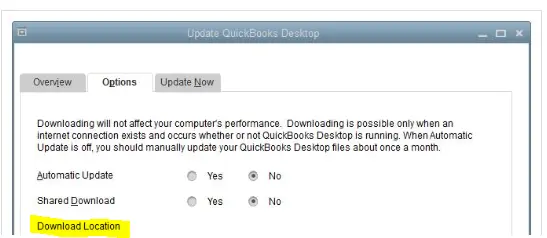
QuickBooks can’t download updates if you disable the write permissions to the download folder. To do so, you will need to find the download location. Let us show you how to prevent QuickBooks from updating automatically.
- Launch QuickBooks Desktop and go to the Update QuickBooks Desktop window.

- Choose the Options tab, and then you can see the Download location.
- Now, open the download location and right-click on the folder where QuickBooks downloads the updates.
- Choose Properties followed by Security and then Edit.
- Change the permissions, deselecting the write permissions for QuickBooks to this folder.
- When you are done, choose Apply to save the changes.
Now, restart QuickBooks Desktop and see if you can prevent automatic updates. If you still can’t, try the next solution.
3. Sign into a Sample Company
Let us log out of the current company file and sign into a sample company to figure out if the issue is related to data damage. Here is how to open a sample company file in QuickBooks Desktop:
- Go to the Start menu or Desktop, where your QuickBooks icon is, and press the Ctrl key.
- Double click the QuickBooks icon to open it, while still holding the Ctrl key. Don’t take your finger off the Ctrl key until QuickBooks is done opening.
- Don’t open the company file. Instead, let go of the Ctrl key and tap on the Open a Sample File.
- After opening the sample company file, click on the Updates and go to the Options tab.
Now, is the No option in QuickBooks automatic update greyed out or not? If it is not greyed out when opening it in a sample company file, there might be corruption or damage to your company data. Verify and rebuild your company file to resolve it.
However, if the problem persists in the sample company file as well, move to the next step.
4. Repair QuickBooks Program
If the No option in QuickBooks automatic update continues to be unavailable, try repairing the QuickBooks program.
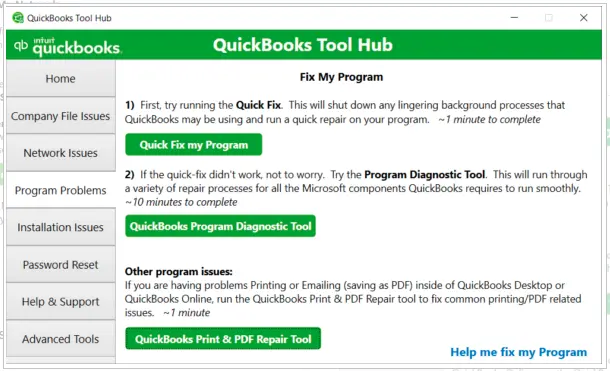
This is possible through QuickBooks Tool Hub; therefore, download and install it. Once done, follow the steps below:

- Open QB Tool Hub and navigate to the Program Problems tab.
- Here, you will see Quick Fix my Program. Click on that.
- Now, from the Program Problems tab again, choose QuickBooks Program Diagnostic Tool.
Let the tool run and repair your QuickBooks Desktop application. When it is done, restart it and check and make sure the No button can be selected in the QuickBooks automatic update section.
When the Next Button in QuickBooks Tax Table Updates is Greyed Out
Sometimes, the Next button in QuickBooks tax table update might be unavailable, or in other words, greyed out. This would make you unable to proceed or install the updates.
Let us show you what you should do when the next button in quickbooks tax table updates is greyed out.
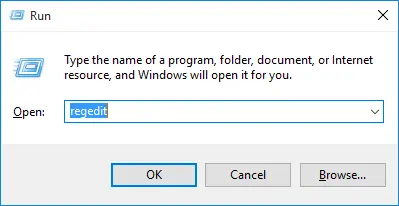
- Press the Windows+R keys together to launch the Run window.

- Now, type Regedit and hit Enter.
- Navigate to HKEY_LOCAL_MACHINE > SOFTWARE > Microsoft > Windows NT and select the folder named Current Version.
- Find Registered Owner, right-click on it, and choose Modify.
- In the Value Data field, type in a name and hit OK.
- Now, tap on the File menu and select Exit.
Finally, relaunch the tax table update and check if it is successfully done.
Conclusion
If you find the no option in QuickBooks automatic update greyed out, you might not be able to turn off the unwanted updates. However, in this guide, we discussed some hacks to address that.
However, if you are still having a problem, dial +1(855)-510-6487 and connect with a QuickBooks expert. They can help you resolve such issues in no time!
Frequently Asked Questions
How do I turn on automatic updates in QuickBooks?
To enable automatic updates in QuickBooks, tap on the Help menu and click on Update QuickBooks Desktop. Choose the Overview tab, and ensure that Automatic Updates is turned on. To do so, go to the Options tab and choose Yes for Automatic Updates. Finally, Mark All and hit Save.
Why is QuickBooks not updating?
QuickBooks might not be able to connect to the server due to firewalls, antivirus, or security programs. They can block the executable files responsible for updates from connecting to the internet or running or quarantine them. Therefore, check if the Windows firewall is blocking QuickBooks.
How do I turn off automatic updates in QuickBooks Desktop 2024?
To disable the automatic updates in QuickBooks, tap on the Help menu followed by Update QuickBooks Desktop. Tap the Options section and choose the No bullet in the Automatic Update. Finally, choose Save, followed by Close.

Kate is a certified public accountant (CPA) with expertise in various accounting software. She is technically inclined and finds passion in helping businesses and self-employed people carry out bookkeeping, payroll, and taxation without worrying about errors. Every once in a while, Kate loves to travel to far-off places and relax in the lap of nature.