Last Updated on November 20, 2025
While updating QuickBooks Desktop, there can be times when you might encounter an error during the update of Windows to a newer version. This situation is most likely QuickBooks error code 20, which is causing your printer to display the error message:
| “Printer not activated, error code -20” |
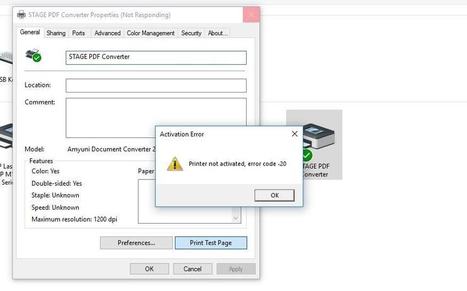
This can occur when the upgraded operating system adds the HKEY_CURRENT_CONFIG\Software key to the registry, preventing you from printing payslips, forms, or PDFs, or from emailing invoices to customers. After you click OK on the above message window, it displays the following error message:
| “Could not print to the printer. Check your printer selection. Printing may have been canceled from another program.” |
Several other reasons trigger error code 20 in the QB desktop application. We have covered all such reasons in the next part of this blog.
If you need any more help with the QuickBooks update, get in touch with our experts at +1(855)-510-6487 for a free consultation.
Potential Culprits Behind the QuickBooks Printer Error Code 20
This section covers the reasons why you may encounter the ‘Printer not activated error code’ in QuickBooks.
- When the QuickBooks PDF converter is not configured accurately, this error can be seen.
- You are using an outdated version of the QBDT application, which is causing compatibility issues with the OS.
- If your Windows OS version is outdated, this error might cause you trouble.
- Windows has a registry error in your system.
- An incomplete or corrupt installation of the QB software can also evoke QuickBooks PDF Converter Activation error 20.
- An incorrect printer was selected as the default.
- Missing or outdated printer drivers can also be a reason.
- If your device manager is having some issues in the system.
- Issues in the USB Device can also trigger the printer not activated error code -20.
Before you troubleshoot error code 20, consider the key things that we have mentioned in the next section.
Things to Keep in Mind Before Fixing QuickBooks Printer Not Activated Error 20
Ensure the following things to avoid the printer not activated error code -20:
- Make sure to log in as an admin on Windows.
- If you are using Windows XP, Vista, or an older version, ensure you have the 32-bit version.
- Eliminate any background running applications.
- Temporarily disable your antivirus or firewall to check whether it is blocking the update process.
- If you have installed two different versions of QuickBooks on your OS, make sure each has its own installation directory.
- Any QuickBooks version is good for only 3 years from the year it is launched. After that, you should consider upgrading to a newer version.
Retry printing or saving a PDF file from QuickBooks to check if the error is resolved. If not, move to the troubleshooting solutions mentioned in the next section of this article.
Expert-Backed Methods to Address QuickBooks Printer Not Activated Error 20
Follow the troubleshooting methods below to resolve the QuickBooks printer not activated error 20 in your system:
Solution 1: Disable the UAC (User Account Control) Settings
The UAC settings can also be the reason behind the error. Follow the steps below to fix it.
- Open the Run command by pressing the Windows + R keys on the keyboard.
- Search the Control Panel.
- Click on OK.
- Now, tap on the User Accounts section under the Control Panel.
- Select Change User Access Control Settings.
- Further, move the slider to Never to Notify.
- Tap on OK.
- Lastly, try to restart your computer.
If you are still stuck with the printer not activated error code -20, even after following the above solution, follow the next solution.
Solution 2: Delete qbprint.qbp & wpr.ini Files
You can opt to delete the qbprint.qbp and wpr.ini files in your installation folder by following the steps below:
- Access the Windows File Manager.
- Go to C:\ProgramData \Intuit \QuickBooks folder.
- Right-click the qbprint.qbp & wpr.ini files.
- Choose the Delete option from the QuickBooks folder.
- After that, delete qbprint.qbp & wpr.ini files from the C:\Users \All Users \Intuit \QuickBooks folder as well.
Now, verify if the problem persists in the printer.
Solution 3: Run QuickBooks Print & PDF Repair Tool
Follow the steps to eliminate misconfigurations and printing errors in QuickBooks, such as QuickBooks Desktop error code 20.
- Download and install the latest version of QuickBooks Tool Hub.
- Launch the tool hub in your system.
- Now, go to the Program Problems tab.
- Choose the QuickBooks PDF & Print Repair Tool from the section.
- Let the tool run and fix the issue.
Once the tool has completed the process, restart your QBDT application to see if the QuickBooks printer not activated error 20 still appears.
Related Post: Need help to Print Bank Reconciliation in QuickBooks? Learn the quick steps to access, preview, and print your reconciled reports for accurate financial tracking.
Solution 4: Check the Default Email Program
Check and verify the default email program in the Windows registry to fix this issue:
- Press Windows + R to open the Run dialog.
- Look for the Registry Editor in the search box.
- Tap on OK.
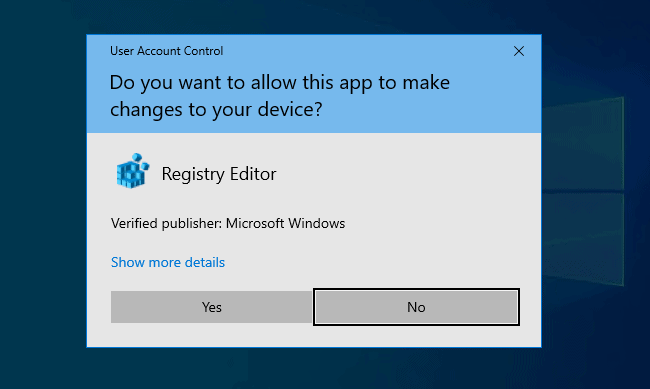
- Right-click on the Regedit icon.
- Select the Run as an admin option.
- Now, go to HKEY_CURRENT_USER> Software> Clients> Mail.
- Verify the default email name on the left side of the panel. If you are not using the default email program, then double-click on the Default section and enter the name of your email program.
- At last, click OK, then restart Windows.
If error code 20 persists, try starting the Windows print spooler service.
Also Read: Learn how to easily Set up email in QuickBooks to send invoices, estimates, and reports smoothly. Follow simple steps to configure your email service and improve workflow efficiency.
Solution 5: Activate Windows Print Spooler Service
Check the USB connections regularly. Besides, run antivirus or security programs regularly to eliminate errors such as QuickBooks Enterprise error code 20.
- Press Windows + R keys on your keyboard to access the Run command.
- Search for services.msc in the text space.
- Then, press the Enter key.
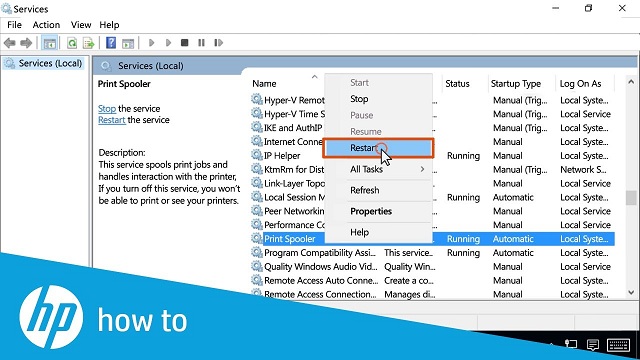
- Now, search for the Print Spooler service in the services list.
- Right-click it and select Start.
Lastly, try to print any document using the QuickBooks application.
Solution 6: Clean Install QuickBooks Desktop
For the QuickBooks printer not activated error 20, the damage in QuickBooks program can be the culprit. Clean install the QuickBooks Desktop to start anew and resolve this issue.
Solution 7: Set Full Control Access
Set full control access for the software folder in the Windows registry by following the steps below:
- Click the Windows icon, then type Regedit in the search bar.
- Right-click the Regedit icon, then select Run as Administrator.
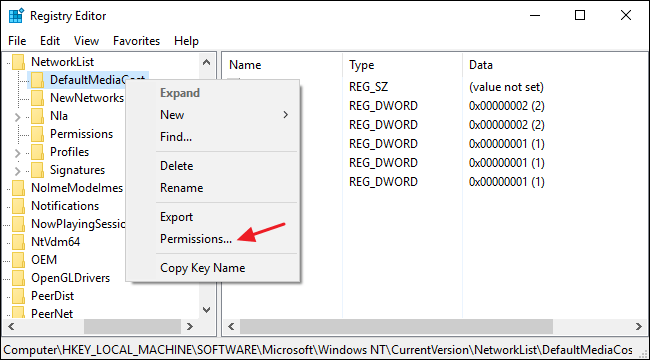
- Go to the HKEY_CURRENT_CONFIG folder and right-click on it.
- Now, click Permissions, then choose Full Control for Users.
- Click on OK.
- Close the Registry Editor.
- Open the QuickBooks application and try to print a PDF.
This method will help you to set full control access in the Windows Registry.
Conclusion
In this blog, we covered everything you need to know about the QuickBooks printer not activated error 20. We saw factors that lead to the error and things to ensure before you start troubleshooting it, followed by extensive solutions to the error. If you need assistance, you can get in touch with a QB expert at +1(855)-510-6487.
Frequently Asked Questions (FAQs)
There are two crucial points you must check before getting rid of the “printer not activated error code -20 while printing PDF” error message. Ensure that there are no issues with the USB connectivity to the printer, and you can print a self-test page outside of QuickBooks Desktop.
Well, there are several methods available that can help you do that. But, you can try to uninstall the QB application by using the Clean install tool.
There are two crucial points you must check before getting rid of the “printer not activated error code -20 while printing PDF” error message. Ensure that there are no issues with the USB connectivity to the printer and you can print a self-test page outside of QuickBooks Desktop.
To set the default printer on Windows, you must go to the Printers and Faxes section, right-click the printer that you want to set as default, and click the Set as Default Printer option
If the QuickBooks Print & PDF repair tool fails to resolve error 20, you can try renaming the QBPrint.QBP file. You can find the QBPrint.QBP file in the following locations.
If you wish to rename the QBprint.qbp, here are the steps to be followed:
1. Locate the QBprint.qbp file from C:\ProgramData\Intuit\QuickBooks 20xx, where XX represents the version year of your QuickBooks,
2. Right-click on the QBprint.qbp file.
3. Tap on the Rename option.
4. Now, include the .old extension in the file name.
5. Hit Enter.
6. Access the QB Desktop.
7. Head to the File menu.
8. Click Printer Setup, then choose the transaction from the Form Name.
9. Tap on OK.
To set the default printer on Windows, you must go to the Printers and Faxes section, right-click the printer that you want to set as default, and click the Set as Default Printer option.

Oriana Zabell, a professional cloud engineer, has over three years of experience in desktop, online QuickBooks support and troubleshooting. She is currently working as a cloud hosting consultant with Asquare Cloud Hosting. She loves to read and write about the latest technologies such as cloud computing, AI, DaaS, small businesses, manufacturing. When not writing, she is either reading novels or is indulged in a debate with movie fanatics.