Last Updated on December 29, 2025
The chart of accounts is a complete list that consists of the data of your business’s accounts and balances. The QuickBooks application offers COA templates that can be easily downloaded. However, to utilize it, you need to learn the procedure of setting up chart of accounts in QuickBooks.
In this blog, we will delve into this subject in detail. So, let’s start by discussing the chart of accounts.
If you can’t set up a chart of accounts in QuickBooks due to a general or technical inconvenience, contact a certified QB expert at (855)-510-6487 to get professional assistance!
Chart of Accounts in QuickBooks – An Overview
The chart of accounts is a detailed list of the business’s accounts and balances. Your accounting operations require you to record the transactions in the correct accounts. A chart of accounts helps you to manage that. There are four different types of accounts:
- Asset accounts
- Liability accounts
- Revenue accounts
- Expense accounts
- Equity accounts
Further, setting up a chart of accounts in QuickBooks means defining where transactions will go. It includes adding, modifying, and deleting accounts. The QB mapping chart accounts means that QuickBooks will go through your journal entries and record them in the accounts they belong to.
How to Setting Up Chart of Accounts in QuickBooks Desktop and Online?
The initial steps to Setting Up Chart of Accounts in QuickBooks Desktop and Online are pretty much the same. This procedure applies when we try to make changes to the accounts. Let’s look at how we can set up a chart of accounts:
Step 1: Give the Business Account a Name
The name you give an account is its title. It represents what you are reporting on, such as bank fees, cash, taxes, etc.
Step 2: Give Account Numbers to Businesses
A number is assigned to every account name. Generally, the account number sequence is as follows:
- Assets – 1000 to 1999
- Liabilities – 2000 to 2999
- Equity – 3000 to 3999
- Revenue – 4000 to 4999
- Expenses – 5000 to 5999
Now, let’s move to the next step to discuss how to organize the account names into one of four account category types.
Related Post: If you’ve lost access to your QuickBooks account, don’t panic. Simply visit the QuickBooks login page, click on “Forgot Username or Password”, and follow the instructions to recover your QuickBooks account quickly and securely.
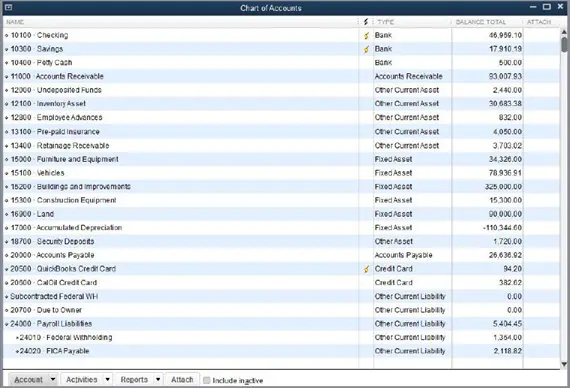
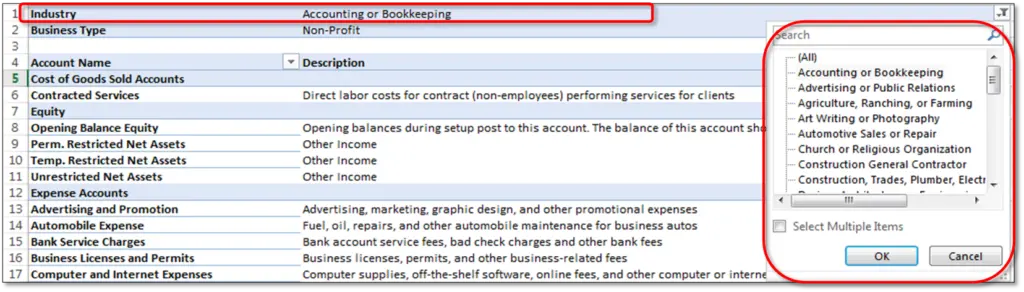
Step 3: Characterise Account Names into the Category they Belong to
Every account name must be assigned an account type or a general ledger. They are required to be characterized as an asset, liability, income, or expense so that the entry related to them is recorded in their defined category. Here is an example of what your chart should look like after assigning account numbers and characteristics:
To characterise the accounts names into the right category, you need to customize a chart of accounts in QuickBooks, which differs between the Online and Desktop versions. The customization part includes adding, deleting, and editing accounts. So let’s look at how you can modify charts of accounts for QB Desktop and Online in detail.

A: Modify the Chart of Accounts in QuickBooks Online
We will look at the process of adding an account and editing an account for QuickBooks Online:
1. Add a New Account to the Chart of Accounts
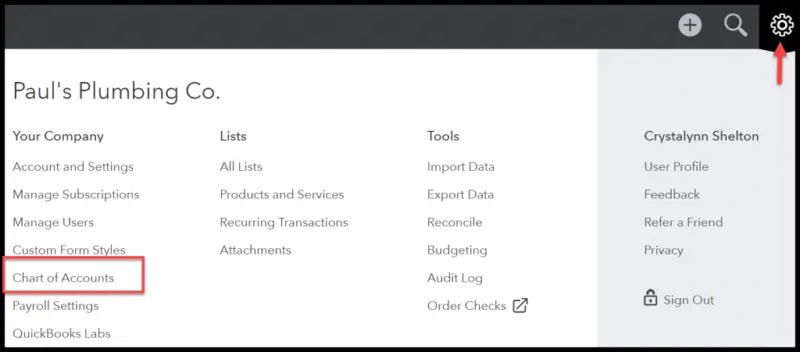
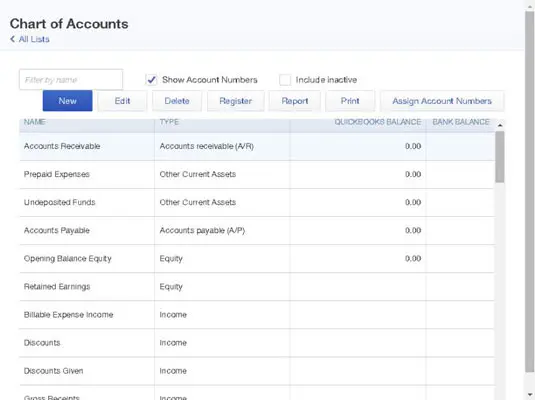
- Go to the Chart of Accounts screen
- Click the green New button in the upper right corner
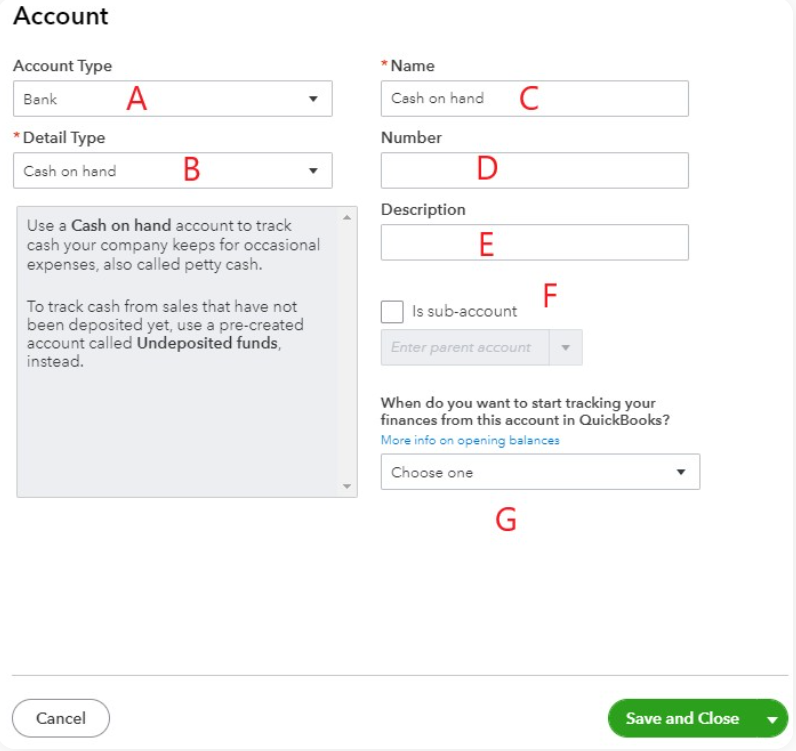
- Now fill in the following details:
- Account type – Choose the type of account from the list
- Detail type – From the list, choose a detail type. Depending on the selected account type, different detail types will be available. The grey box to the right of the detail type describes the detail type you’ve chosen
- Name – Give your account a name that will help you differentiate when selecting accounts to post transactions
- Number and Description – These are the optional details you can fill out for a new account
- Start tracking – Enter the date you start tracking your finances, then click on the Save and Close button
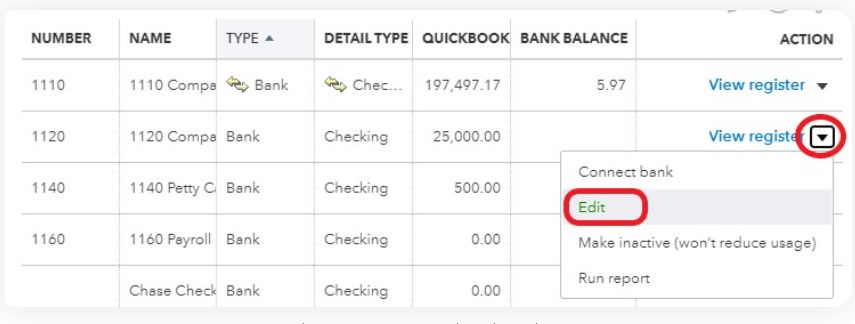
11. Edit an Account in the Chart of Accounts List
- Open Chart of Accounts
- Click on the View register button, and the list will open up
- Select Edit, and the account setup screen will open up
- Make the required changes
- Finally, tap on the Save and Close button
Implementing the instructions above will help you make changes to the chart of accounts in QB Online
B: Modify Chart of Accounts in QuickBooks Desktop
Let’s look at how we can add, delete, and edit an account to modify your chart of accounts in QuickBooks Desktop:
1. Add a New Account
- Click on Lists and select Chart of Accounts
- Select Account and then click on New in the lower left-hand corner
- Choose the Type of Account and then click on the Continue button
- Fill in the required account information
- Tap on the Save and Continue button
11. Delete an Account
- Click on the Lists button and open the Chart of Accounts
- Click on the Accounts button and press the Delete Account button present in the lower-left corner
- Finally, tap on the OK button to confirm the deletion process
111. Edit an Account
- Open the Chart of Accounts following the above steps
- Tap on the Account button and choose Edit Account
- Make changes in the field you wish to make changes to
- Finally, tap on the Save and Continue button
This was the complete procedure to set up the chart of accounts in QuickBooks application. We hope that after implementing it, you will have no doubts about the COA template.
A Quick View on the Chart of Accounts Set Up in QuickBooks
Go through the quick view table below to see a condensed version of this complete guide on setting up chart of accounts in QuickBooks application.
| Chart of Accounts | The chart of accounts is a list that consists of your company’s accounts and balances. You can set it up just the way you like it using our Excel template. |
| Types of accounts in COA | There are four basic types of accounts in the chart of accounts, listed below: a. Asset accounts b. Liability accounts c. Revenue accounts d. Expense accounts e. Equity accounts |
| Here’s how to set it up | To set up the chart of accounts, first create business account names. Next, assign numbers to business accounts, and organize account names into one category from four. |
Conclusion
This detailed blog has discussed the significance of setting up chart of accounts in QuickBooks. It has covered the different account types of COA in QuickBooks, including their limits and benefits. Moreover, you can follow the expert steps outlined above to set up the chart of accounts in QB. However, if you are facing any technical difficulty completing the QB setup, you should seek professional help. For that, connect with an expert at (855)-510-6487 to get assistance.
Frequently Asked Questions (FAQs)
Does QuickBooks have a Chart of Accounts template?
Yes, the QuickBooks software provides a Chart of Accounts template. To download it, head to the Bookkeeping and choose the Chart of Accounts. Next, select Import from the dropdown arrow next to New. Lastly, choose Download a sample file.
What are the basic account types in a chart of accounts?
There are four main account types in a chart of accounts, which include Assets, Liabilities, Revenue, and Expenses. You may have another chart of accounts, the Equity account.
Is the chart of accounts the same as a balance sheet?
The answer is no, a chart of accounts and a balance sheet are not the same. The chart of accounts consists of accounts from the balance sheet and income statement, and feeds into both of these accounts.

Oriana Zabell, a professional cloud engineer, has over three years of experience in desktop, online QuickBooks support and troubleshooting. She is currently working as a cloud hosting consultant with Asquare Cloud Hosting. She loves to read and write about the latest technologies such as cloud computing, AI, DaaS, small businesses, manufacturing. When not writing, she is either reading novels or is indulged in a debate with movie fanatics.