Last Updated on August 18, 2025
QuickBooks Scan Manager allows you to quickly scan receipts and documents and attach them to invoices, sales receipts, bills, and other transactions. However, QuickBooks Scan Manager sometimes becomes faulty. Users might see an error message saying QuickBooks Scan Manager is not working.
The issue can be quite confusing for the users as it is primarily unclear if the problem is with the scanner or something in QuickBooks. To address this challenge, we have compiled a troubleshooting guide to help you get rid of the error in no time. The article will help you understand why is QuickBooks Scan Manager not working and will equip you with verified solutions to fix it.
Reasons Why QuickBooks Scan Manager Could Not Be Selected
Below, we have mentioned some of the possible reasons why QuickBooks Scan Manager could not be selected error is stopping you from scanning documents:
- Your scan profile might be ineffective due to unknown reasons.
- The UAC settings interfere with the QuickBooks Scan Manager’s scanning process.
- There might be some problems with QuickBooks installation files.
- Some QB program files might be corrupted.
- The wireless connection the scanner is using is experiencing some problems.
- You are not using a TWAIN-compatible scanner.
Note: QB Scan Manager is compatible with TWAIN-compliant scanners. So, make sure to use a TWAIN-compatible scanner, or else you might face issues scanning the documents in QB.
Before You Troubleshoot QuickBooks Scan Manager Not Responding Error
Before you move ahead with the troubleshooting methods, you need to check the following things:
- Make sure to use a TWAIN-compliant scanner.
- Test your scanner outside of QB to check if it is working correctly or not.
- If the scanner is not working outside of QB, then the issue is with the scanner. You need to connect with an IT expert or scanner manufacturer for further resolution.
However, if your scanner works perfectly fine outside QB, then the QuickBooks Scan Manager has Stopped Working error might be a result of some internal conflict. You should tweak some settings in QB to rectify the issue.
How To Troubleshoot QuickBooks Scan Manager Not Working?
To resolve the QuickBooks Scan Manager issue that could not be selected, follow the steps below.
Solution 1: Delete the Scan Profile and Create a New One
You might be facing this issue because the file containing the user scan profile information is corrupted. This file is required to be documented through the QuickBooks Scan Manager. In this scenario, you need to delete the scan profile from the Scan Manager and create a new one. Here are the steps listed for the same.
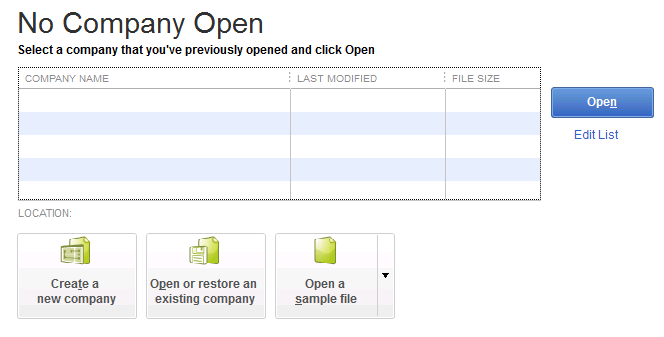
- Open the QuickBooks Desktop application and click the Company menu.
- Choose the Documents option followed by the Doc Center.
- Select Scan a Document and click the old scan profile.
- Select Delete to delete the profile from the QuickBooks Scan Manager.
- Go back to the Doc Center and click the Scan a Document option.
- Click New to set up a new profile and add a name to the profile.
- Then, select Continue and configure the profile settings correctly.
- At last, click on Save.
Note: QB Scan Manager always saves the documents in the same folder as the company file (.QBW).
Solution 2: Update the User Account Settings in Windows
There is a possibility that the User Account Control (UAC) is disrupting the connection between the scanner and the Scan Manager while running in the background. To tackle the issue, you must edit the UAC settings in the following manner:
- Close the QuickBooks Desktop and press the Windows + R keys to get the Run Window on the screen.
- Then, type Control Panel in the Run window and select OK to open it.
- Once the Control Panel window opens, click User Accounts, followed by User Accounts (Classic View).
- Now, select Change User Account Control settings.
- Select Yes to continue if UAC prompts a message on the screen.
- Now, you need to move the slider:
- Set it to Never Notify and hit OK to disable the UAC.
- Set it to Always Notify and hit OK to enable UAC. If UAC prompts for anything, click Yes.
- Lastly, restart the computer.
Note: The above solution might fix the issue with the QB Scan Manager, and consequently, you will be able to scan the documents. Keep in mind to enable the UAC again at the end by sliding the slider to the Always Notify option. It will help you protect your system from any security risks.
Solution 3: Repair QuickBooks via the Windows Repair Utility
You can also encounter issues with the QuickBooks Scanner Manager if there are issues within the QB program or the Scan Manager installation files. To resolve the issue, try to repair the program with the help of the Windows repair utility. However, make sure to create a backup of your data file before running the repair tool.
Read More: How To Connect QuickBooks To Database Server Manager?
Steps to Repair QuickBooks via the Windows Repair Utility
- To make sure that no other background process interferes with the repair, restart the computer.
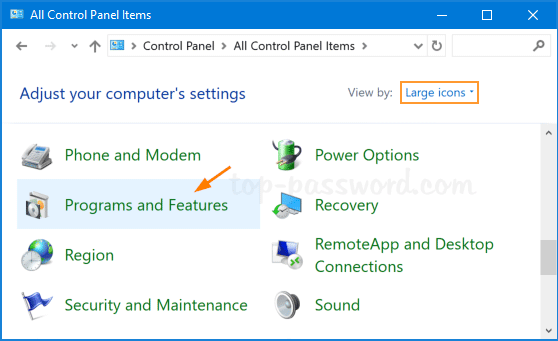
- After the system restarts, go to the Control Panel and click Programs and Features.
- Select Uninstall a Program, and choose QuickBooks from the list of programs.
- Select Uninstall/Change and hit Continue or Next.
- You will find the Repair option; click on it and select Next.
- Once the repair is finished, click Finish.
- Restart the computer and update QuickBooks Desktop if any updates are available.
If repairing the QuickBooks application does not work, you should clean install QuickBooks Desktop. This might help to rectify the QuickBooks Scan Manager not working error.
Solution 4: Clean Install QuickBooks and Set Up the QuickBooks Scan Manager
When you clean install QuickBooks, it recreates the old installation files and renames the residual files and folders. This way, if the corrupted Scan Manager files cause the issue, then it gets resolved. Therefore, follow the steps for Clean Installation of QuickBooks using a dedicated tool for the same. Once done, carry out the steps below to set up the QuickBooks Scan Manager again. Steps to Set Up and Test QuickBooks Scanner
- Open QuickBooks and go to the Company menu.
- Click Documents and select Doc Center.
- Highlight your profile and choose Select.
- Choose Scanner Setup Wizard under the Select Scanner window.
Note: The Current Selection field will display the scanner. If it does not show the scanner, click Yes and then Next to download the latest scanner database.
- Now, you must select the appropriate mode; typically, Normal Mode is chosen. But you can choose any mode that suits your preference.
- After this, check the box against the Perform Tests option and hit Next.
- Select the test you want to run for the scanner and choose Next to start the test.
- Now check the box for the ‘Repeat this test in order to check all modes’ option. Hit Next to continue testing the other available modes.
- You can use the scanner after successfully testing all the modes.
If you still can not use the scanner and see the QuickBooks Scan Manager has Stopped Working error again, move to the next solution.
Solution 5: Switch for a Wired Connection Between the Scanner and the Scan Manager
The wireless connection might be experiencing technical glitches and causing connection issues between the scanner and the QuickBooks Scan Manager. So, you can switch to a wired connection by attaching a cable to the scanner to fix the issue. After shifting to a wired connection, reinstall the scanner and rerun the QuickBooks Scan Manager.
Read more: QuickBooks Email Setup – Configure Outlook & Webmail in QB Desktop
Conclusion
This is how you can fix it if you find QuickBooks Scan Manager not working. Hopefully, you don’t face a problem following the steps given above. However, if you are still stuck with the same issue and can not use the scanner, we recommend you contact our experts at +1855-738-0359. A QB expert will immediately assist you and help you resolve all your queries in no time.
Frequently Asked Questions
The QuickBooks error 281, 1 is related to the QuickBooks Scan Manager and can appear while setting up or using the Scan Manager to scan the documents.
TWAIN is a standard that defines the application program interface (API) that facilitates the communication between the image input devices (such as scanners) and applications like scanning software that control the image input devices. Using both application and scanner that adhere to TWAIN-compliant with a TWAIN-compliant driver, you can operate any scanner seamlessly.
If QuickBooks says an error saying “Could not scan. TWAIN driver not found”, then make sure you are using a TWAIN-compliant scanner. Also, check if the scanner works outside of QB or not. In case it doesn’t, contact an IT expert to fix it.

Kate is a certified public accountant (CPA) with expertise in various accounting software. She is technically inclined and finds passion in helping businesses and self-employed people carry out bookkeeping, payroll, and taxation without worrying about errors. Every once in a while, Kate loves to travel to far-off places and relax in the lap of nature.