Last Updated on August 4, 2025
QuickBooks Error Code 15106, such as other 15XXX series errors, is an update error that occurs when you try to update QB. When the user attempts to update QuickBooks, they get an error message stating:
| “Error 15106: The update program cannot be opened.” or, “Error 15106: The update program is damaged.” |
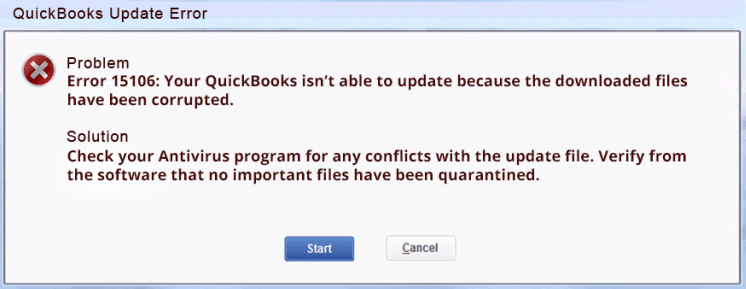
A reason for QuickBooks error code 15106 is that the antivirus or security software might have blocked the QuickBooks update. Alternatively, you might not be signed in as a Windows admin user. However, there is a lot more to the story.
In this guide, we will explore all the causes of error 15106 in QuickBooks Desktop and follow that with proven solutions to fix it. Therefore, make sure to read the blog to the very end.
Reasons for Error Code 15106 in QuickBooks Desktop
Here are some possible reasons you get an error 15106 when updating the program:
- An antivirus is blocking the update.
- You aren’t logged in as the admin on the computer.
- If the Windows User Account Control setting is set to high, it interferes with QuickBooks updates.
- If you have installed the Web Root antivirus application on the system, it assumes the QuickBooks installer to be a threat and hence blocks the essential operations in Windows.
Top Fixes for QuickBooks Error Code 15106 When Updating Software or Payroll
Now that you have already become familiar with the reasons for QuickBooks error 15106, let us go about fixing it. Here are some proven solutions recommended by QuickBooks experts to simply fix the error 15106.
1. Sign in to the Computer as an Administrator
Note: If you have a QuickBooks Desktop payroll subscription turned on, consider downloading the latest tax table after every step to keep your payroll info accurate.
- Go to the desktop or location where the QB icon is.
- Right-click the QuickBooks Desktop icon and choose Run as Administrator from the list of options you see.
- When asked, “Do you want to allow this program to make changes to your computer?” choose Yes.
Now, update QuickBooks to the latest release.
2. Download and Install QuickBooks Desktop’s Latest Release
Keeping QuickBooks up-to-date is a proactive way to get the latest features and product improvements.
If you receive QuickBooks error code 15106 when updating payroll, install the latest updates for QB software first.
Run a Manual Update
Download the recently released updates:
- Open QuickBooks, head to the Help menu, and then select Update QuickBooks Desktop.
- Go to the Options tab, select Mark All, and then Save.
- Lastly, move to the Update Now tab, mark the checkbox to Reset Update, and then hit the Get Updates button on the screen.
When the update finishes, close and then reopen the QBDT. Then, select Yes to install the updates you have just downloaded. When the installation finishes, consider restarting the computer.
Note: If you have a QuickBooks Desktop payroll subscription turned on, consider downloading the latest tax table after every step to keep your payroll info accurate.
- If you have an antivirus application installed on the system, consider implementing the next solution given below.
- If you don’t have an antivirus installed on the system, you can skip method 3 and jump to the next one directly.
3. Stop the Antivirus Application and Rename Folders
- Press Ctrl+Shift+Esc on the keyboard to open the Task Manager window.
- Go to Processes, then search for [ANTIVIRUS].exe. For instance, Spy Sweeper.exe.
Note: In case you get an error, uninstall the antivirus application from the system.
- Choose End Process.
Rename the QuickBooks update folder following the step-by-step instructions below.
- Press the Windows key+E to open File Explorer.
- Go to C:\Program Files\Intuit\QuickBooks(year)\Components.If you are a 64-bit user, go to C:\Program Files(x86)\Intuit\Quickbooks(year)\Components.
- Right-click on the download qbXX folder, then choose Rename. XX in downloadqbXX denotes the year of QuickBooks—for instance, downloadqb19 for QuickBooks Desktop 2019.
- Lastly, add .old to the end of the folder name—for instance, download qbxx. old.
Now, attempt to download the QuickBooks update again. If you continue to face an issue, proceed to the next solution.
4. Install Digital Certificate for QuickBooks
Applications require a digital certificate to install updates to the computer. Let us check and if required install a digital certificate for QuickBooks.
- Open File Explorer by pressing the Windows + E keys together.
- Navigate to or paste this location on the navigation bar:
- C:\Program Files\Intuit\QuickBooks.
- Right-tap QBW32.exe and choose Properties.
- Choose Digital Signature.
- Check and make sure Intuit is marked in the signature list.
- Choose Details.
- From the Digital Signature Details window, choose View Certificate.
- Now, click Install Certificate from the Certificate window.
- Choose Next until you see Finish. Finally, choose Finish.
- Restart the PC.
Now, launch QuickBooks and attempt to download the update once again.
5. Change User Account Control in Windows
UAC helps improve security for all users. Its primary purpose is to protect the computer and minimize exposure and attacks on the operating system.
However, it might be preventing QuickBooks from downloading the updates. Let’s see how to change the UAC settings step-by-step.
Note: You might need to disable UAC in order to fix the QuickBooks Desktop problems. For security reasons, you are strongly advised to switch it back on later.
- Press the Windows+R to open the Run window.
- Type Control Panel into the search bar and press Enter.
- Select User Accounts followed by User Accounts (Classic View).
- Select Change user account control settings. Also, if UAC prompts you, select Yes to proceed further.
- Set the slider to Never Notify and hit OK to turn UAC OFF.
- Lastly, restart the computer.
6. Install QuickBooks Updates in Selective Startup
If you are unable to install QuickBooks or its updates on the computer, consider switching to Selective Startup mode and try again.
Before you begin, ensure a couple of things, such as:
- First, you must create a company file backup.
- Secondly, keep QuickBooks Desktop product and license info handy.
Let’s learn how to switch to Selective Startup mode in Windows.
(a). Switch to Selective Startup
First, switch to Selective startup to ensure no other apps interfere with QuickBooks.
- Press the Windows+R keys on the keyword to open the Run command.
- Enter ms config, then hit OK.
- Select Selective Startup and Load System Services in the General tab.
- Move to the Services tab, then select Hide all Microsoft Services.
- Choose Disable All and Uncheck Hide all Microsoft services.
- Choose Windows Installer from the list of services and then hit OK.
- Select Restart on the System Configuration window.
(b). Install QuickBooks Desktop
Now, try updating QuickBooks Desktop or Payroll.
(c). Switch Back to Normal Startup
Once done, make sure to switch back to normal startup.
- Press the Windows+R keys to open the Run command.
- Type ms config, and then hit OK.
- Select Normal Startup in the General tab and then hit OK.
- Select Restart on the System Configuration window.
If this doesn’t resolve the issue, move to the next solution below.
7. Configure Firewall and Internet Settings
You might not be able to download QuickBooks updates if QB can’t connect to the internet. This might happen due to firewall blocking or incorrect internet settings.
Therefore, you need to configure firewall and internet settings for QuickBooks Desktop. However, if this doesn’t resolve the error 15106, let us clean install QB.
8. Clean Install QuickBooks Desktop
When you install QuickBooks Desktop again, it renames your QuickBooks folders to fix company file issues. Secondly, when you reinstall QuickBooks, it doesn’t affect your data at all. Let’s learn how to clean install QuickBooks Desktop here.
Important: Before you uninstall QuickBooks, ensure that the license number is ready. If you have purchased it online, you can easily find it in the purchase confirmation email. Alternatively, if you bought the product CD, you can find it in the original package.
(a). Remove QuickBooks Desktop
- Move to the Windows Start menu, enter Control Panel in the search bar, and open it.
- Choose Programs and Features or Uninstall a Program.
- Select your version of QuickBooks Desktop from the list of programs you want to remove.
- Choose Uninstall/Change, then Remove, and then hit Next.
Note: If you don’t see this option on the screen, sign out and sign back into Windows as an administrator.
(b). Rename Installation Folders Manually
First, enable the Windows feature to display hidden files before you follow the steps below.
- Go to the Windows Start menu and enter File Explorer in the search bar. Then, open it to continue.
- Locate and open the QuickBooks folder that holds the company files. This folder is usually found in one of these locations:
- C:\ProgramData\Intuit\QuickBooks (year)
- C:\Users(current user)\AppData\Local\Intuit\QuickBooks (year)
- C:\Program Files\Intuit\QuickBooks (year)
- 64-bit version C:\Program Files (x86)\Intuit\QuickBooks (year)
- Right-click the folder and choose Rename.
- Include “old” at the end of the folder name. This stops QuickBooks from opening it when you reinstall.
- Lastly, reinstall the QuickBooks desktop.
(c). Install QuickBooks Desktop Again
When you are done, install the QuickBooks desktop. QuickBooks automatically installs the new folders.
Hopefully, this troubleshooting solution has helped you eliminate the error code 15106 in QuickBooks. Unfortunately, if it persists, you should try the next solution given below.
Read More: QuickBooks Clean Install Tool.
9. Run Reboot.bat. Before Updating QB
Let’s run Reboot.bat. and then try updating your desktop application again to resolve QuickBooks error code 15106.
- Run Reboot.bat. and then restart the computer.
- Launch QuickBooks Desktop.
- Choose Install Now if you are prompted to install an update.
- If you still can’t install the update, delete and download the update again.
- Exit QuickBooks Desktop.
- Move to C:\Documents and Settings\All Users\Application Data\Intuit\QuickBooks < versionXX> \Components.
Note: xx notifies version number of QuickBooks Desktop. For instance, QuickBooks Desktop 2020 is DownloadQB20.
- Open QuickBooks Desktop, go to the Help Menu, and select Update QuickBooks Desktop.
- Move to the Update Now tab and then check the Reset the Updates checkbox.
- Choose Get Updates to re-download the updates.
- When the download is completed, close and then re-open QuickBooks Desktop.
- Select Install Now on the QuickBooks Desktop Update Service window.
For all 15000 series errors, explore solutions for the QuickBooks 15XXX error series.
Conclusion
Hopefully, the troubleshooting solutions mentioned in this blog have helped you effectively resolve the QuickBooks Error Code 15106. This will make sure you can update the QuickBooks desktop to the latest release.
However, if the error persists, we suggest you connect to a QB expert. Our QB experts are dedicated to ensuring your accounting experience is smooth. Talk with a consultant now!
Questions That Users Ask
It can be because you are not logged in as an administrator on the computer. Another reason could be that Windows Firewall or Internet Settings are preventing QuickBooks access to the Internet.
To resolve QuickBooks update error 15106, you can install the digital certificate for QuickBooks. Additionally, you can update QuickBooks in selective startup mode.
No, you just need to find out the correct troubleshooting methods. Carry out the detailed troubleshooting given in this guide. For further assistance, you can get in touch with our experts.

Oriana Zabell, a professional cloud engineer, has over three years of experience in desktop, online QuickBooks support and troubleshooting. She is currently working as a cloud hosting consultant with Asquare Cloud Hosting. She loves to read and write about the latest technologies such as cloud computing, AI, DaaS, small businesses, manufacturing. When not writing, she is either reading novels or is indulged in a debate with movie fanatics.