Last Updated on March 5, 2026
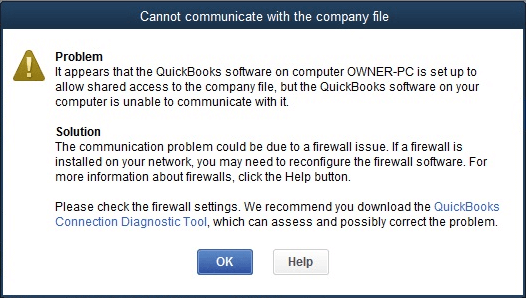
Many times, you would have witnessed errors due to restrictive Firewall settings. To keep your company data safe and intact, strict rules are applied by the firewall on the server that sometimes prevents QuickBooks on the user’s workstation from accessing the company file stored on the server. These errors sometimes do not allow opening the QuickBooks Desktop application as well. This may result in QuickBooks cannot communicate with the company file error. Whenever QuickBooks software is unable to communicate, an error message appears on the screen stating:
| “Error: Cannot communicate with the company file due to a firewall,” |
However, the reasons aren’t just restricted to these; there are numerous of them that you must be well-versed with. Don’t worry! We have covered all such possible reasons why your QuickBooks cannot find the company file in the blog.
Why QuickBooks Fails To Communicate With The Company File?
Apart from the restrictive firewall settings, the server that hosts the company file may also result in QuickBooks cannot communicate with the company file error. However, there are several other reasons as well. We have mentioned all such causes below:
- The QuickBooks fails to communicate with the company file error occurs when there is an issue with the server configuration. Also, when the server comes across connectivity issues with other workstations in the network.
- Such an issue can take place when you fail to run QuickBooks Database Server Manager on the workstation.
- Apart from resulting in company file connection errors, outdated QuickBooks Desktop applications can also trigger printing errors, payroll errors, banking errors, and update errors.
- The company file folder does not have enough permission.
- Incorrect hosting settings on server and/or workstation computers is another reason due to which QuickBooks software fails to communicate with the company file.
- QBDBMgrN service is not running in the background of your system.
How To Fix Error: Cannot Communicate With The Company File Due To Firewall
Follow the troubleshooting solutions mentioned below to resolve QuickBooks cannot communicate with the company file error:
Step 1: Download QuickBooks Tools Hub and run QuickBooks File Doctor
QuickBooks File Doctor is a tool developed by Intuit that runs a mini repair of your server and firewall. Along with that, it’s highly useful when it comes to repairing damaged company files or issues like QuickBooks cannot communicate with the company file. To run the File Doctor Tool, you have to first download and install the QuickBooks Tool Hub.
Step 2: Update QuickBooks Desktop
Intuit on a regular basis keeps on introducing new and robust features that can help in streamlining your business process. Thus, you must always download and install all the latest updates of QuickBooks Desktop application to avail the latest features of the accounting application. It helps you eliminate errors like cannot communicate with the company file in QuickBooks desktop.
Read more: How to Update QuickBooks Desktop to Latest Release?
Step 3: Check your firewall settings
Suppose you have installed multiple versions of the QuickBooks Desktop application on the same computer. In that case, you have to perform the below-given steps for each version to resolve the QuickBooks cannot communicate with the company file error:
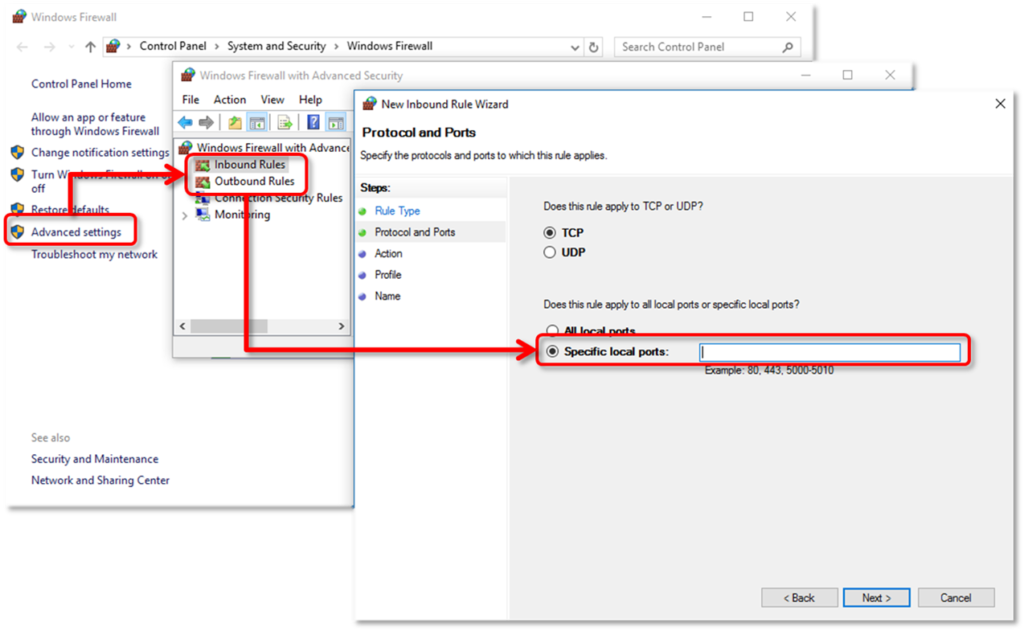
- Click on the Windows icon type Windows Firewall in the search bar. Then, open Windows Firewall and select Advanced Settings.
- Now, right-click Inbound Rules and select New Rule>Port>Next.
- Further, make sure to select TCP.
- In the Specific local ports field, enter the specific ports needed for your QuickBooks year version:
- QuickBooks Desktop 2020: 8019, XXXXX.
- QuickBooks Desktop 2019: 8019, XXXXX.
- QuickBooks Desktop 2018: 8019, 56728, 55378-55382.
- QuickBooks Desktop 2017: 8019, 56727, 55373-55377.
- Click on Next after entering your port number.
- After that, click on Allow the Connection followed by Next.
- Make sure to mark all the profiles and again, click on Next.
- To proceed, you have to create a rule and then name it “QBPorts(year).“
- Lastly, click on Finish.
Note: You need to follow the same steps to create outbound rules. However, you need to select Outbound Rules instead of inbound rules in the above steps.
Step 4: Set up your folder permissions
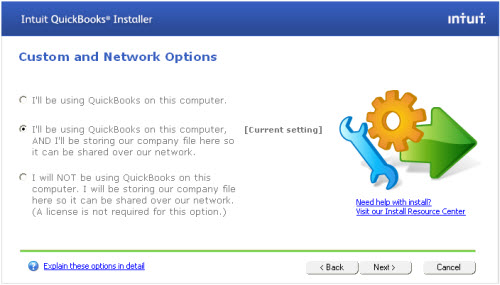
You need to make sure that the folder in which you have stored your company files is set up to share files over your network.
Windows 10 and 8
- Click on the Windows icon and open File Explorer.
- Find and right-click the folder that contains your company files.
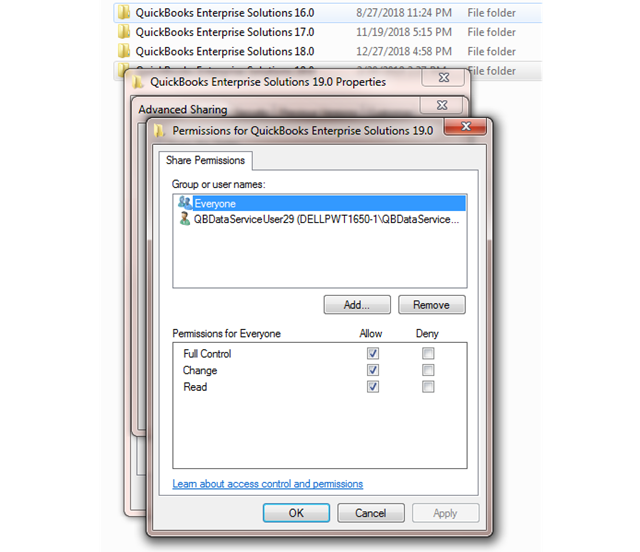
- After that, click on Properties>Sharing>Share Add.
- Further, you need to select the corresponding QBDataServiceUserXX for your version.
- Make sure to set the permission level of both users to Full Control and select Share.
Windows 8.1
Take ownership of the file
- Click on the Windows icon and open File Explorer.
- Select the folder that you want to take ownership of, and select Share.
- Select Advanced Security, and then Change>Advanced>Find Now.
- Further, select the user and click OK.
Grant Full Control
- Click on the Windows Start menu and then, open File Explorer.
- Select the folder and then, click on Share.
- After that, click on the Advanced Security option followed by Add. Further, you have to select a principal.
- Select Advanced then Find Now.
- Moving ahead, select a user and click OK.
- At last, click on Full Control and then, OK.
Step 5: Run the QuickBooks Database Server Manager
The server computer is the one that stores all your QuickBooks company files. Whereas, the other computers connected to your network are your workstations. Further, run the QBDBSM to resolve QuickBooks cannot communicate with the company file error:
- To begin, you have to first select Network Issues.
- Then, select QuickBooks Database Server Manager. If QuickBooks isn’t installed on your server, you’ll be prompted to install it.
- Click on Start Scan within the QuickBooks Database Server Manager. If they aren’t, Browse to the location of your company file and then select Start Scan.
- The QuickBooks Database Server Manager will begin to repair your firewall permissions automatically.
- Once the scan completes, select Close.
Once done, find and open the folder that you scanned. Make sure there’s an .ND file in the folder. It will display as: [your company file]qbw.nd. However, if you couldn’t see the ND file, scan the folder again. If this doesn’t work for you, then you can move to the next solution to fix QuickBooks cannot communicate with the company file error.
Step 6: Turn off hosting on your workstations
You need to make sure that you have turned off the Host Multi-User Access option on your workstations. These are those computers that are connected to your network, and don’t host your company files. Therefore, the hosting should only be done by your server computer.
- Open QuickBooks on one of your workstations.
Note: Don’t open your company file.
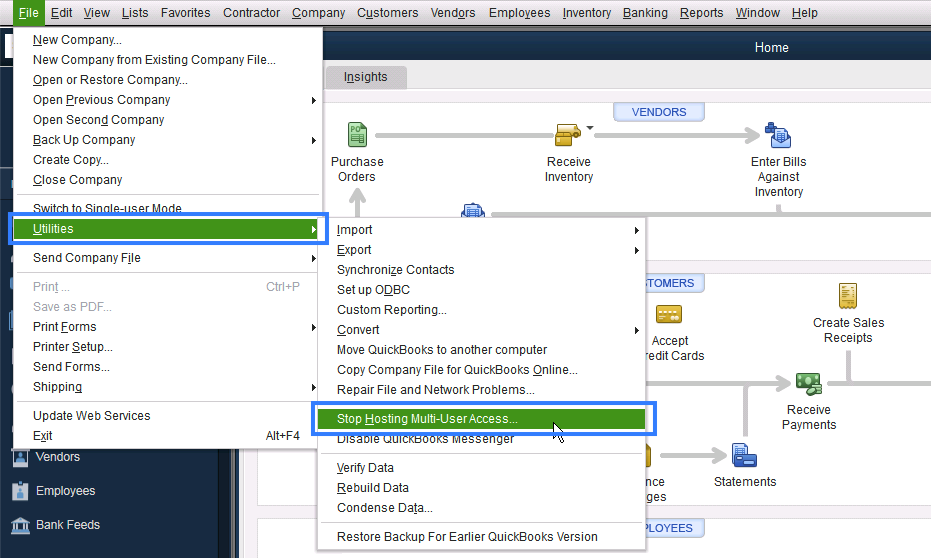
- Go to the File menu and click on Utilities.
- Further, don’t select the Host Multi-User Access if you come across it. Then, go to the next workstation.
- Then, click on the Stop Hosting Multi-User Access option.
After verifying all the workstations, go to the server computer and reset your hosting settings.
- Open QuickBooks on your server computer, there, go to the File menu and click ok Utilities.
- Select, if Host Multi-User Access is an option. Repeat this process and select Stop Hosting Multi-User Access. It will reset multi-user mode.
- Repeat the process one more time and select Host Multi-User Access.
Conclusion
We hope the troubleshooting methods mentioned in this blog have helped you fix QuickBooks Cannot Communicate With The Company File issue. However, if you need any further assistance, we would suggest you give us a call on our Asquare Cloud Hosting Helpline.
Frequently Asked Questions (FAQ’s)
How do I fix communication issues between QuickBooks and the company file?
Start by restarting all systems, then verify hosting settings and ensure only the server hosts the file. Run the QuickBooks File Doctor from QuickBooks Tool Hub. Also check firewall permissions and confirm the company file location is accessible on the network.
Can firewall settings cause this QuickBooks error?
Yes, firewall or antivirus programs can block the ports required by QuickBooks Desktop to access the company file. Make sure the necessary ports are open and QuickBooks programs are added as exceptions in your firewall settings to restore proper communication.
What role does QuickBooks Database Server Manager play in this issue?
The QuickBooks Database Server Manager manages multi-user access to company files. If it’s not running or incorrectly configured, QuickBooks cannot communicate with the file. Scanning the company file folder again can often re-establish proper network connectivity.
Is this error related to multi-user mode problems?
Often, yes. When using QuickBooks Desktop in multi-user mode, incorrect hosting settings or network interruptions can block communication. Ensure only the server computer hosts multi-user access and verify that all workstations are properly connected to the shared company file.
Related Search Terms
QuickBooks to Encounter Company File Connection Error, Unable to connect to your company data file, QuickBooks enterprise cannot communicate with the company file, Error: QuickBooks Unable to communicate with a company file, QuickBooks software on your computer is unable to communicate,

Oriana Zabell, a professional cloud engineer, has over three years of experience in desktop, online QuickBooks support and troubleshooting. She is currently working as a cloud hosting consultant with Asquare Cloud Hosting. She loves to read and write about the latest technologies such as cloud computing, AI, DaaS, small businesses, manufacturing. When not writing, she is either reading novels or is indulged in a debate with movie fanatics.