Last Updated on August 14, 2025
Being a QuickBooks Desktop user, you must be well aware of the importance of the company file as it holds every bit of detail of your business. At times, you might be required to move your company file to a different device or location on the local drive, which can occasionally result in error messages like ‘QuickBooks connection has been lost,’ ‘Cannot communicate with the company file,’ or ‘Problem with multi-user hosting setup.’ Intuit introduced the QuickBooks Connection Diagnostic Tool to overcome these errors, which was later replaced by QuickBooks File Doctor in 2013. In this article, we will discuss what the QuickBooks Desktop connection diagnostic tool is and how you can still benefit from its features using QuickBooks File Doctor.
What is QuickBooks Desktop Connection Diagnostic Tool?
QuickBooks is most prone to errors when operating in a network to host the company file for multi-user access. Intuit, being aware of all these issues users deal with, developed the QuickBooks connection diagnostic tool that automatically detects and resolves underlying reasons for these errors. However, with advancements in QuickBooks, Intuit discontinued the connection diagnostic tool back in 2013 and replaced it with QuickBooks File Doctor. Thus, you can only use it to troubleshoot issues with QuickBooks Desktop 2013 and earlier versions. Also, it is only supported on Windows 7, Windows Vista, or Windows XP operating systems.
So, if you have a later version of Windows (Windows 8 or later) or QuickBooks (QB Desktop 2014 or later), you will need QuickBooks File Doctor to deal with company file connection issues. Now, let’s have a look at some of the most common instances when you will need to employ the QuickBooks connection diagnostic or File Doctor tool.
When To Use Connection Diagnostic Tool For QuickBooks?
IMPORTANT: You must only follow the instructions in this section if you have QuickBooks 2013 or older versions running on Windows 7 and older versions.
Given below are some of the most common instances where you can consider running QB Connection Diagnostic Tool.
- When you get notified about an error related to the non-functioning QuickBooks Database Server Manager.
- If Windows Firewall misconfiguration settings start restricting access to the company file.
- If you find damage or corruption in the QuickBooks company files that restrict company file operations.
- You can use this tool if you find an empty Vendor and Customer list.
- QuickBooks 6000- series of errors like 6150, 6000-82, 6000-301, 6147, and 6103.
- QB multi-user mode errors like H101, H303, H202, and H505.
- Firewall port issues in Windows.
- Resolve QuickBooks errors 1722, 1311, 1603, 1618, 1723, and 1336 by using QuickBooks Install Diagnostic Tool, updating Windows, checking permissions, and performing a clean install.
If you are facing any of the issues mentioned above, it is time to run the Intuit Connection Diagnostic Tool. Let’s see how you can download and install it on your system.
Steps to Download and Install QuickBooks Connection Diagnostic Tool?
Downloading the QuickBooks Connection Diagnostic Tool is a straightforward process, and all you need is a stable internet connection.
- First, download the QB Connection Diagnostic tool from this LINK.
- Then, save the setup file on the system somewhere you can easily find it.
- Now, close all the programs running in the background on your system.
- To begin the installation, run the QBInstall_tool_vs.exe file.
- Follow the on-screen prompts to proceed with and complete the installation.
How to Launch Intuit Connection Diagnostic Tool?
Once you have successfully downloaded and installed the QuickBooks Desktop connection diagnostic tool, it is time to run it to resolve general company file connection errors.
- Launch QuickBooks Desktop and close the company file in it.
- Go to the File tab > select Utilities > and choose the option that says Repair File and Network Problems.
- Go to the Network Problems tab and agree to the prompt that requires collecting QuickBooks-related info.
- Now, navigate to the folder that has your company file and open it.
- Choose the Show Advanced Settings option and select the problems you are facing with the program.
- When prompted, enter your login credentials and select the QB connection diagnostic tool.
How to Use QB Connection Diagnostic Tool?
Below are instructions on how you can use the different options available in the QuickBooks Desktop connection diagnostic tool to get rid of company file issues in QuickBooks. The connection diagnostic tool for QuickBooks gives you the following options.
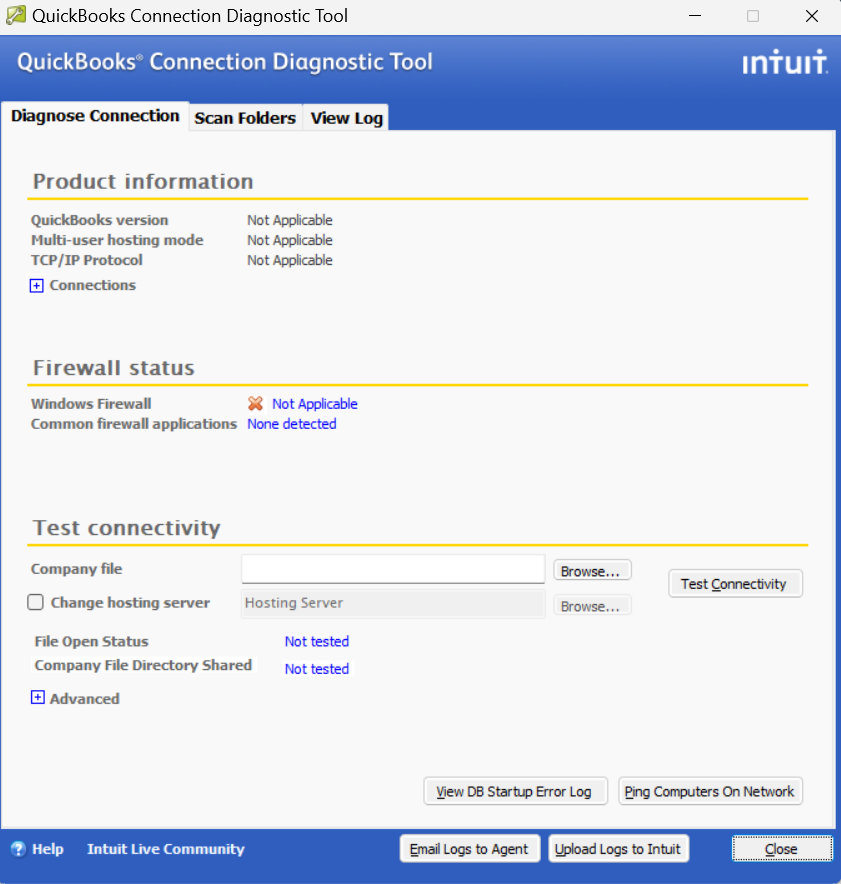
Diagnose Connection Tab

This is the first tab in the QuickBooks install diagnostic tool, which has three sections for different troubleshooting purposes.
Product Information
Under this section, you will find the version of QuickBooks you are using, your hosting status, and your TCP/IP Protocol status.
Firewall Status
This section will show Windows Firewall port configuration and common firewall application status. In this section, you also get an option to open ports for QuickBooks.
Test Connectivity
In this section, you can browse and select your company file, change hosting servers, and check whether the company file is open or its directory is being shared. You can also have the option to test connectivity and ping other systems in the network under this tab.
Scan Folders Tab

Under this tab, you can add the QuickBooks folder and scan it to locate the company files in it. Once the file is connected to the Connection Diagnostic Tool, you can then view the file’s ND file status, Permission status, and Folder shared status.
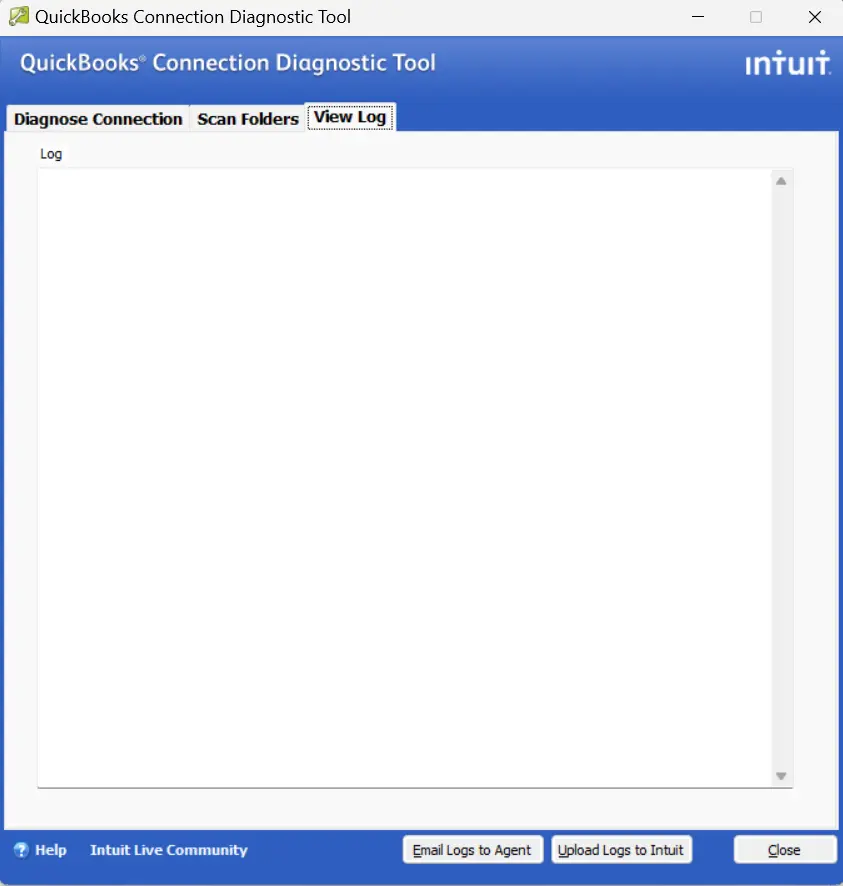
View Log Tab

From this section of the connection diagnostic tool, you can access the logs created by the QuickBooks application and can also upload them to Intuit for further investigation.
How to Use Diagnose Connection in QuickBooks Desktop 2014 and Later?
As already discussed, the QuickBooks Connection Diagnostic Tool only works for QB Desktop 2013 and earlier versions. In cases when the company file connection issues arise in 2014 and later versions, you will need to use QuickBooks File Doctor, and this is how you can proceed.
Step 1: Download and Install the QuickBooks Desktop Tool Hub Program
The first step is to download QuickBooks Tool Hub, which is an all-in-one troubleshooting application that offers access to the QuickBooks File Doctor Tool.
- Click this LINK to download QuickBooks Tool Hub and save it somewhere you can easily locate.
- If you already have the tool hub installed, make sure it is the latest version (1.6.0.8.) You can find the version of the tool hub at the bottom of the home screen.
- Run the downloaded file (QuickBooksToolHub.exe) to initiate the installation and follow the on-screen prompts to complete it.
- After the installation, locate and double-click the QuickBooks Tool Hub icon on the desktop screen to launch it.
Step 2: Run QuickBooks File Doctor Using Tool Hub
The next step is to run QuickBooks File Doctor, the instructions for which are given below.
- Go to the Company File Issues tab in QuickBooks Tool Hub and select the QuickBooks File Doctor option.
- If, for some reason, QuickBooks File Doctor won’t launch, manually search and open it using Windows search.
- Using the drop-down menu in QB File Doctor, select your company file, and if you don’t find it in the list, select the Browse and Search option.
- Select the company file you are facing issues with and click the Check your Network option.
- Click Continue, and when prompted, enter your QuickBooks admin account credentials.
Now, all you need is to wait for about 10-15 minutes for the File Doctor to identify and diagnose network issues. Once it closes automatically, retry to access the company file to check if the connectivity issues are resolved.
Conclusion
QuickBooks Connection Diagnostic Tool is a valuable resource for QuickBooks users who are experiencing connectivity issues, but it should be used in conjunction with other troubleshooting methods and should not be relied upon as the sole solution for all connectivity issues. If you need any assistance regarding This error then we suggest you give us a call at our Asquare Cloud Hosting Helpline Number. Our experts are available round the clock at your service.
Frequently Asked Questions (FAQs)
It’s important to note that the QuickBooks connection diagnostic tool is not a standalone solution for all connectivity issues with QuickBooks. It may not be able to resolve all issues, especially those related to hardware or other software applications that are not compatible with QuickBooks.
The most recent version of the QB connection diagnostic tool is (4.0), and the file name appears as QBNetDiagTool.exe.
QuickBooks connection diagnostic tool is completely free. Even QuickBooks File Doctor is also a freeware that you will need to diagnose connection issues on recent QuickBooks and Windows versions.
QuickBooks connection diagnostic tool setup file takes 1.7 MB of disk space, and its installation is only supported by 32-bit operating systems.

Oriana Zabell, a professional cloud engineer, has over three years of experience in desktop, online QuickBooks support and troubleshooting. She is currently working as a cloud hosting consultant with Asquare Cloud Hosting. She loves to read and write about the latest technologies such as cloud computing, AI, DaaS, small businesses, manufacturing. When not writing, she is either reading novels or is indulged in a debate with movie fanatics.