Last Updated on February 28, 2025
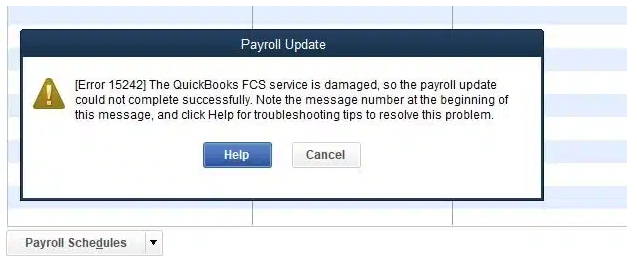
QuickBooks Error 15242 is an issue that can be encountered while updating QuickBooks Desktop or payroll. It can prevent you from accessing the latest features and improvements, as well as critical payroll updates. This is what the error message on your screen might look like:
| “[Error 15242] FCS file of your QuickBooks is damaged, so the payroll update could not be completed successfully.” |
When you see QuickBooks error 15242 on your screen, here’s what you can do to fix it:
- Run Reboot.bat File: Open the QuickBooks folder, right-click on reboot.bat file, and choose Run as administrator.
- Utilize Quick Fix my Program: Install QuickBooks Tool Hub, open it, and run Quick Fix my Program to instantly repair the program.
- Get QuickBooks Digital Signature Certificate: Install a digital signature certificate in QuickBooks so that Windows can verify the update.
- Enable File Copy Service (FCS): Check the services and ensure Intuit QuickBooks FCS (File Copy Service) is enabled.
- Verify the Payroll Service Subscription: Check your payroll service subscription and ensure that it is active.
The error code 15242 can prove challenging to resolve. However, with the right guidance and step-by-step instructions, you can overcome it and install QuickBooks updates on your computer.
In this comprehensive guide, we will provide you with the necessary information on QuickBooks payroll error 15242 and tell you how to resolve it effectively. Therefore, continue reading.
What do you understand about QuickBooks update error 15242?
QuickBooks update error 15242 is an error code that occurs when there are issues with updating or installing updates for QuickBooks Desktop or QuickBooks Payroll. This error can arise due to various reasons, such as incorrect or incomplete installation of QuickBooks. At times it can be due to damaged or corrupted files, issues with the Windows registry, or conflicts with other software.
When error 15242 in QuickBooks occurs, you may encounter difficulties in downloading and installing updates. This can prevent them from accessing the latest features, bug fixes, and critical payroll updates. It is important to address this error promptly to ensure that your QuickBooks software remains up to date-and functions smoothly.
| Problem | Description |
| [Error 15242]: | FCS file of your QuickBooks is damaged, so the payroll update could not be completed successfully. |
How does QuickBooks Error 15242 occur on a desktop?
Identifying the specific cause of error 15242 is crucial in order to apply the appropriate solutions and resolve the issue effectively. Here are some common reasons why this might have happened on your desktop.
- If QuickBooks is not installed properly or if some components are missing or corrupted.
- A damaged or corrupted company file can cause this error. This could occur due to improper shutdowns, power outages, or other factors.
- If the update process for QuickBooks was interrupted or not completed successfully, it results in QuickBooks Error 15242.
- Also, if your QuickBooks software or system is infected with malware or viruses, it can cause this error or issue.
- Problems with the Windows registry, such as invalid entries or conflicts, can interfere with QuickBooks’ functioning and trigger the QuickBooks update error 15242.
- Certain programs or applications running in the background may conflict with QuickBooks processes.
- Using an outdated version of QuickBooks may introduce compatibility issues with other components or the operating system.
- If the user account running QuickBooks does not have sufficient permissions to access certain files or perform specific actions.
- Overly strict firewall or antivirus settings may prevent QuickBooks from functioning correctly, resulting in QuickBooks error code 15242.
- Problems with the operating system, such as damaged system files or misconfigured settings, can impact QuickBooks’ performance and trigger issues.
What could be the signs and symptoms of QuickBooks Payroll Update Error 15242?
Please note that these signs and symptoms may vary in individual cases, and it’s important to refer to the specific error code and message for accurate identification of the issue.
- Appearance of an error message with error code
- QuickBooks freezing or becoming unresponsive
- QuickBooks crashes frequently
- Incomplete or failed update process
- Difficulty accessing company files
- Slow performance of QuickBooks
- System crashes or instability
- Unresponsive system or slow response times
You may check also: How to Resolve QuickBooks Error 6000 83? (Company File Issue)
Solutions for QuickBooks error code 15242 that are going to help
QuickBooks Error Code 15242, commonly encountered during the update process, can be resolved using a few solutions. Here are some of the best solutions you can pick for this issue. Make sure you check the signs and symptoms as well as the cause so that you can select the best solution.
Solution 1: Use QuickBooks tool hub to fix the error
Remember to always create a backup of your QuickBooks data before attempting any repairs or troubleshooting steps. Here is what you will have to do in order to fix QuickBooks payroll error 15242.
- Visit the official Intuit website and download the QuickBooks Tool Hub. Save the downloaded file and follow the on-screen instructions to install it on your computer.
- Once installed, locate the QuickBooks Tool Hub icon on your desktop and double-click to open it.
- In the QuickBooks Tool Hub window, click on the “Program Problems” tab located on the left-hand side.
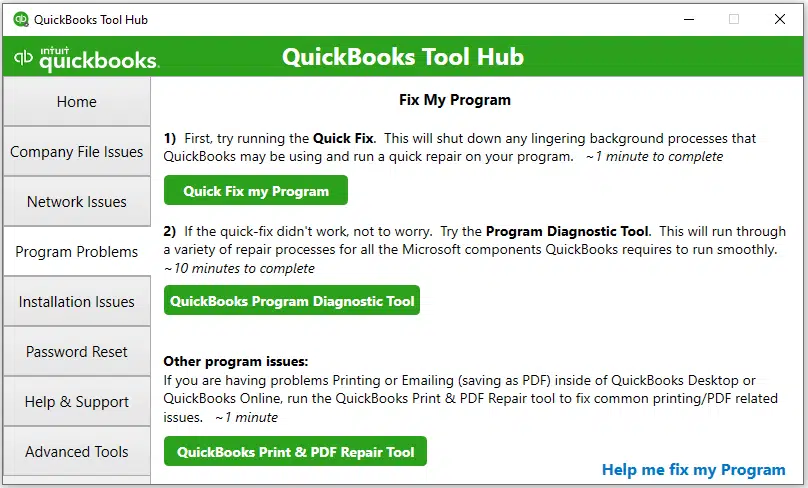
- Under the “Program Problems” tab, click on the “Quick Fix my Program” button. This tool will automatically scan and fix common issues with QuickBooks software.
- If the Quick Fix my Program tool doesn’t resolve the issue, go back to the QuickBooks Tool Hub’s main window and click on the “Installation Issues” tab on the left-hand side.
- Then, select the “Clean Install Tool” option and follow the on-screen instructions. This tool will help you perform a clean installation of QuickBooks, which can often resolve more complex issues.
- If the issue is specific to a company file, you can use the QuickBooks Tool Hub to repair the company file.
- Go back to the main window of the Tool Hub, click on the “Company File Issues” tab, and choose the “Run QuickBooks File Doctor” option.
- Follow the prompts to diagnose and repair issues with the company file.
Solution 2: You can try verifying the payroll subscription status of your QuickBooks
It’s important to note that the specific steps may vary depending on the payroll service provider you are using. The above steps are general guidelines, so make sure to adapt them accordingly to the particular platform you are subscribed to. Here is what you will have to do for the execution of this solution.
- Launch QuickBooks on your computer. Make sure you have the appropriate permissions and access rights to view subscription details.
- Enter your QuickBooks username and password to log in to your account.
- Once you are logged in, select the company file for which you want to verify the payroll subscription status. If you have multiple company files, choose the relevant one.
- In the top menu bar, click on “Employees” or “Payroll” (depending on your QuickBooks version).
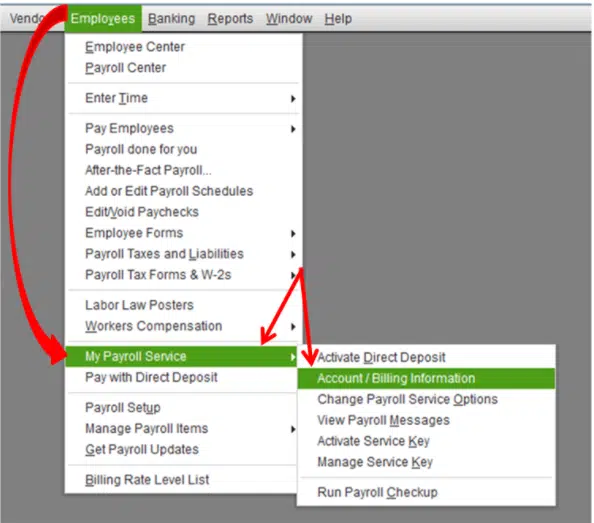
- From the drop-down menu, select “My Payroll Service” or “Payroll Center.”
- In the Payroll Service window or Payroll Center, you should see a section that displays your payroll subscription status.
- It may show information such as the subscription type, expiration date, or renewal status. Look for any indicators that confirm your active subscription.
Read More:- Resolve QuickBooks Payroll Error PS036- Can’t Verify Payroll Subscription
Solution 3: You can also Install a “Digital Signature Certificate” for your QuickBooks
These steps that you are going to see mentioned below are going to not only help in checking the real issue but also sometimes fix QuickBooks Error 15242. So, simply follow this solution for easy execution.
- Before installing the certificate in QuickBooks, make sure you have a valid digital signature certificate. This certificate is typically issued by a trusted certification authority.
- Export the digital signature certificate from the source where it is stored (e.g., USB token, software application). You will need to export it as a file with the “.pfx” or “.p12” extension.
- Open QuickBooks on your computer and log in to your company file with administrator rights.
- From the top menu bar, click on “Edit” and select “Preferences” from the drop-down menu.
- Then in the Preferences window, choose “Integrated Applications” from the left-hand side menu.
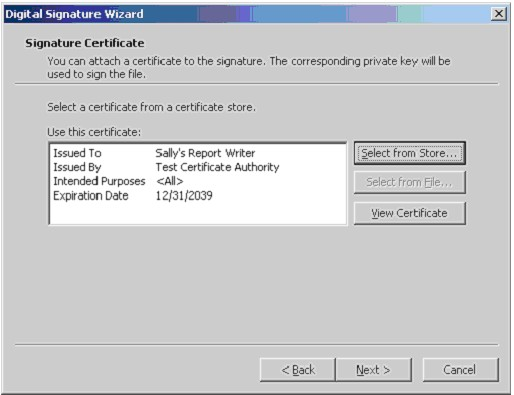
- In the Integrated Applications Preferences window, select the “Digital Signature” tab.
- Look for the option to browse or select the file that contains your digital signature certificate.
- Click on it to locate and select the exported certificate file with the “.pfx” or “.p12” extension.
- If the certificate is protected with a password, you will be prompted to enter it during the installation process. Provide the correct password and click “OK” or “Next.”
- Follow any additional on-screen instructions provided by QuickBooks to complete the installation process.
- This may involve confirming the installation and specifying the use of the certificate for specific functions within QuickBooks.
- After installing the digital signature certificate, you can test it by signing any necessary documents or forms within QuickBooks that require a digital signature.
Also Read:- Resolve QuickBooks Error 6069 Like An Expert
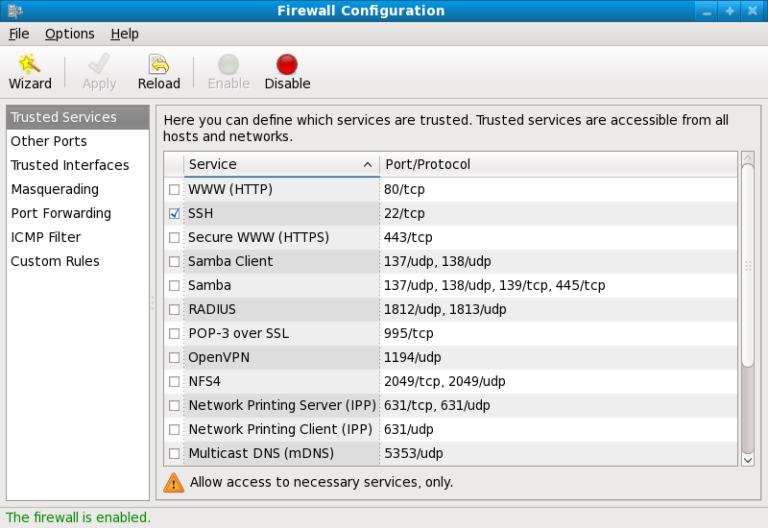
Solution 4: Just change the firewall configuration on your desktop
By modifying the firewall configuration as described above, you should allow QuickBooks to communicate through the firewall and resolve any connection issues. It’s worth noting that the specific steps may vary slightly depending on your Windows version and firewall settings.
- Press the Windows key on your keyboard and type “Windows Firewall” in the search bar.
- From the search results, select “Windows Defender Firewall” or “Windows Firewall with Advanced Security.”
- In the Windows Firewall window, you may see an option on the left-hand side called “Advanced Settings.” Click on it to open the advanced firewall configuration.
- From there, you will have to open the Windows Firewall settings and look for the “Inbound Rules” and “Outbound Rules” options in the left-hand side menu.
- The next thing you will have to do is go to the rules that control the inbound and outbound connections for applications.
- Scroll through the list of inbound and outbound rules until you find the rules related to QuickBooks. They may be named something like “QuickBooks Inbound” or “QuickBooks Outbound.”
- Right-click on the QuickBooks inbound and outbound rules and select “Properties” from the context menu. In the properties window, you can make changes to the rule settings.
- In the properties window, ensure that the rule is set to “Allow” or “Allow the connection.” This allows QuickBooks to communicate through the firewall.
- In the properties window, you can also verify that the correct protocol (TCP or UDP) and ports are specified for QuickBooks.
- The default ports for QuickBooks are usually 8019 and 56728, but they can vary depending on the QuickBooks version and configuration.
- After modifying the properties of the QuickBooks inbound and outbound rules, click “Apply” or “OK” to save the changes. Close the Windows Firewall settings window.
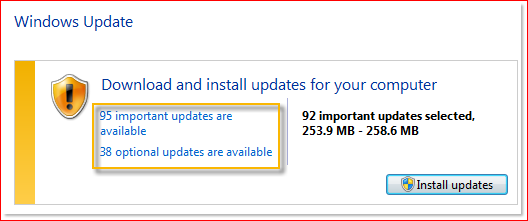
Solution 5: Just try and download the updates as an admin user
Please note that the specific steps may vary depending on your operating system and the update settings configured on your computer. It’s recommended to refer to the official documentation or support resources specific to your operating system for more detailed instructions.
- Ensure that you are logged into your computer using an administrator account. Administrator accounts have the necessary privileges to download and install updates.
- Depending on your operating system, there are different methods to check for updates:
- Windows: Go to the Start menu, click on “Settings” (gear icon), and choose “Update & Security.” In the Windows Update section, click on “Check for updates” to see if any updates are available.
- macOS: Click on the Apple menu in the top left corner, select “System Preferences,” and then click on “Software Update” macOS will check for available updates.
- Once you have checked for updates, the system will display a list of available updates. Click on the “Download” or “Install” button to start downloading the updates. If prompted, enter your administrator password to authorize the download.
- During the download process, the system will show the progress bar or percentage indicating the download status.
- Depending on the size of the update and your internet connection speed, it may take some time to complete the download.
- After the updates have finished downloading, the system may prompt you to install them. Click on the “Install” or “Restart” button to initiate the installation process.
- If prompted, enter your administrator password to authorize the installation.
- The system will guide you through the installation process, which may involve accepting license agreements, confirming settings, and restarting the computer if necessary.
- Follow the on-screen instructions to complete the update installation.
Solution 6: Try scanning through QuickFix my Program to fix the issue
Quick Fix My Program is a diagnostic tool provided by Intuit, the company behind QuickBooks, to resolve common program issues. And it is used to fix not only QuickBooks Payroll Update Error 15242 but multiple other issues as well. Here is what has to be done.
- Exit the QuickBooks program completely to ensure that no processes are running in the background.
- Restart your computer. This can help refresh the system and resolve temporary issues.
- Ensure that you are using the latest version of QuickBooks. To update QuickBooks, follow these steps:
- Open QuickBooks and log in to your company file as an administrator.
- Go to the “Help” menu and select “Update QuickBooks.”
- Click on “Update Now” to start the update process.
- Wait for the update to complete and restart QuickBooks if prompted.
- Temporarily disable your antivirus software and firewall to check if they are blocking QuickBooks from functioning properly.
- Consult the documentation or support resources for your specific antivirus/firewall software to learn how to temporarily disable them.
- If the error persists, perform a clean install of QuickBooks. This involves uninstalling QuickBooks, renaming the installation folders, and then reinstalling the software. Before proceeding with a clean install, make sure you have a backup of your company file and the necessary installation files or product keys.
- Uninstall QuickBooks from your computer through the control panel or using an uninstallation tool.
- Rename the QuickBooks installation folders to ensure a clean installation. The default location is typically “C:\Program Files\Intuit” or “C:\Program Files (x86)\Intuit“
- Reinstall QuickBooks using the installation files or product keys.
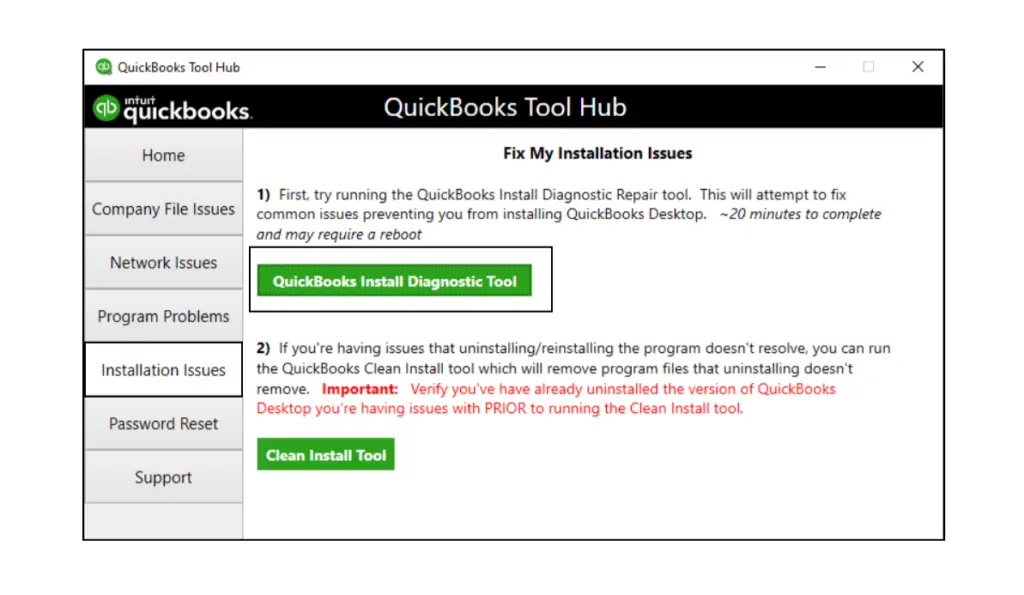
Solution 7: You can also run QuickBooks Install Diagnostic Tool
Running the QuickBooks Install Diagnostic Tool can help resolve common installation and opening issues with QuickBooks. It can surely help in fixing the QuickBooks error code 15242 and here is what has to be done.
- Visit the official Intuit website or search for “QuickBooks Install Diagnostic Tool” in your preferred search engine.
- Locate the official Intuit download page and click on the download link to save the installation file to your computer.
- Ensure that QuickBooks and all other running programs are closed before proceeding with the installation and running the diagnostic tool.
- Read the terms and conditions presented in the installation wizard, and if you agree, select the checkbox to accept the license agreement. Click on “Next” to proceed.
- After accepting the license agreement, click on “Install” to start the installation process. The tool will be installed on your computer.
- Once the installation is complete, click on “Finish” to exit the installation wizard.
- Then, locate the QuickBooks Install Diagnostic Tool on your computer (usually found in the Windows Start menu or desktop) and double-click on it to launch the tool.
- In the QuickBooks Install Diagnostic Tool window, you will typically find two options: “I am having problems installing QuickBooks” and “I am having problems opening QuickBooks.” Select the appropriate option based on the issue you are facing.
- After selecting the appropriate option, click on “Continue” to allow the tool to scan and diagnose any issues related to the installation or opening of QuickBooks.
- The tool will automatically scan your system for any issues and attempt to repair them. The process may take some time depending on your system’s performance and the complexity of the issues encountered.
- After the diagnostic tool has completed its scan and attempted repairs, restart your computer to ensure that the changes take effect.
Solution 8: Just reinstall your QuickBooks applications
By following these steps, you can reinstall QuickBooks Desktop and restore your company files to continue working with your data. Remember to use your valid license and product information during the reinstallation process.
- Before reinstalling QuickBooks, it is crucial to create a backup of your company files. This ensures that your data is safe and can be restored after the reinstallation.
- You can back up your company files by going to the “File” menu in QuickBooks and selecting “Create Backup.”
- To uninstall QuickBooks from your computer, follow these steps:
- Close QuickBooks and all related processes.
- Go to the Windows Start menu and open the Control Panel.
- Click on “Programs” or “Programs and Features.”
- Locate QuickBooks in the list of installed programs and select it.
- Click on “Uninstall” or “Remove” and follow the prompts to complete the uninstallation process.
- After uninstalling QuickBooks, you need to rename the installation folders to ensure a clean installation. The default locations of these folders are usually:
- C:\Program Files\Intuit\QuickBooks (for 32-bit systems)
- C:\Program Files (x86)\Intuit\QuickBooks (for 64-bit systems)
Step-by-Step Guide to Installing and Updating QuickBooks Desktop
- Rename these folders to something like “QuickBooks.OLD” or any other name of your choice.
- Visit the official Intuit website or use a trusted source to download the latest version of QuickBooks Desktop.
- Make sure to download the correct version for your operating system (32-bit or 64-bit).
- Locate the downloaded QuickBooks installer file and double-click on it to run the installation. Follow the prompts to proceed with the installation process.
- During the installation, you will be prompted to enter your QuickBooks license and product information.
- Provide the required details accurately to validate your license and activate QuickBooks.
- In the installation wizard, you may have the option to select installation preferences, such as the installation location and whether to create a desktop shortcut.
- You can also easily customize these options according to your preferences.
- Once you have selected the installation options, click on “Install” to begin the installation process. Wait for the installation to complete.
- After the installation is finished, open QuickBooks and restore your company files from the backup you created in Step 1.
- Go to the “File” menu, select “Open or Restore Company,” and choose “Restore a Backup Copy.” Follow the prompts to restore your data.
- After restoring your company files, it is important to update QuickBooks to the latest version. Go to the “Help” menu and select “Update QuickBooks.”
- Follow the prompts to download and install any available updates.
Solution 9: Open QuickBooks in the selective startup mode
Sometimes you can fix QuickBooks payroll update Error 15242 and it is an easy solution for this issue. By switching to selective startup and disabling startup items and services, you can isolate and identify potential conflicts or issues that may be causing QuickBooks Error 15242.
- Make sure that QuickBooks and all related processes are closed before proceeding.
- Press the Windows key on your keyboard and type “msconfig” in the search bar.
- From the search results, select “System Configuration” or “msconfig.exe” to open the System Configuration Utility.
- In the System Configuration Utility window, navigate to the “General” tab. Under the Startup Selection section, select the “Selective startup” option.
- Now, in the same window, go to the “Startup” tab. Click on the “Disable All” button to disable all the startup items that load during the system startup process.
- Still in the System Configuration Utility window, switch to the “Services” tab. Check the box next to “Hide all Microsoft services” to exclude Microsoft services from the list.
- Once you have hidden the Microsoft services, click on the “Disable All” button to disable all the remaining services associated with QuickBooks or Intuit.
- After disabling all startup items and services, click on the “Apply” button and then click on “OK” to close the System Configuration Utility.
- You will be prompted to restart your computer for the changes to take effect. Save any unsaved work and restart your computer.
- After your computer restarts, open QuickBooks to see if QuickBooks Error 15242 persists. If the error is resolved, it indicates that one of the disabled startup items or services was causing the issue.
Solution 10: Verify whether your payroll is up-to-date or not
By following these steps, you can verify the payroll update status in QuickBooks and ensure that you have the latest payroll updates installed. If you encounter any issues or have specific questions regarding your payroll subscription or updates.
- Launch QuickBooks on your computer and log in to your company file as an administrator.
- Go to the “Employees” menu and select “Payroll Center.”
- In the Payroll Center, look for the “My Payroll Service” section. Under this section, you should see the status of your payroll subscription. It will indicate whether your subscription is active or expired.
- If the status is active: This means your payroll subscription is up to date, and you have the latest payroll updates.
- Also the status is expired or inactive: It indicates that your payroll subscription has expired, and you need to renew it to receive the latest payroll updates.
- If your payroll subscription is active, you can proceed to download the latest payroll updates. In the Payroll Center, click on the “Download Payroll Updates” button.
- QuickBooks will connect to the internet and download any available updates for payroll.
- Once the updates are downloaded, QuickBooks will prompt you to install them. Follow the on-screen instructions to install the updates.
- It may require closing and reopening QuickBooks.
- After installing the updates, go back to the Payroll Center and check the “My Payroll Service” section. The status should now indicate that you have the latest updates installed.
Conclusion
QuickBooks Error 15242 is an installation or update-related issue that can occur in QuickBooks Desktop. This error typically indicates a problem with updating or installing QuickBooks. To resolve this error, you can try updating QuickBooks to the latest version, running QuickBooks as an administrator, disabling antivirus/firewall temporarily, performing a clean install of QuickBooks, or seeking assistance.

Alastor Moody is an Author at Asquare Cloud Hosting with experience in technical and functional writing. He loves travelling for adventure and fun.