Last Updated on March 20, 2025
Be it QuickBooks or any other program on your system, you will need an uninterrupted connection to the internet to download the updates. When, for some reason, the internet connection starts facing trouble, you get errors while downloading QuickBooks Desktop and payroll updates. One such error we are going to examine in this article is QuickBooks error 12031, which falls under the category of 12XXX series of errors.
Keep reading this guide and find out expert ways to resolve error 12031 in QuickBooks Desktop.
Causes for QuickBooks Error Code 12031
Below is a list of every possible reason that we have identified behind the occurrence of error code 12031 in QuickBooks Desktop.
- Windows firewall, anti-virus software, or third-party application is blocking the QB from connecting to the internet.
- Internet Explorer is not set as the default browser.
- Incorrectly configured Internet Explorer settings can also be a reason why you receive error code 12031.
- A bug in the previously downloaded update is preventing QuickBooks from downloading the updates.
- Installation errors in the QuickBooks Desktop program also trigger update errors like QuickBooks Desktop error 12031.
Let’s now have a look at one major prerequisite to troubleshooting QuickBooks update errors like 12031.
Essential Requirements to Fix QuickBooks Update Error 12031
Some crucial requirements to avoid any update error in QuickBooks are to have a stable internet connection and TLS 1.2 compliance. Below are the instructions to verify internet connectivity and make your system TLS 1.2 compliant using the TLS 1.2 Readiness tool.
Step 1: Verify Internet Connectivity and Set Internet Explorer as the Default Browser
QuickBooks uses Internet Explorer to connect to the Internet, so you must set it as the default browser on your system.
- Press Windows + R and enter inetcpl.cpl in the Run dialog box.
- Press Enter and go to the Programs tab in the Internet Options window.
- Select Make Default and hit Apply and OK to save the changes.
Now, access some secure websites like Google.com to see if you are properly connected to the internet. If you can’t access the website, download and run the TLS 1.2 Readiness tool by following the next step.
Step 2: Run TLS 1.2 Readiness Tool
TLS 1.2 is an encryption and authentication protocol that monitors data transmission between QuickBooks and other applications with online servers. Therefore, you must ensure that your system is TLS 1.2 compliant.
- First, download and install QuickBooks Tool Hub.
- Launch it after the installation and go to the Installation Issues tab.
- Now select QuickBooks TLS 1.2 Tool, which you will find at the bottom-right of the window.
- Click OK to launch the TLS 1.2 tool and hit Yes on the EULA Agreement.
- Click Run and wait till the tool is done configuring the TLS 1.2 settings.
- At last, click Exit to close the TLS 1.2 tool.
Now try to access some safe websites, like your banking website, outside of QuickBooks. If you can’t access the website, contact your IT expert or our support team.
Next, in this article, we will discuss the most effective approaches to resolve QuickBooks error 12031.
Instant Ways to Fix QuickBooks Desktop Error 12031
The solutions below will help you eliminate every possible reason that is causing restrictions in downloading the QuickBooks Desktop or payroll updates.
Solution 1- Set Up Your Internet Connection
This solution helps you configure QuickBooks internet connection preferences, which can help QuickBooks Update Error Code 12031.
- Run the QuickBooks application and go to the Help tab.
- Click on Internet Connection Setup, and a new window will open up.
- Now, you need to choose ‘Use my Computer’s Internet Connection settings to establish a connection when this application accesses the Internet.’
- Tap Next and then Done.
- Now retry getting QuickBooks Desktop or payroll updates to check if error 12031 is resolved.
If you still find QB error code 12031 restricting the download of the updates, follow the next troubleshooting solution.
Also Read: How to fix if QuickBooks closes unexpectedly after opening.
Solution 2- Reconfigure Internet Explorer Settings
In this solution, we will reconfigure Internet Explorer settings to ensure that some misconfiguration doesn’t restrict QuickBooks from downloading the updates.
- Close your QB application and run Internet Explorer.
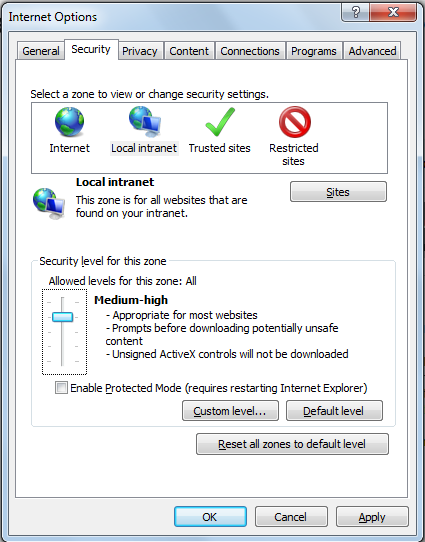
- Click on Tools and then select Internet Options.
Note:- Press Alt on your keyboard if you can’t find Tools.
- Go to the Security menu and tap on the Globe icon. You need to ensure that the security level is not set above Medium-high.
- Now go to the Connections menu and tap on Never Dial a Connection if you don’t use the dial-up node (DUN) on the system. Select the correct ISP if you use DUN and then tap OK.
- Navigate to LAN settings and ensure that you select the Automatically Detect Settings option. Additionally, verify that you leave the Use a Proxy Server box unchecked.
- If you need to select the Use a Proxy Server option, make a note of the complete IP address and port.
- If the port is not port 80, leave the Use a Proxy Server option unchecked.
- If the port is port 80, uncheck the box for testing purposes.
- Then click on OK.
- Go to the Advanced tab and click on Restore Advanced Settings.
- Go to Settings, find Use TLS 1.2, and ensure that it is selected.
(These options may not be available for your Internet Explorer version.)
- Click on OK and close Internet Explorer.
- Now reboot your system and then rerun QB to check if the error is resolved.
If you still can’t download the updates because of QuickBooks error 12031, follow the next troubleshooting solution.
Solution 3: Reconfigure Windows Firewall and Security Settings
The instructions below will help you reconfigure the Windows firewall in a way that does not restrict QuickBooks from downloading the updates.
Step 1: Configure and Add Firewall Port Exception for QB Desktop
You will need to follow the instructions below for each version of QuickBooks Desktop you have installed on your system.
- Click the Windows Start button and enter Windows Firewall in the search box.
- Select Windows Firewall from the list of results and select Advanced Rules.
- Find and right-click Inbound Rules and choose New Rule. (You will later need to create Outbound Rules in the same manner).
- Choose Ports, hit Next, and ensure that the TCP option is selected.
- Enter the port mentioned below for your QuickBooks version in the Specific Local Ports field.
- QuickBooks Desktop 2020 and later: 8019, XXXXX.
- QuickBooks Desktop 2019: 8019, XXXXX.
- QuickBooks Desktop 2018: 8019, 56728, 55378-55382.
- QuickBooks Desktop 2017: 8019, 56727, 55373-55377.
NOTE: QuickBooks Desktop 2019 and all later versions use dynamic ports. These ports are specific and not a range, which helps QuickBooks fully utilize a port dedicated to it.
- If you use QuickBooks 2019 or any later version, go to the Start menu and enter QuickBooks Database Server Manager in the search field.
- Select QuickBooks Database Server Manager from the list of results to open it and go to the Port Monitor tab.
- Locate your QuickBooks version and take note of the Port Number. You will need to enter this port number in the Specific Local Port field.
- Once you have entered the port number for your QuickBooks version, click Next and select Allow the Connection.
- Click Next, and when prompted, ensure all the profiles displayed on the screen are marked.
- Click Next and enter a name for this rule, like Port.for.QB(Year).
- Once you’ve done this, click Finish and repeat the steps above to create Outbound Rules. In STEP 3, ensure that you select Outbound Rules instead of Inbound Rules.
Step 2: Get Windows Firewall Exceptions Created for QuickBooks
Now, we will create exceptions for (.exe) files that QuickBooks uses for several different operations.
- Click the Windows Start button and enter Windows Firewall in the search box.
- Select Windows Firewall from the list of results and select Advanced Rules.
- Find and right-click Inbound Rules and choose New Rule. (You will later need to create Outbound Rules in the same manner).
- Select Program > Next > This Program Path > Browse.
- Now browse one of the files in the table below and click Next.
- Choose the Allow the Connection option and hit Next.
- Now ensure all the profiles are marked and hit Next.
- Enter a name for this new rule. E.g. QuickBooksFirewallException(Name.exe).
- Once you’ve done this, repeat the steps above to create Outbound Rules. In STEP 3, ensure that you select Outbound Rules instead of Inbound Rules.
| Executable files | Location |
| AutoBackupExe.exe | C:\Program Files\Intuit\QUICKBOOKS YEAR |
| Dbmlsync.exe | C:\Program Files\Intuit\QUICKBOOKS YEAR |
| DBManagerExe.exe | C:\Program Files\Intuit\QUICKBOOKS YEAR |
| FileManagement.exe | C:\Program Files\Intuit\QUICKBOOKS YEAR |
| FileMovementExe.exe | C:\Program Files\Intuit\QUICKBOOKS YEAR |
| QuickBooksMessaging.exe | C:\Program Files\Intuit\QUICKBOOKS YEAR |
| QBW32.exe | C:\Program Files\Intuit\QUICKBOOKS YEAR |
| QBDBMgrN.exe | C:\Program Files\Intuit\QUICKBOOKS YEAR |
| QBServerUtilityMgr.exe | C:\Program Files\Common Files\Intuit\QuickBooks |
| QBCFMonitorService.exe | C:\Program Files\Common Files\Intuit\QuickBooks |
| QBLaunch.exe | C:\Program Files\Common Files\Intuit\QuickBooks |
| QBUpdate.exe | C:\Program Files\Common Files\Intuit\QuickBooks\QBUpdate |
| IntuitSyncManager.exe | C:\Program Files\Common Files\Intuit\Sync |
| OnlineBackup.exe | C:\Program Files\QuickBooks Online Backup |
NOTE: If you find (x86) added to the Program Files folder, this indicates you have a 64-bit operating system.
Also Read: How to Fix QuickBooks TLS Error.
Solution 4: Reinstall QuickBooks Desktop in Selective Startup Mode
In this solution, we will reinstall QuickBooks Desktop in Selective Startup mode to ensure no other program on your system interferes with the installation that resulted in error 12031.
- Press the Windows + R keys on your keyboard, and the Run window will open up.
- Type in Msconfig in the window and press Enter.
- Go to the General tab and choose Selective Startup and Load system services.
- Now go to the Services tab and tickmark Hide all Microsoft Services.
- Click on Disable All.
- Make sure you unmark the “Hide all Microsoft services” box.
- Also, confirm that you have checked the Windows Installer in the services.
- Tap on OK and then click on Restart in the System Configuration window.
- Now, you will need to Clean and Install QuickBooks Desktop.
- Run QuickBooks and try to complete the task that led to QuickBooks Error Code 12031.
- If successful, close QB and press Windows + R to open the Run window.
- Type in MSConfig and press OK.
- Go to the General menu and choose Normal Startup.
- Tap on OK and press Restart on the System Configuration window.
If you still find yourself struggling to get QuickBooks updates because of error code 12031, follow the next troubleshooting solution.
Solution 5: Update QB in Safe Mode with Networking
When running Windows in safe mode with networking enabled, you can update any program without other programs on the system restricting you. This is how you can download QuickBooks updates in Windows safe mode with networking
- Press Windows + I to open the settings, or you can also select settings in the Windows Start menu.
- Choose Update and Recovery and hit the Recovery option.
- Now select the Restart option under the Advanced Startup section.
- Once your system reboots, choose Troubleshoot and go to Advanced Options.
- Choose Startup Settings and hit Restart.
- After the system reboots again, you will get a list of options on your screen.
- Select 5 or hit the F5 key on the keyboard to start your system in safe mode with networking.
- Retry to get QuickBooks or payroll updates to check if this solution helps resolve QB error 12031.
If you still can’t update QuickBooks because of QuickBooks error 12031, follow the next troubleshooting solution.
Solution 6: Reset QuickBooks Updates and Attempt to Download them Again
In this solution, we will clear all the previously downloaded updates and try to install them again. This method can help fix several update errors, including error 12031.
- Exit QuickBooks Desktop and move to this path: C:\ProgramData\Intuit\QuickBooks XX\Components.
NOTE: The XX you will notice with your QuickBooks Desktop represents the version of the program. For e.g. QuickBooks Desktop 2024 is DownloadQB24.
- Right-click the Components folder and choose the Delete option.
- Launch QuickBooks Desktop, open the Help menu and select the Update QuickBooks Desktop option.
- Go to the Update Now tab, checkmark the Reset Update option, and hit Get Updates.
- Restart QuickBooks when the updates are successfully downloaded.
- Go to the Help tab again and select the Update QuickBooks Desktop option.
- Go to the Overview tab and select the Update Now option.
If you have successfully downloaded and installed the updates, error 12031 is resolved. However, if not, follow the next solution and
Solution 7: Check for and Install Windows Updates
Updating Windows will help eliminate bugs that might possibly be triggering error code 12031 in QuickBooks.
Instructions for Windows 10
- Go to the Start menu and select Settings.
- Select Update & Security and select the option that says Windows Updates.
- Click Check for Updates and restart Windows once the updates are downloaded to get them installed.
Instructions for Windows 11
- Go to the Start menu, select Settings, and choose the Windows Update option.
- Next, hit the Check for Updates option and restart Windows to install the downloaded updates.
If QuickBooks error 12031 still prevents you from downloading QuickBooks Desktop and payroll updates, follow the next troubleshooting solution.
Solution 8: End QuickBooks Background Processes
Terminating the background process and restarting QuickBooks refreshes all the services, which can possibly help eliminate QB error code 12031.
- Press Ctrl + Shift + Esc on the keyboard to launch the Task Manager on your system.
- Now go to the Image Name tab and choose processes running under the QuickBooks program.
- Right-click the services one by one and choose End Process.
- Once all QuickBooks processes are closed, relaunch QuickBooks and check if error 12031 is resolved
Conclusion
In this guide, we tried our best to explain the causes and solutions for QuickBooks error 12031 so that you can update QuickBooks and payroll without any delay. However, we are also aware that sometimes the solutions don’t work, and in such instances, we suggest users reach out to us at QuickBooks Data Repair Service Once you connect with our team of certified experts, they will perform advanced diagnostics and assist you in resolving error code 12031 as quickly as possible.
FAQs
Yes, there are some DIY troubleshooting methods for general internet connection issues. They include restarting your router, switching to a hard-wired connection, and running Windows Network troubleshooter.
There are a number of 12XXX series of errors you can face while downloading QuickBooks Desktop or payroll updates, and they include errors 12029, 12009, 12007, and 12002. You can resolve all of them by following a common troubleshooting procedure.
If you have Windows 8 or any later version, you will not find Internet Explorer on it. In such cases, you can simply run the inetcpl.Cpl command using the Run dialog box to access the Internet settings.

Oriana Zabell, a professional cloud engineer, has over three years of experience in desktop, online QuickBooks support and troubleshooting. She is currently working as a cloud hosting consultant with Asquare Cloud Hosting. She loves to read and write about the latest technologies such as cloud computing, AI, DaaS, small businesses, manufacturing. When not writing, she is either reading novels or is indulged in a debate with movie fanatics.